Royal Adelaide Golf Club
Seaton, South Australia, Australia
Architect: Cargie Rymil (1917), Alistair MacKenzie (1926), Revisions by Peter Thompson, Michael Clayton, Tom Doak
6,557 Meters, Par-72
Rating/Slope: 74/133
My Quick Review: A bonafide World Top-100 in its current form, but it could be so much better!
The Royal Adelaide Golf Club moved to its current location and opened The Seaton Links in 1906 with the following routing:
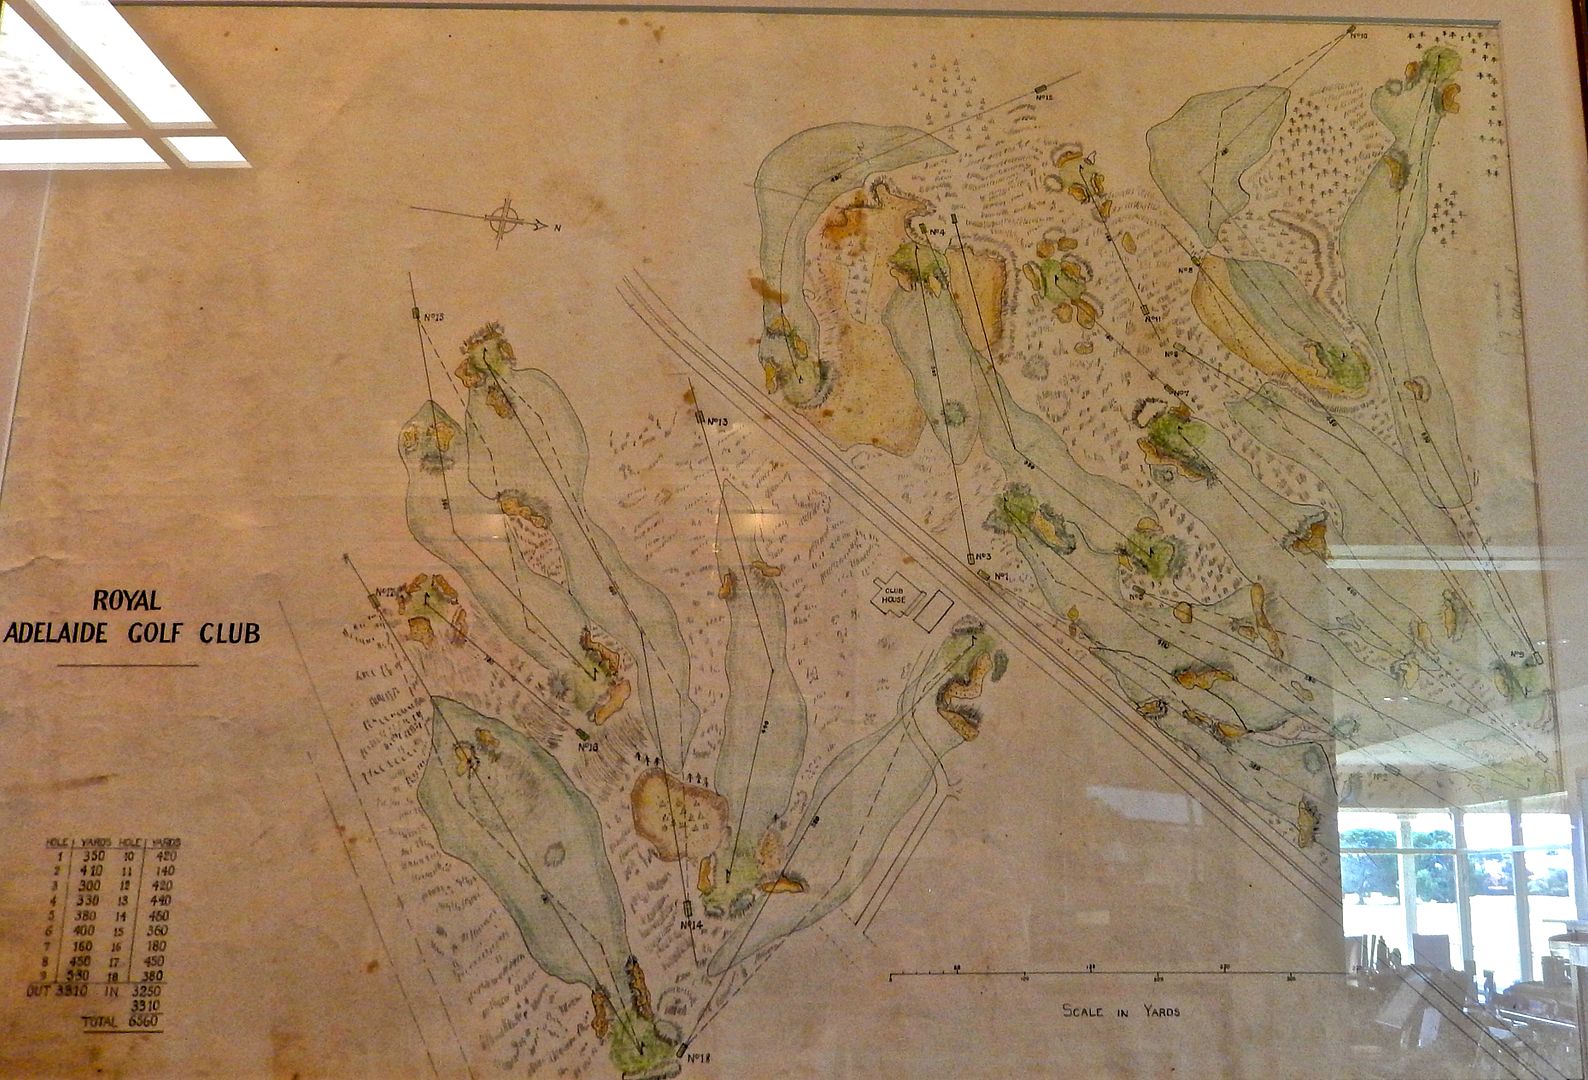
 The course remained largely unchanged, and with some half of the original routing still existing today, until Dr Alister MacKenzie visited the club and proposed the following routing in 1926. While The Seaton Links mostly played around the series of dunes and depressions in the western half of the property, MacKenize suggested changes that would make these features integral to the new golf holes. Many of MacKenzie's amendments were adopted, though the now 1st hole stayed east of the railway line, and the renowned 'Crater Hole,' which was to become a sweeping dogleg of a par-4, was left untouched.

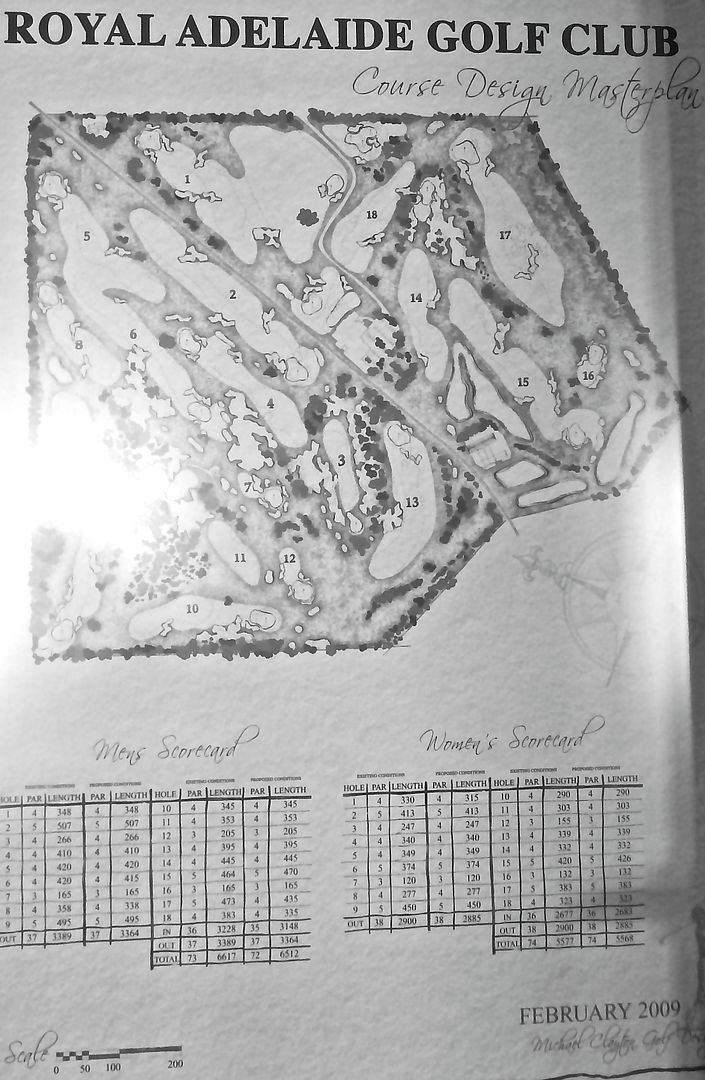
 Though many of the proposed changes were never completed, for completeness, the Ogilvy Clayton Design proposed master plan is below. Even on first glance, it is clear that MacKenzie's 1926 routing was taken to heart.
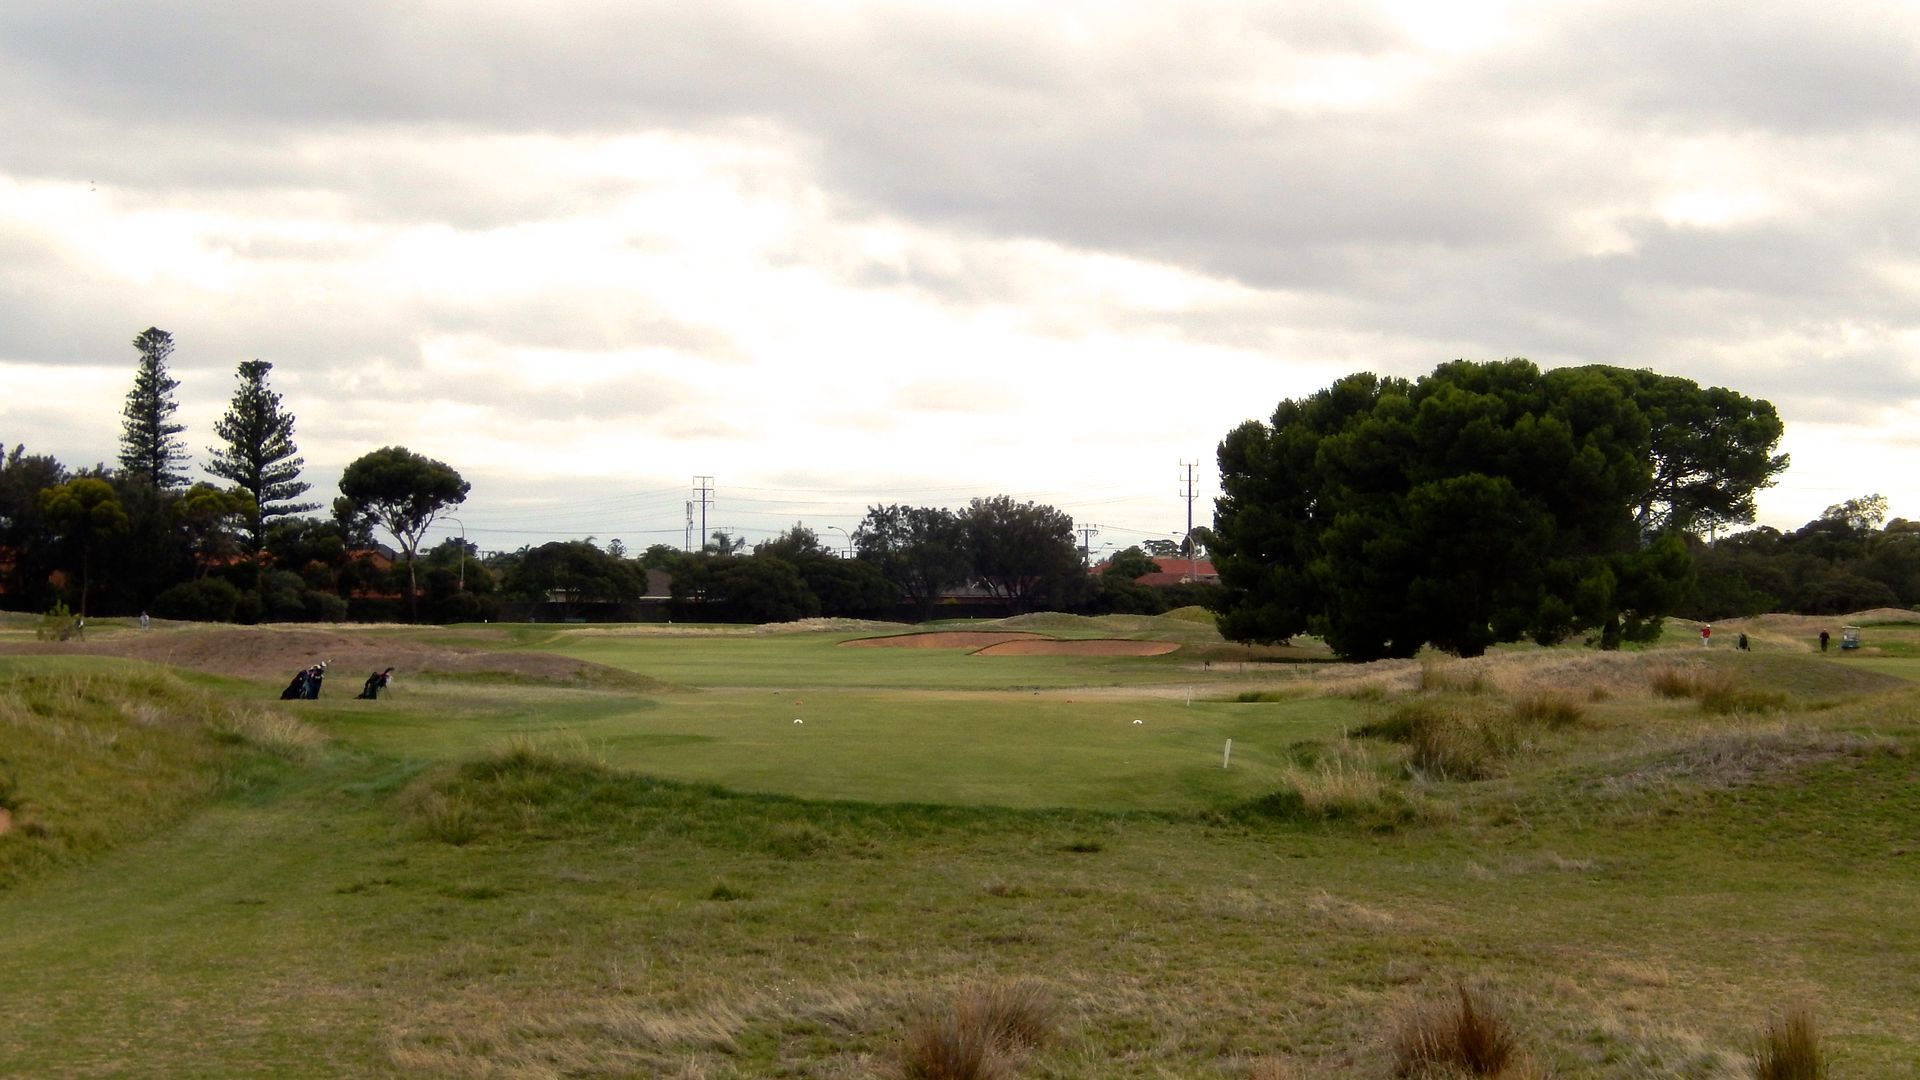
 Hole 1: Par 4, 348 Meters [Note: All pictures and meterages will be from the championship tees]
I heard a fair number of people call the first hole uninteresting and certainly among the worst holes on the course. While I think Mac/MacK's proposed renovations to the first would be an improvement, I think the hole as it sits is a very good opener, allowing the golfer to ease into the round, while still requiring him to think his way around the hole.
This reverse dogleg asks the golfer to play away from the Line of Instinct towards the bunkers guarding the ideal line. At one point the land to the left of the fairway was utterly flat, thus allowing the unthinking golfer to mistakenly take on the direct line to the green, leaving a terrible angle of approach over the bunkers. It is these types of features that Doak has quietly been eliminating, and I would not be surprised to see Doak widen the first fairway the left.
Hole 1: Par 4, 348 Meters [Note: All pictures and meterages will be from the championship tees]
I heard a fair number of people call the first hole uninteresting and certainly among the worst holes on the course. While I think Mac/MacK's proposed renovations to the first would be an improvement, I think the hole as it sits is a very good opener, allowing the golfer to ease into the round, while still requiring him to think his way around the hole.
This reverse dogleg asks the golfer to play away from the Line of Instinct towards the bunkers guarding the ideal line. At one point the land to the left of the fairway was utterly flat, thus allowing the unthinking golfer to mistakenly take on the direct line to the green, leaving a terrible angle of approach over the bunkers. It is these types of features that Doak has quietly been eliminating, and I would not be surprised to see Doak widen the first fairway the left.
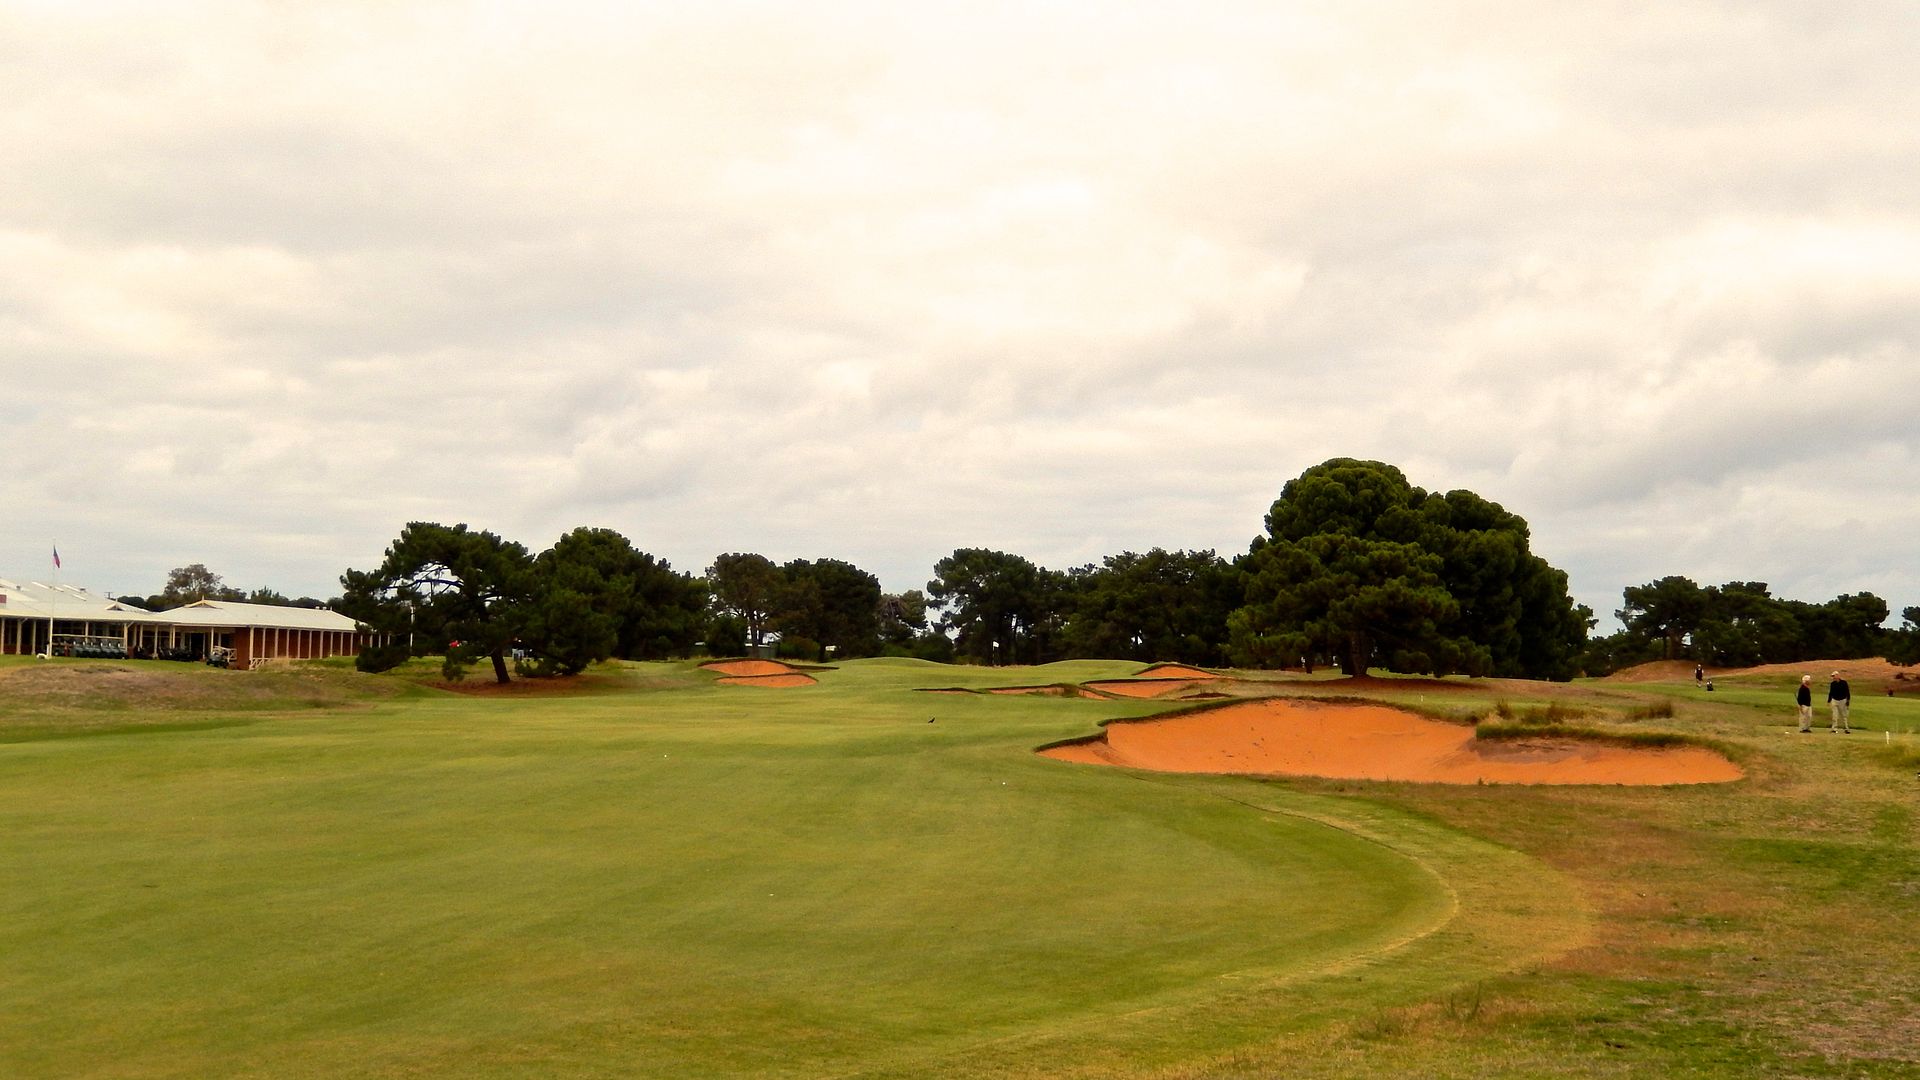
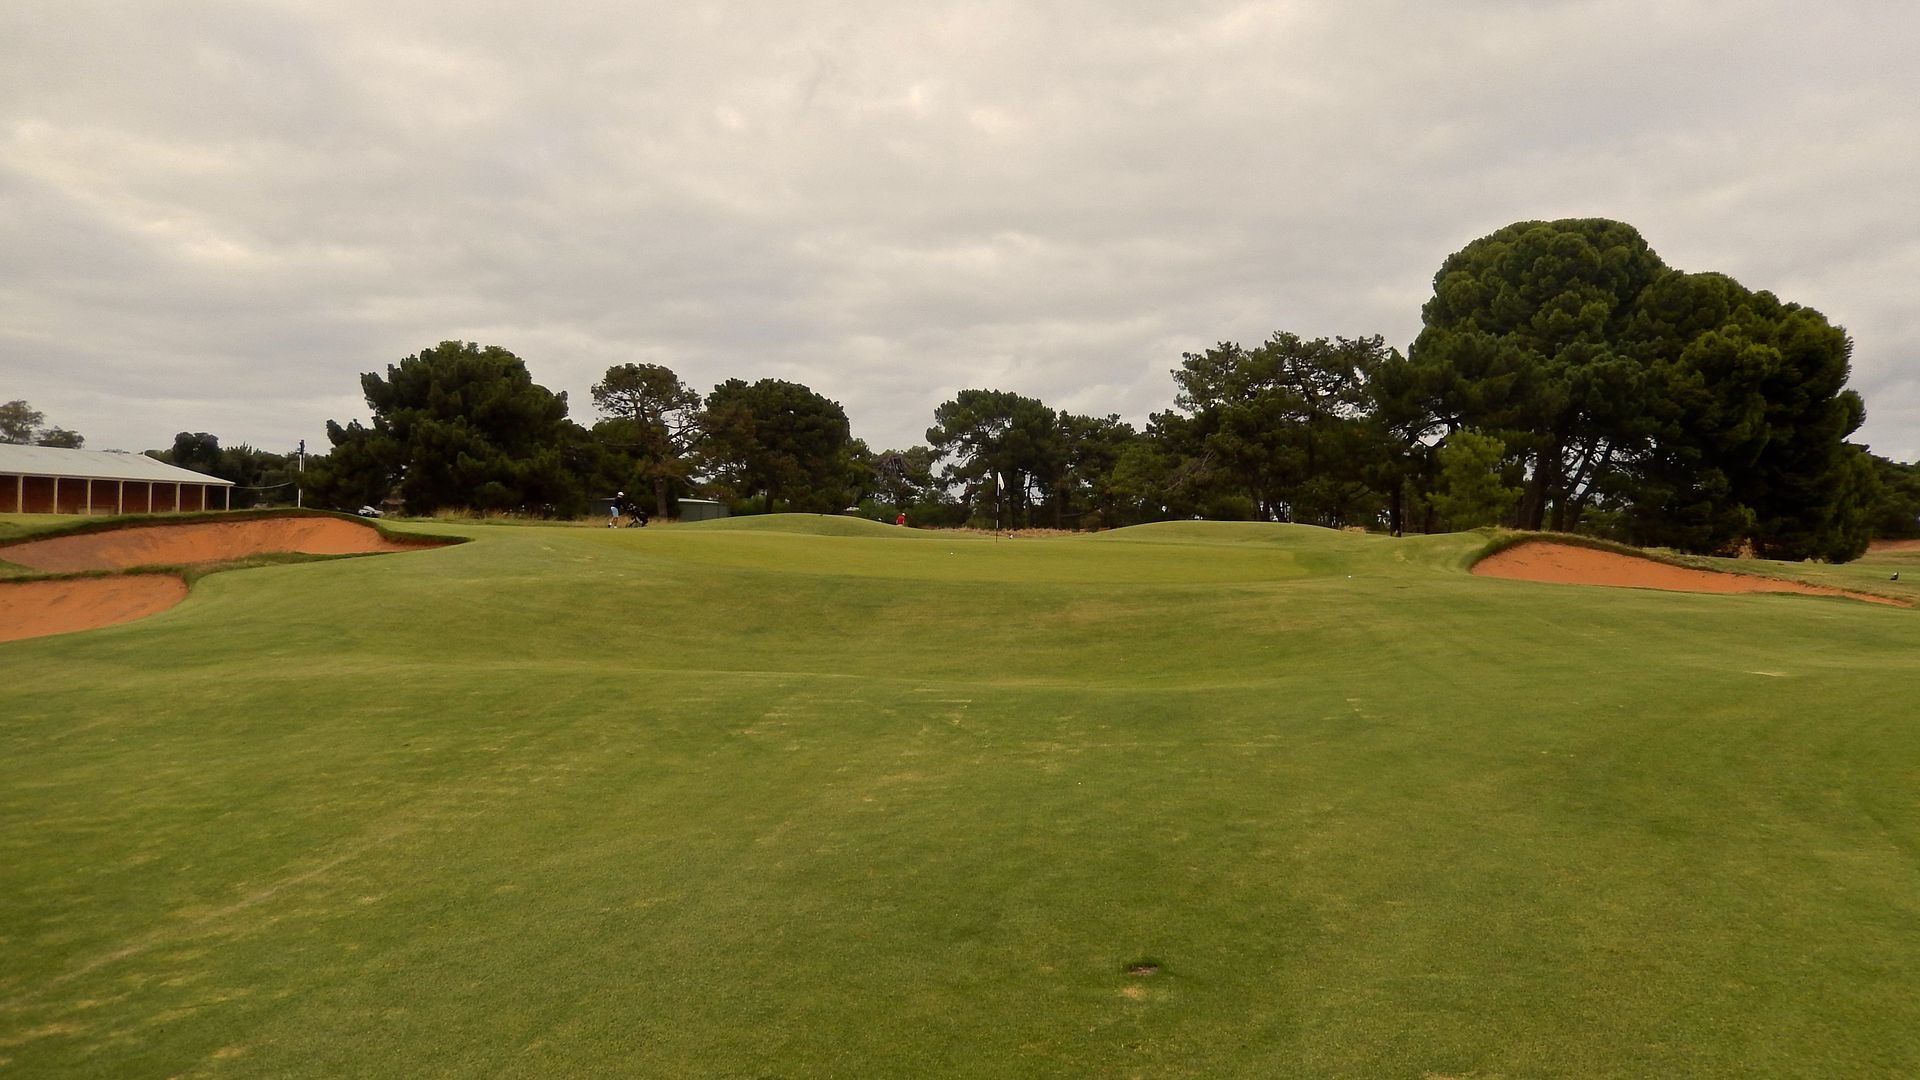
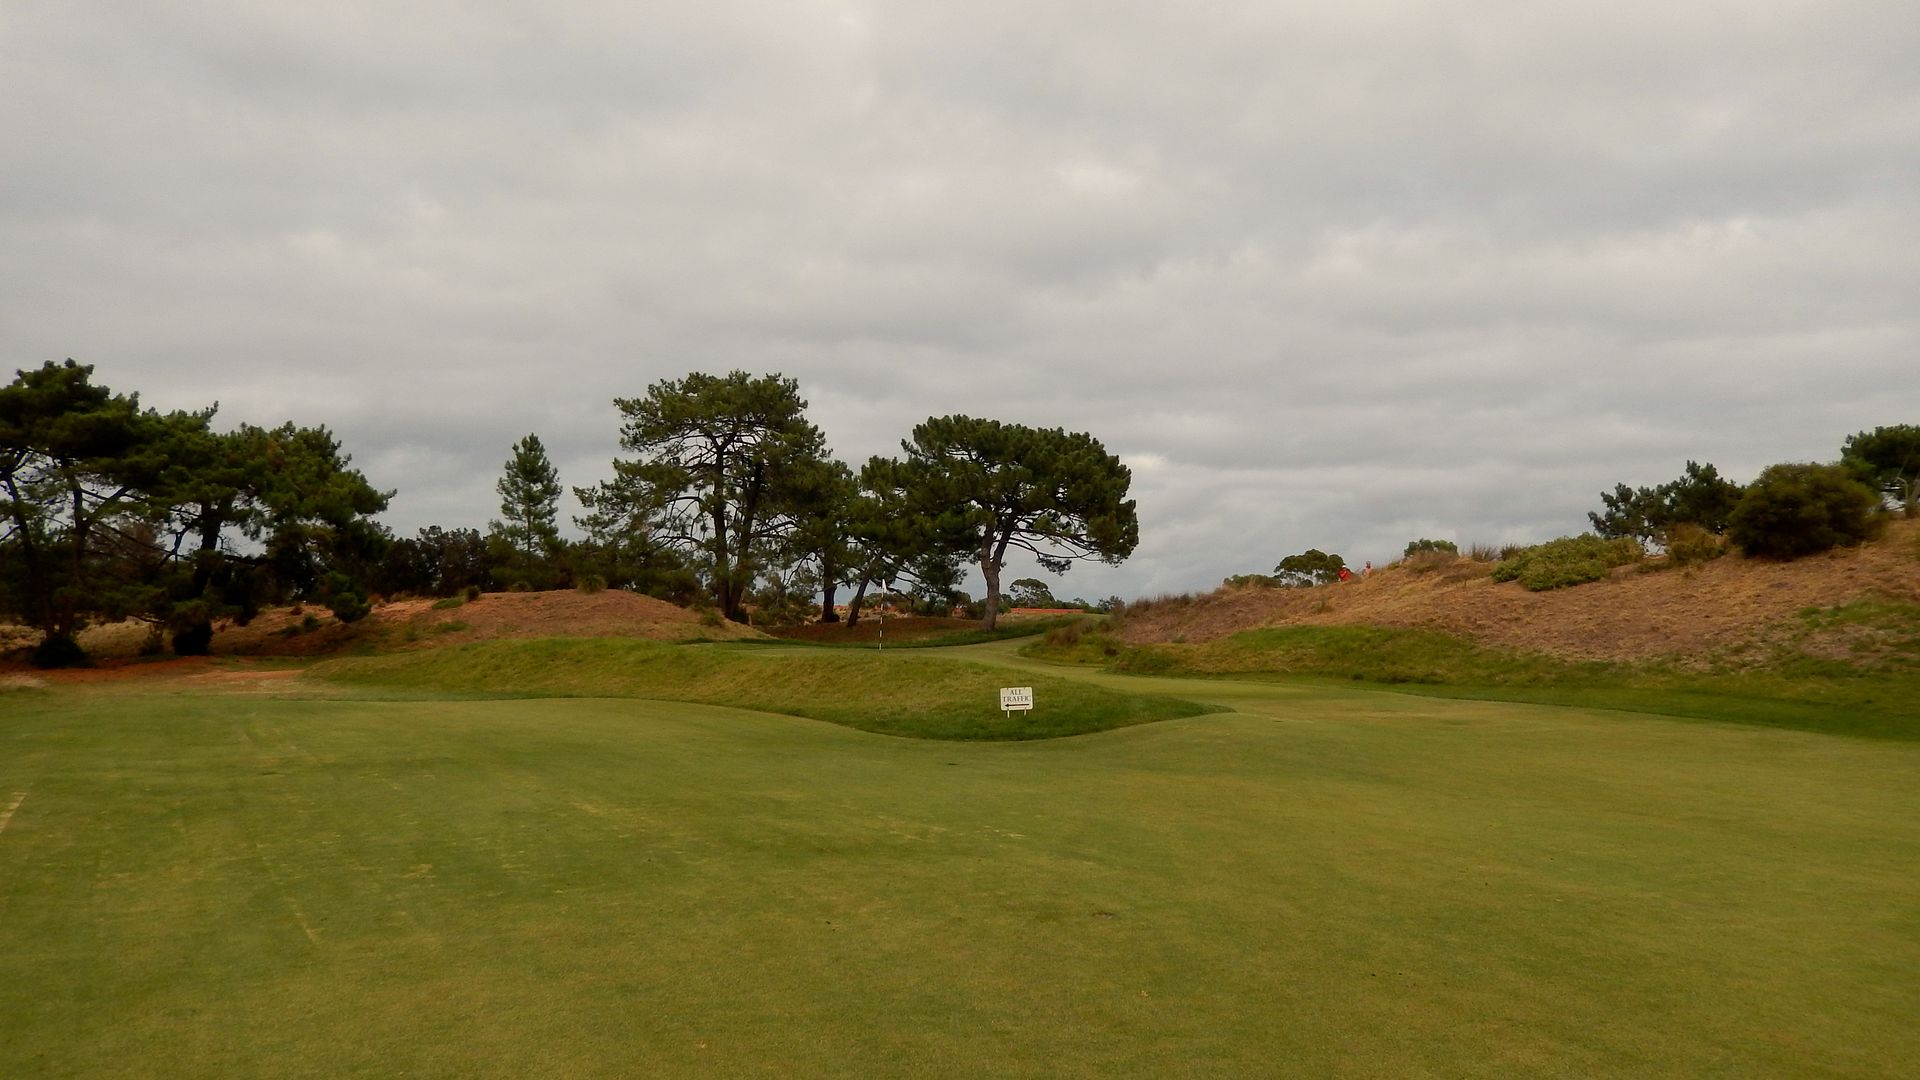
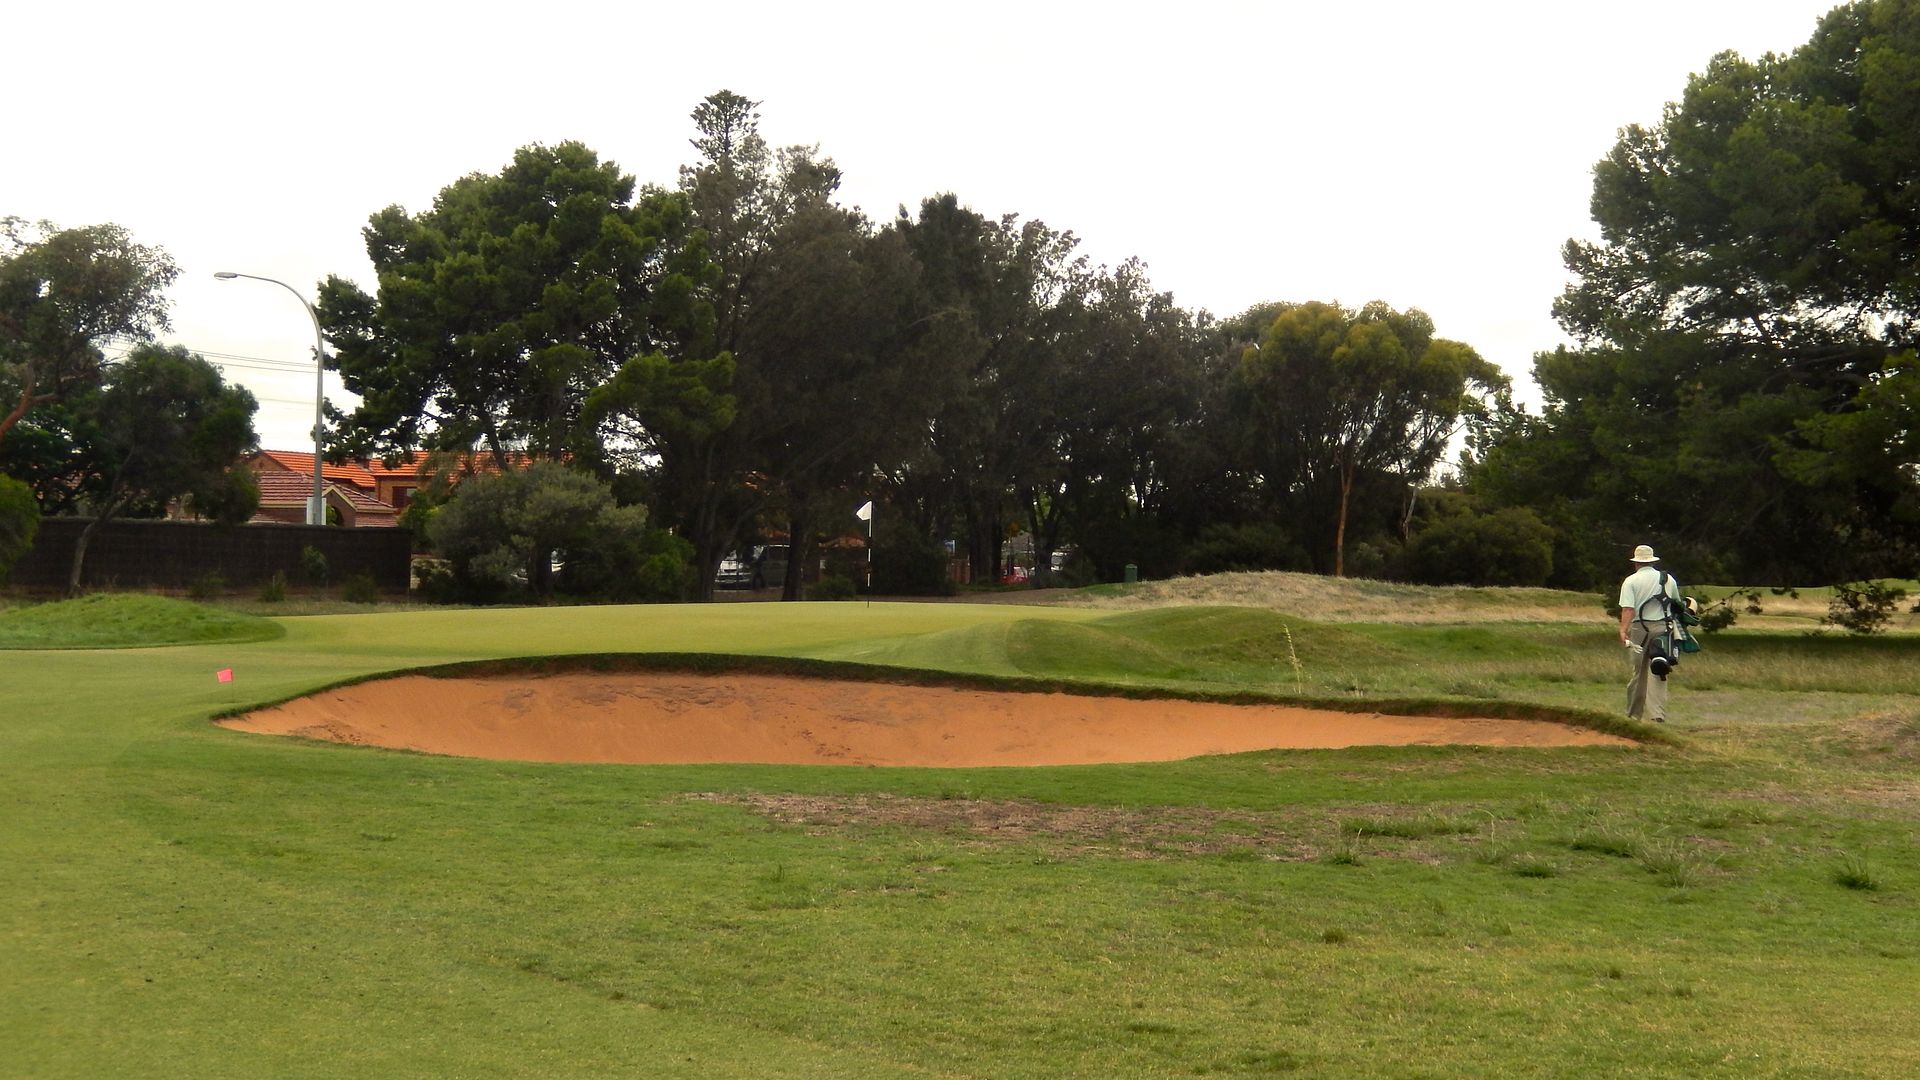
 The first green is slightly raised, angled from front-right to back-left, and protected by a fronting bunker. As seen from the left edge of the fairway, only tee shots on the right have a clear view up the length of the green.
 Not an easy green to approach; not an easy green to read. The front-right portion of the green tilts back to the tee, the back-right portion tilts away from the tee and the entire left half of the green falls off on the left side.
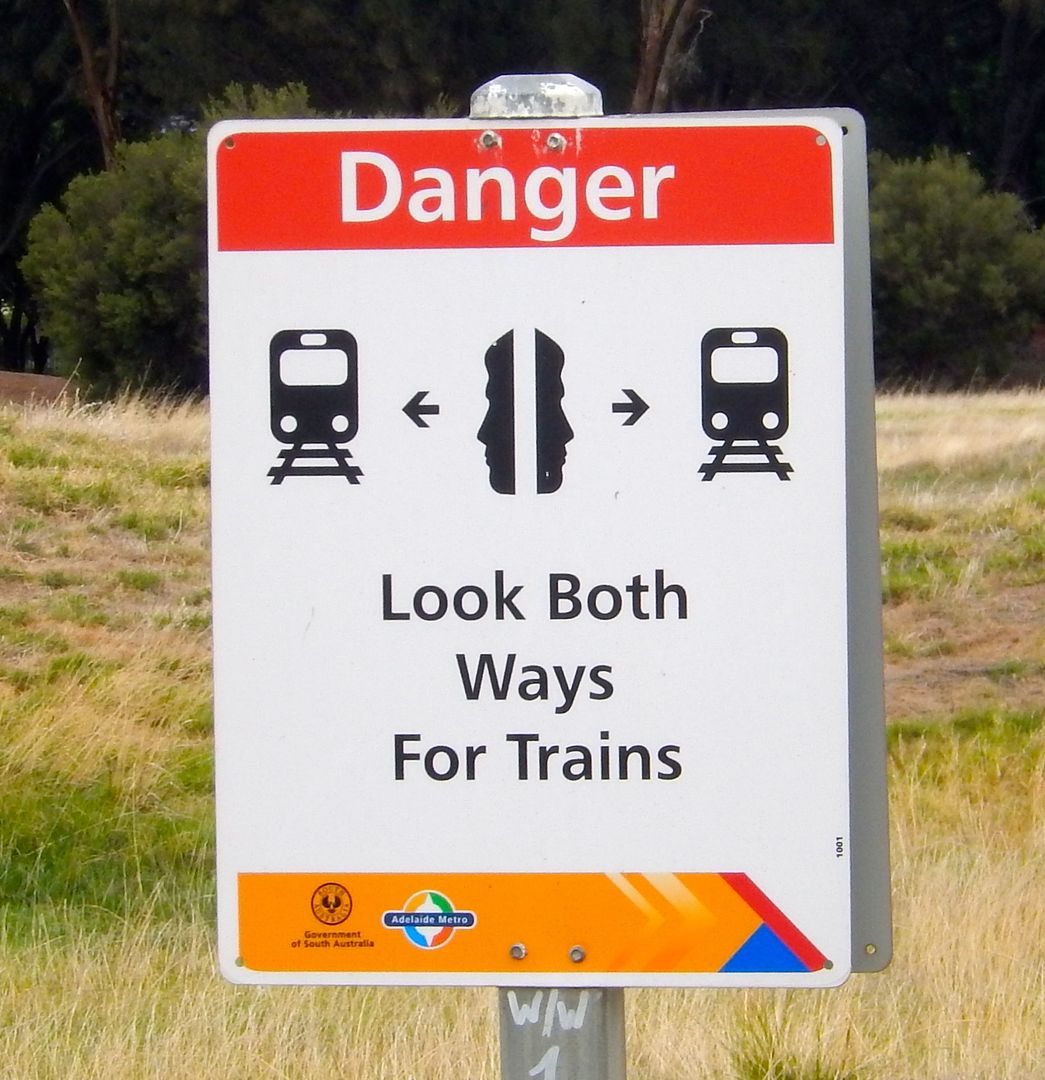
 Royal Adelaide is separated east (holes 1, 14-18) and west (holes 2-13) by a railway line. Is it still operational? Well, yeah, regularly!
 Hole 2: Par 5, 498 Metres
The championship tee for the second is well back and to the left (other side of the railway tracks) of the daily member's tee. The advantage is a slightly angled tee shot over the railway tracks, the disadvantage is that the strategically placed fairway bunker is no longer a consideration for all but the longest of hitters (for many, reaching the fairway is the primary concern!)
Hole 2: Par 5, 498 Metres
The championship tee for the second is well back and to the left (other side of the railway tracks) of the daily member's tee. The advantage is a slightly angled tee shot over the railway tracks, the disadvantage is that the strategically placed fairway bunker is no longer a consideration for all but the longest of hitters (for many, reaching the fairway is the primary concern!)
 The green, out of reach in two for most, is best approached from the right. Predictably, this angle is well-protected by a single bunker 110m from the green and a nest of bunkers 10-50m from the green. The tee played may well dictate which bunkers must be navigated on the lay-up.
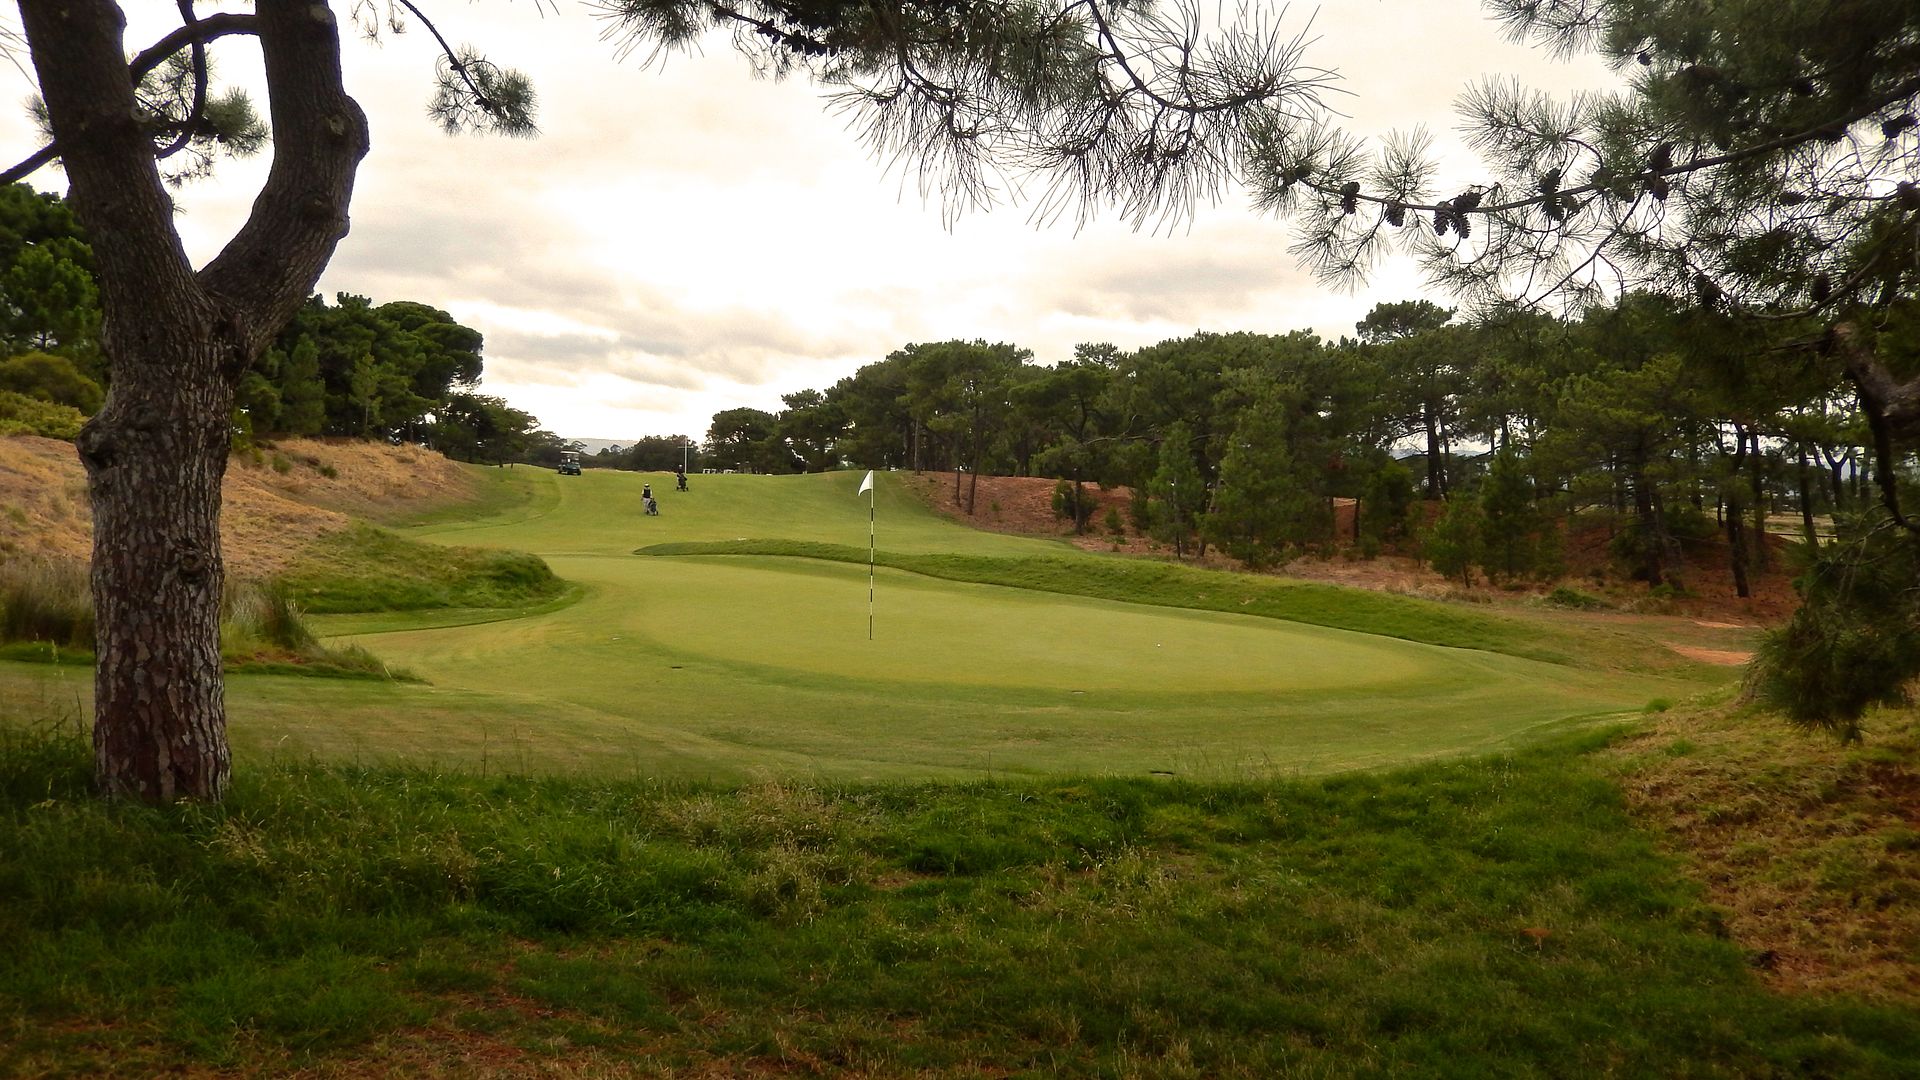
 A rare positive Thompson change, the land short of the second green has been converted from level ground to contoured terrain. While this may encourage more golfers to play an aerial approach, the running shot is still very much an option, but not unlike Royal Melbourne West's 3rd hole, it must be done with purpose. The green itself is another subtly challenging one, with a lower front portion and a pair of shoulder-blade mounds left and right making access to back pin positions far more difficult.
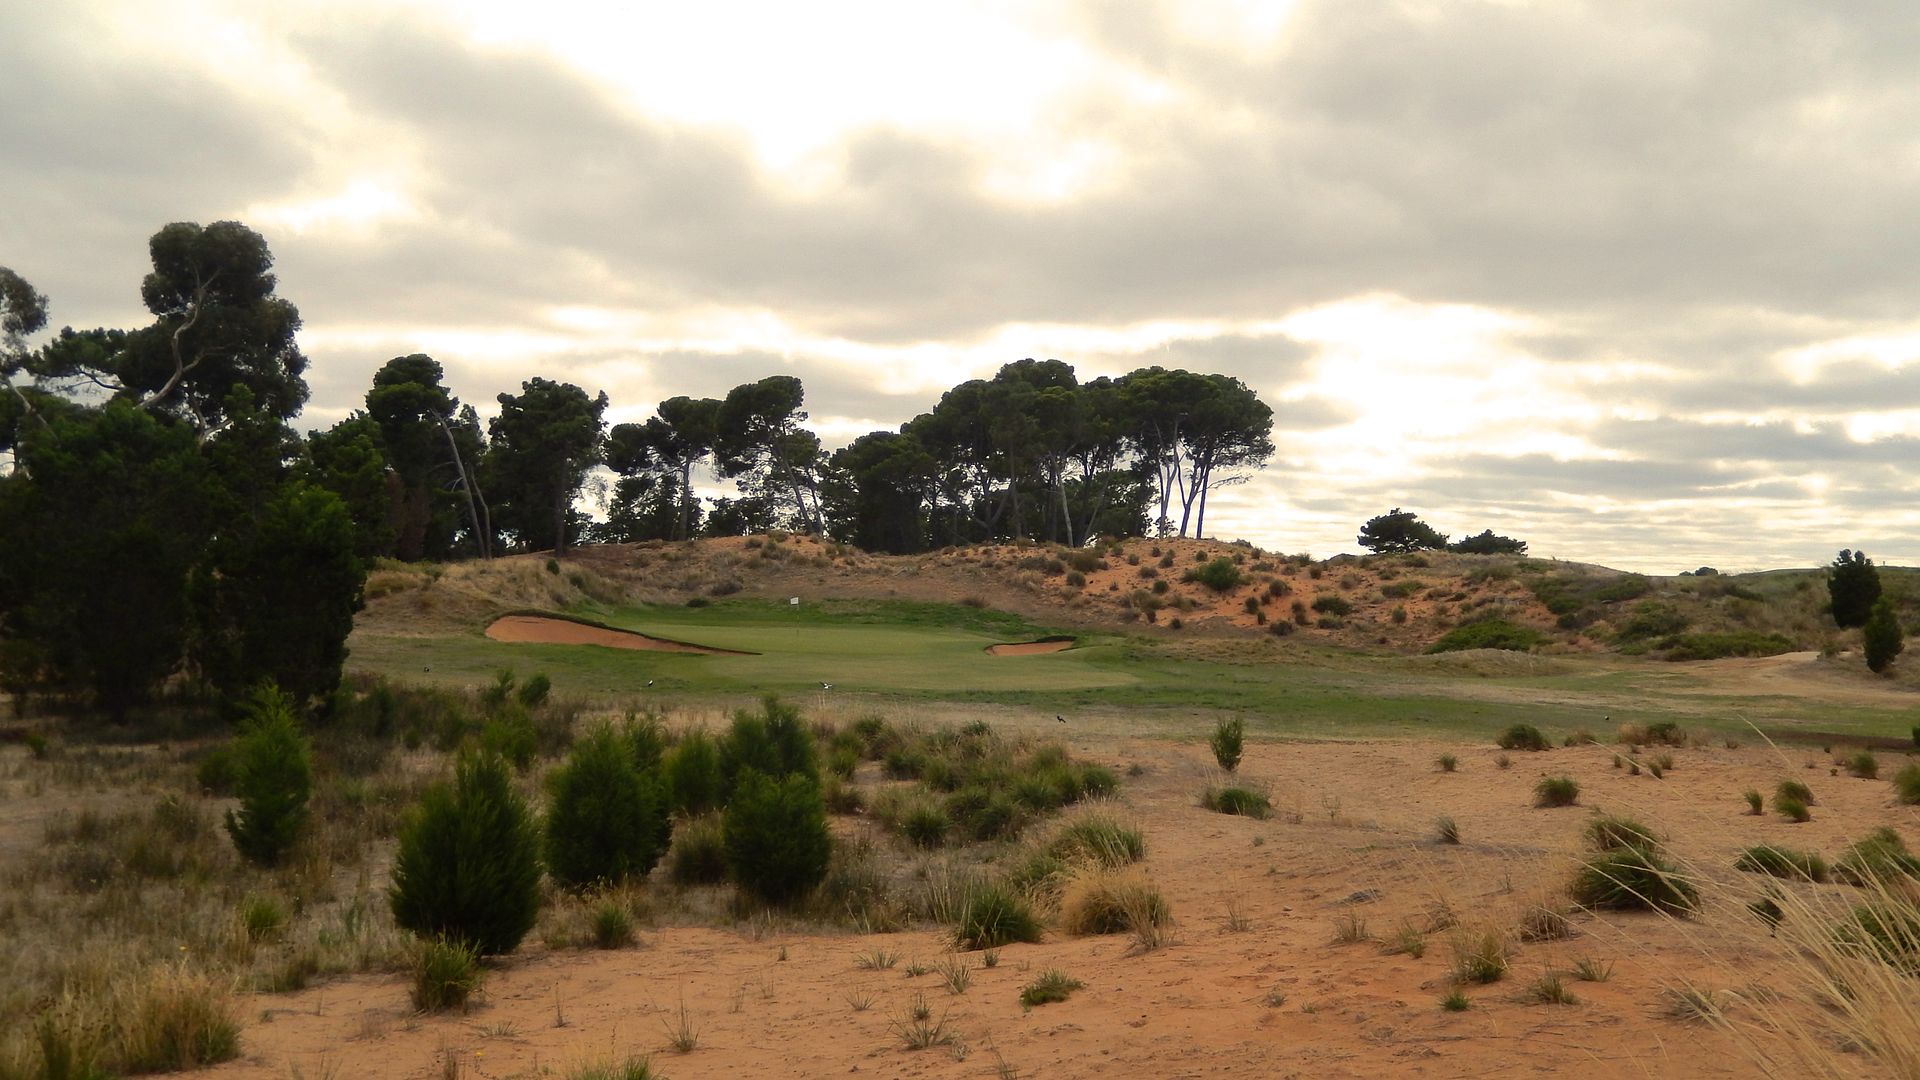
 Hole 3: Par 4, 269 Metres
Alister MacKenzie's world famous third hole once had a completely blind tee shot, but a recently installed oversize flag gives the golfer a better sense of direction from the tee. Even still, without the benefit of a member host, the first-time golfer will have no idea that he should be trying to place his tee shot as far right as possible.
Hole 3: Par 4, 269 Metres
Alister MacKenzie's world famous third hole once had a completely blind tee shot, but a recently installed oversize flag gives the golfer a better sense of direction from the tee. Even still, without the benefit of a member host, the first-time golfer will have no idea that he should be trying to place his tee shot as far right as possible.
 Especially into the wind, golfers may see little benefit in smashing away with driver and instead will try to position their tee shot at the crest of the hill some 175 metres from the tee.
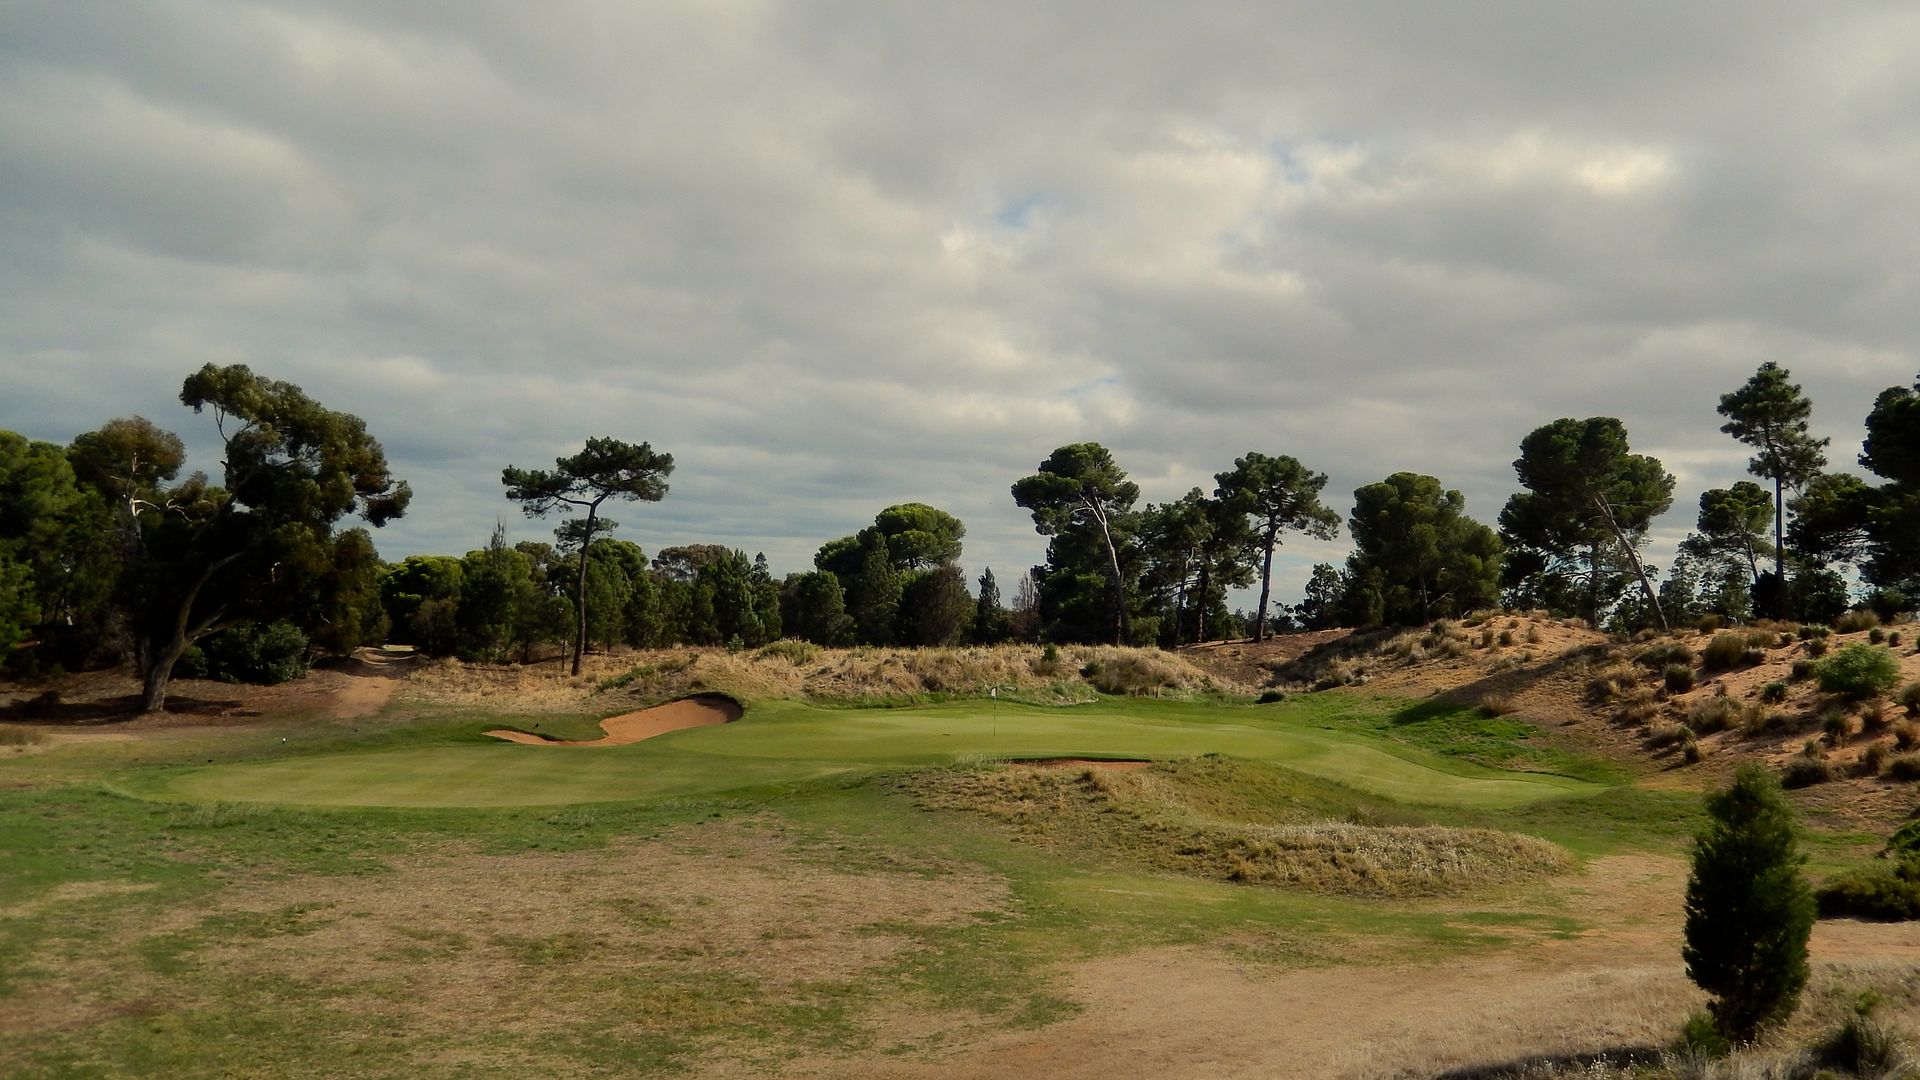
 The leftward cant of the hill will have any tee shot that is centre or left move farther left, leaving a pitch over this berm. Few golfers are comfortable with a pitch off of tight turf, and the narrowness of the green only serves to accentuate the demand for precision.
 A blind tee shot through a tall set of pines and carrying over a deep sand-filled hollow is required at the 413m par-4 4th. For mine, the stretch of holes from the 4th through the 6th is both the hardest and least interesting stretch of holes on the golf course. Interestingly, looking at both MacK and Mac's proposals for the 4th, neither looks particularly interesting, but I suppose they both rely on the rolling fairway and length of the hole to create interest. An understated and uninteresting hole will always be preferred to an overdone and similarly uninteresting hole.
 As the green sits today, approaches from the right are preferred. In an attempt to return the hole to the understated nature depicted by MacK, and to allow the unthinking golfer to hang himself, Tom Doak has removed the first of a series of bunkers along the left. If from the left side of the fairway the golfer can find the green, successfully navigating the green side bunker, that is a feat well-earned.
 Continuing in the same direction as the 4th, the 422m par-4 5th is another brute of a hole and one that could do with some fine tuning. The pair of fairway bunkers are 240m and 270m from the championship tee, and the golfer will be rewarded with the preferred angle by playing as far away from them as possible. While MacKenzie's plan and Clayton's plan differ in the complexity and quantity of fairway bunkering, both reward the golfer that plays near fairway bunkering on the right. This sound strategy is achievable with the removal of the green side bunker and a re-orientation of the green.
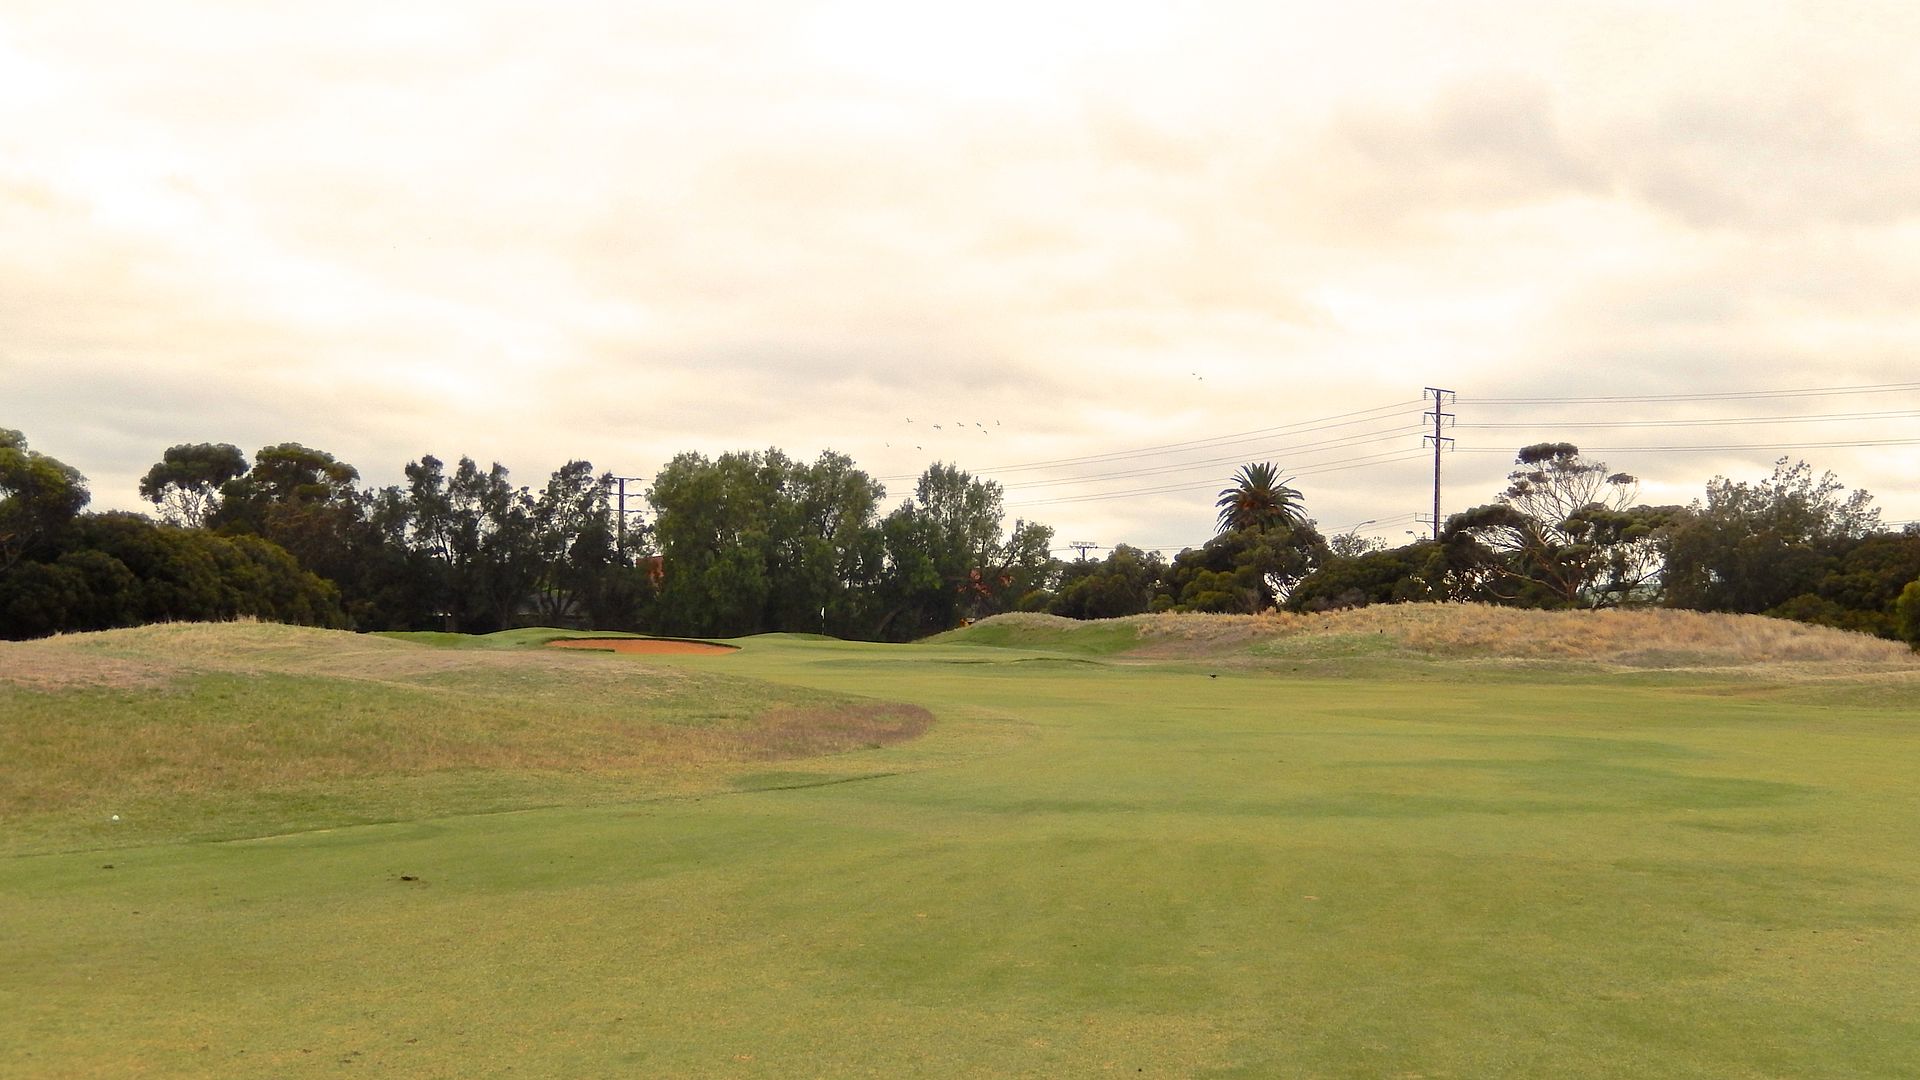
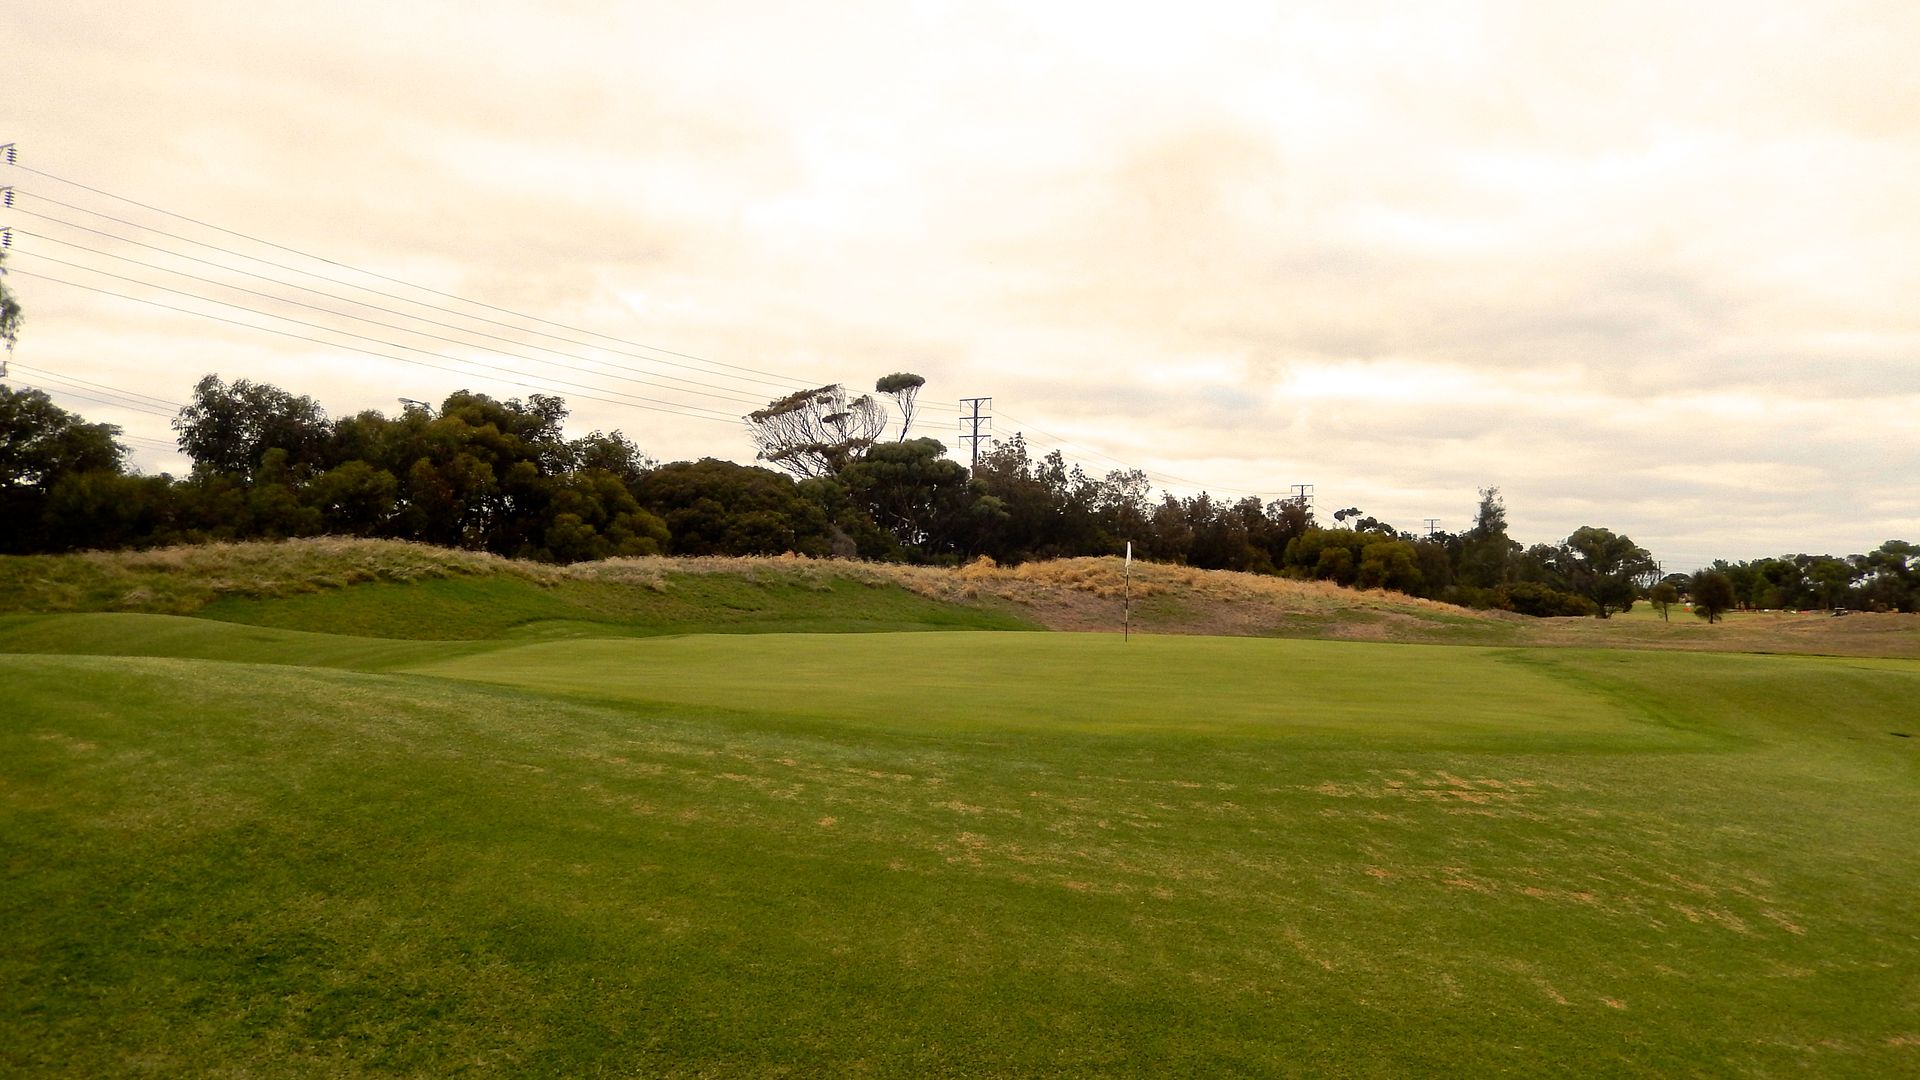
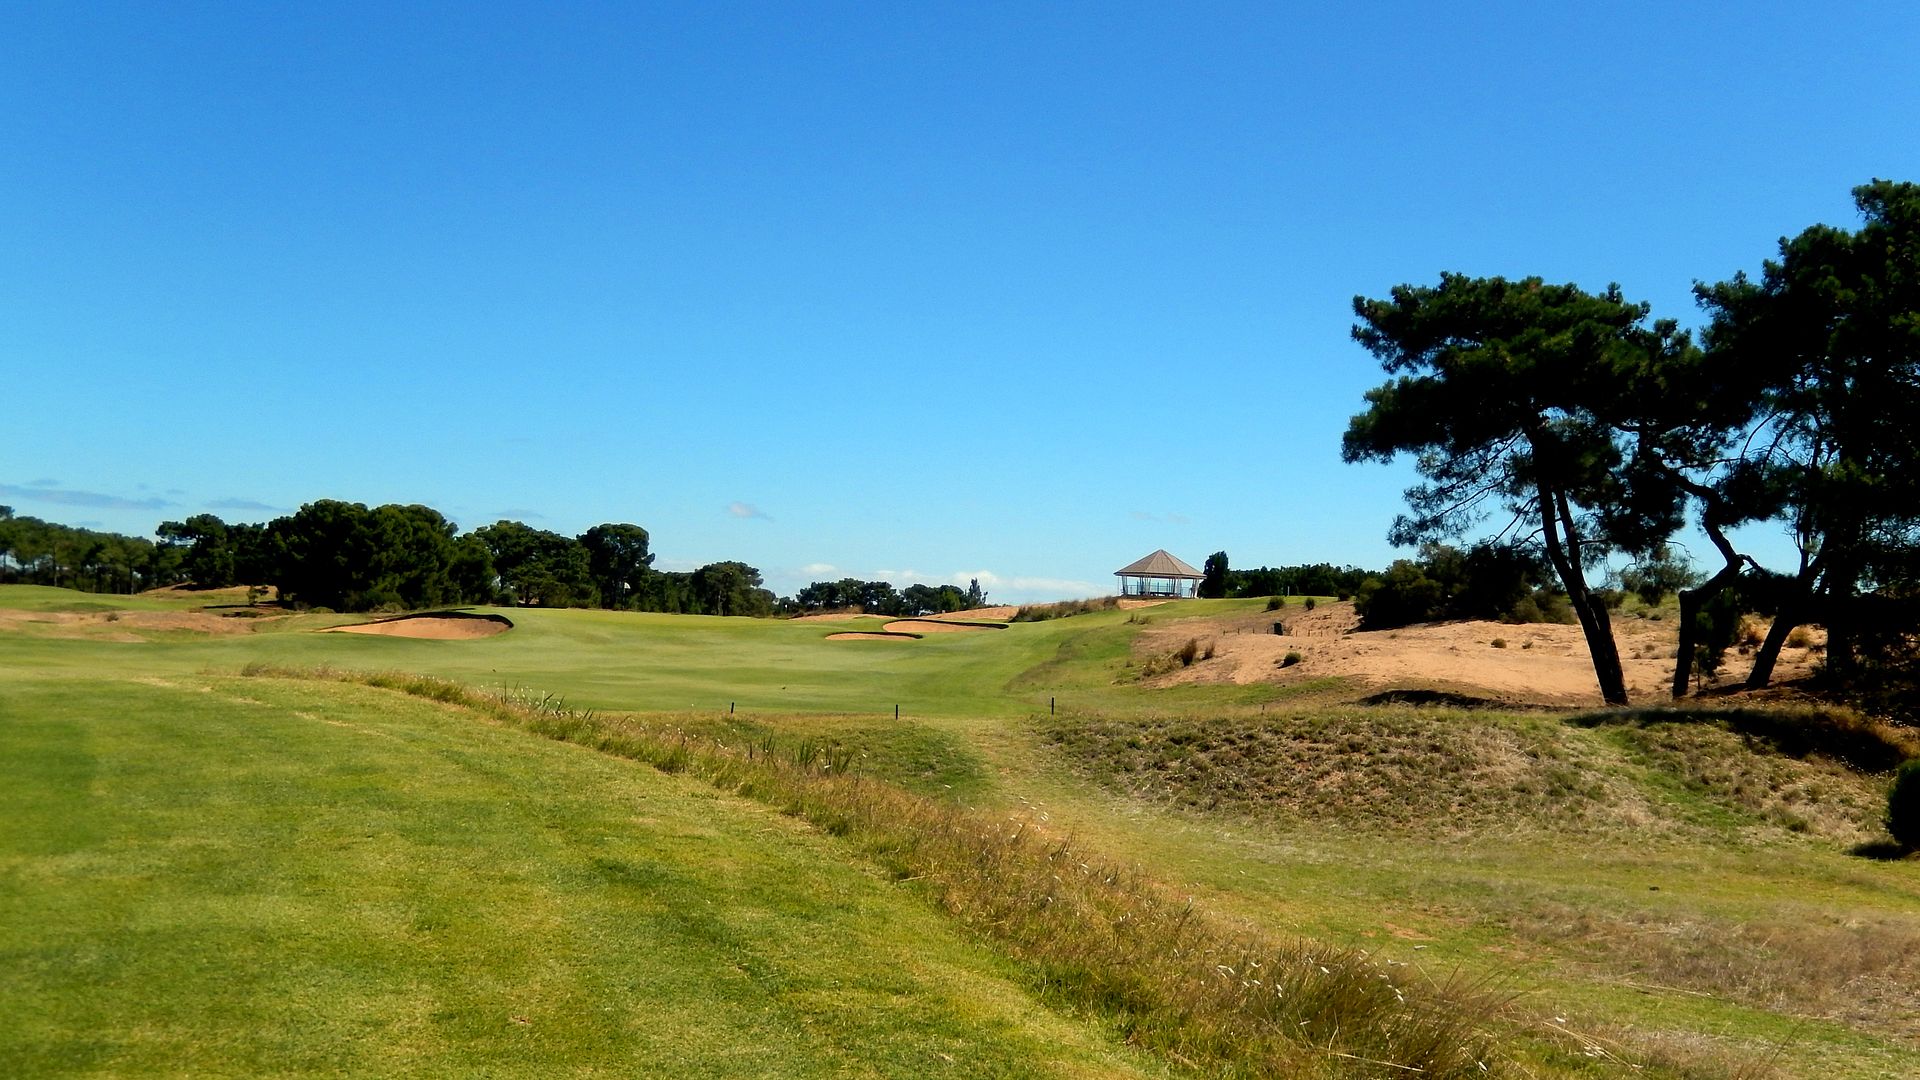
 Hole 6: Par 4, 418 Metres
Reversing course at the 6th we play back alongside the 4th and 5th in this series of tightly routed holes (can you imagine if the 1st was on this side of the tracks too, as recommended by MacKenzie!). Already a short fairway bunker left and long fairway bunker right have been filled in. The hole strikes me as one that would be well-suited without any fairway bunkers... and maybe that's where Doak will take it eventually.
Hole 6: Par 4, 418 Metres
Reversing course at the 6th we play back alongside the 4th and 5th in this series of tightly routed holes (can you imagine if the 1st was on this side of the tracks too, as recommended by MacKenzie!). Already a short fairway bunker left and long fairway bunker right have been filled in. The hole strikes me as one that would be well-suited without any fairway bunkers... and maybe that's where Doak will take it eventually.
 This depression 100m short of the green seems a natural place for a bunker (and is shaped like one may have been here at one time). Though out of play from the tee, it would protect the ideal line if the golfer is forced to lay-up.
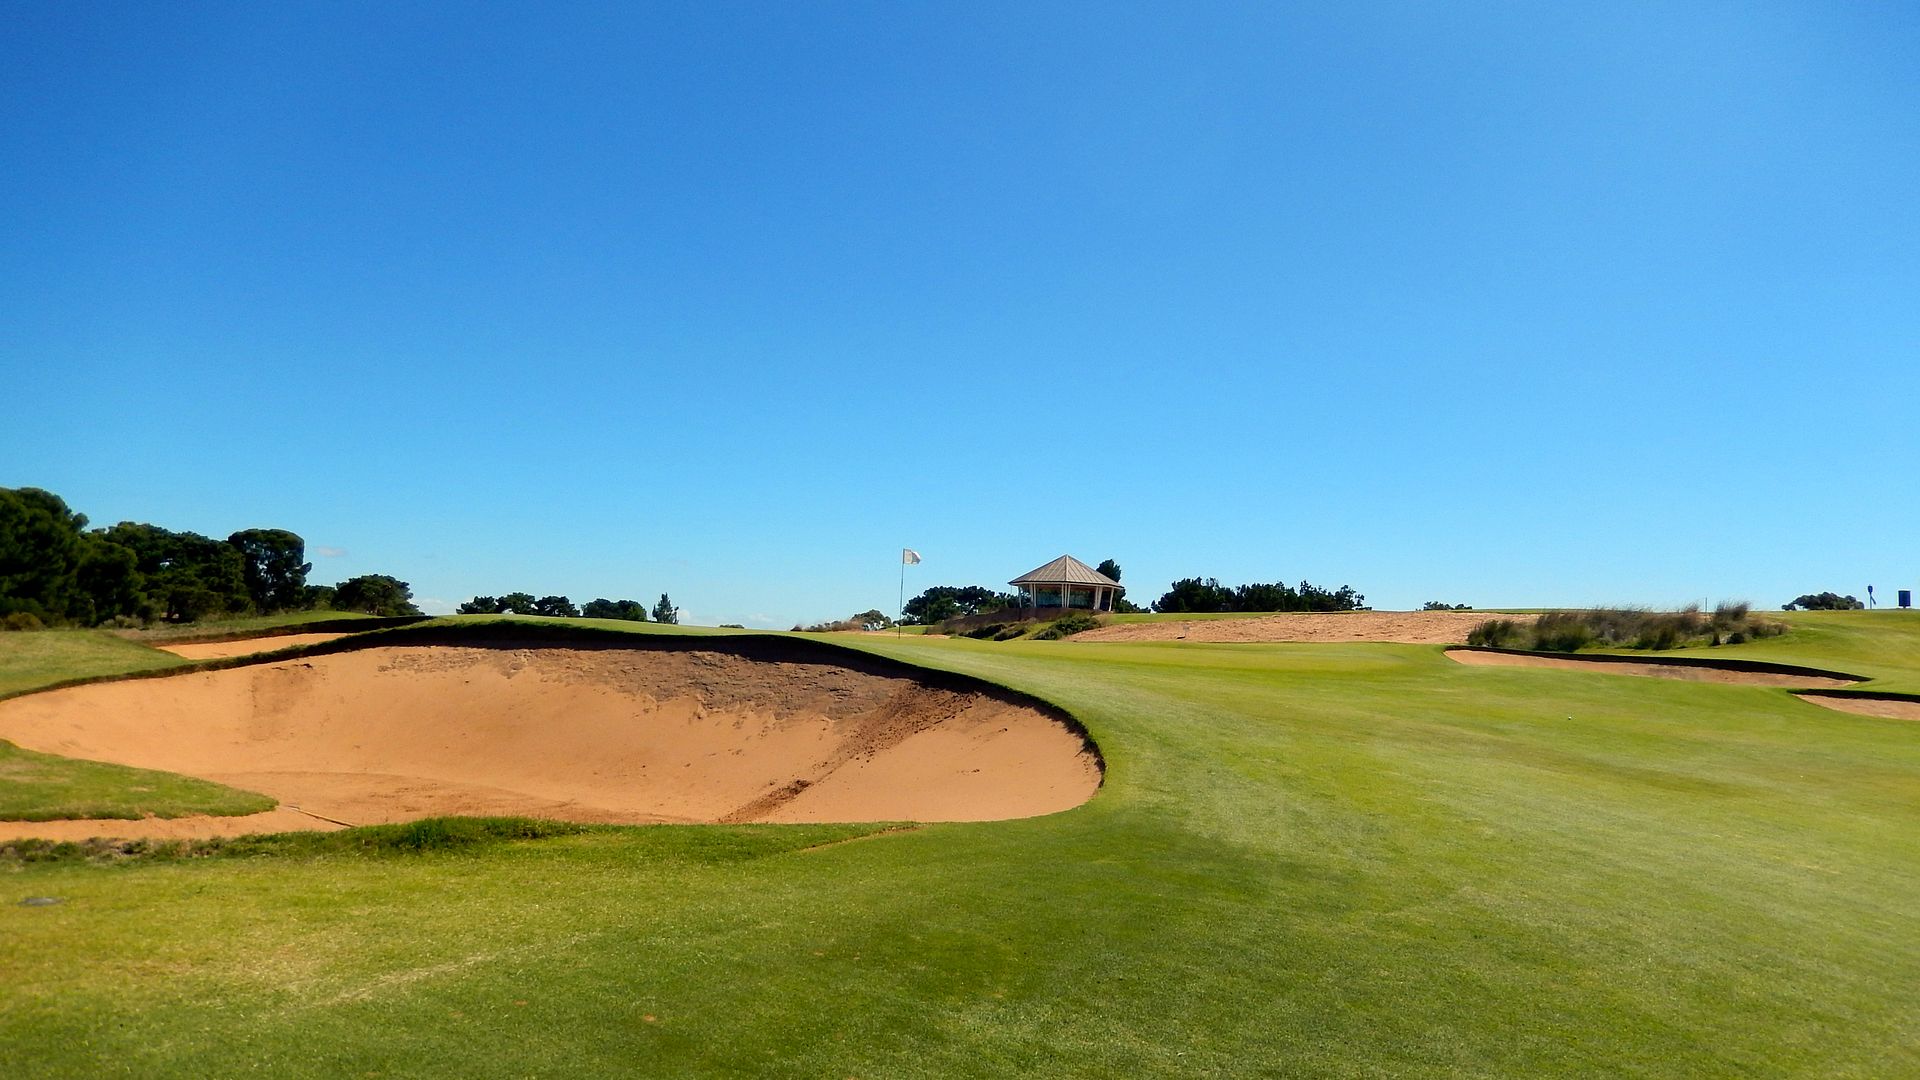
 To me, this bunker short-left of the green should be the hole's dominant feature. As it sits today, the bunker is the deepest on the course and is avoided at all costs. As MacKenzie depicted, I would love to see the front of the bunker extended into the fairway across the middle go the green. This would impact decision-making all the way back to the tee, especially since most golfers will be playing an approach (both downwind and into a headwind) that runs on to the putting surface.
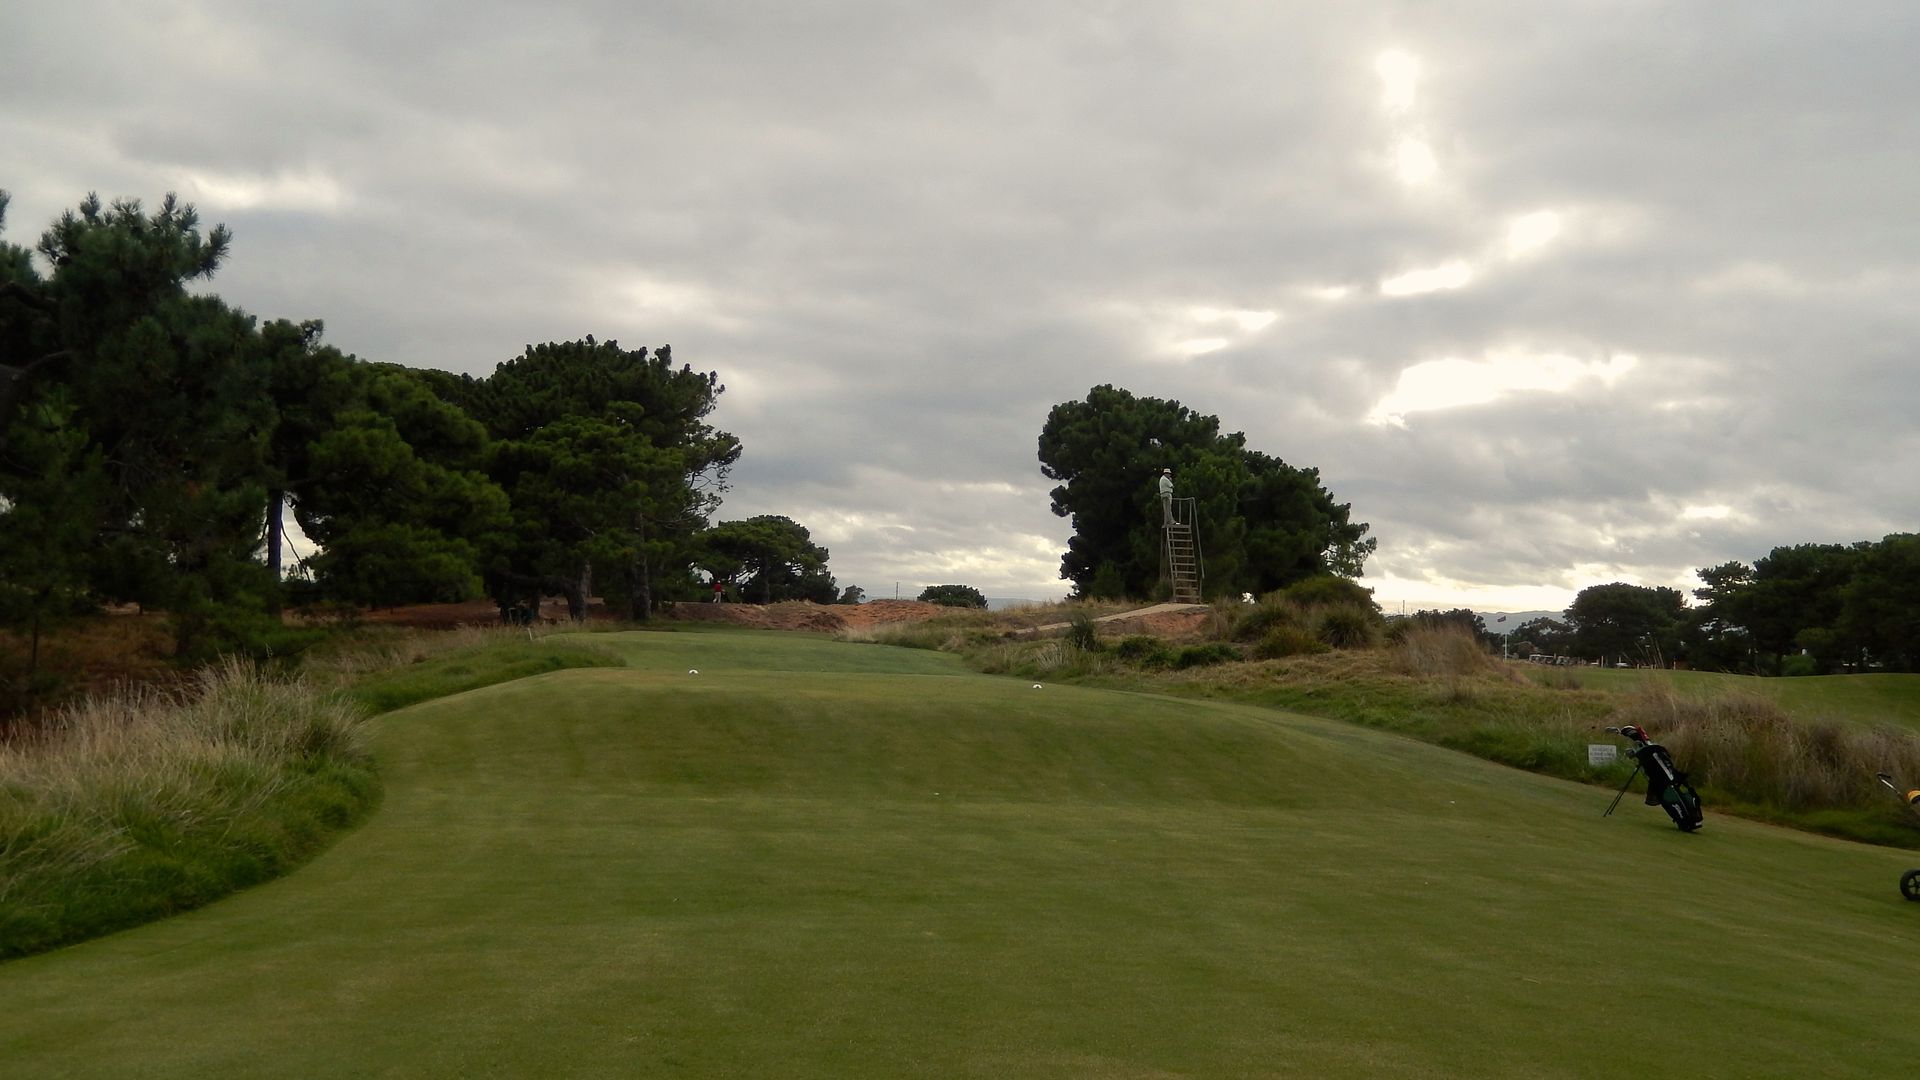
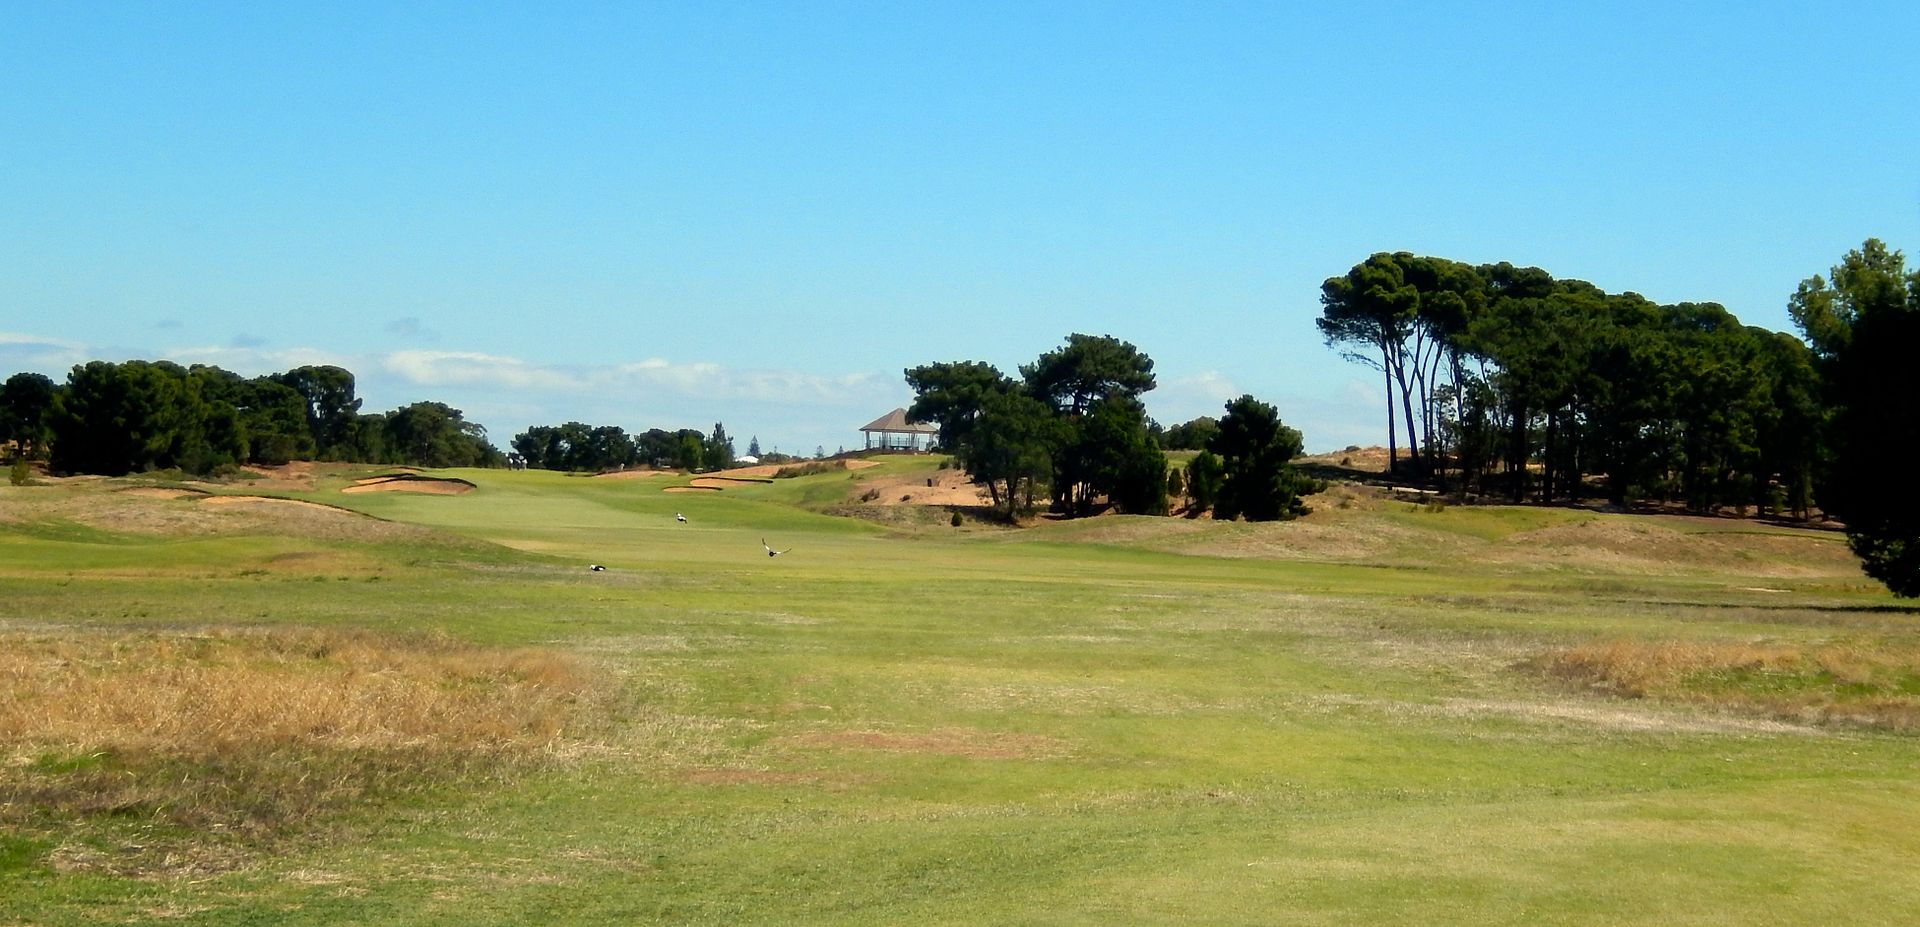
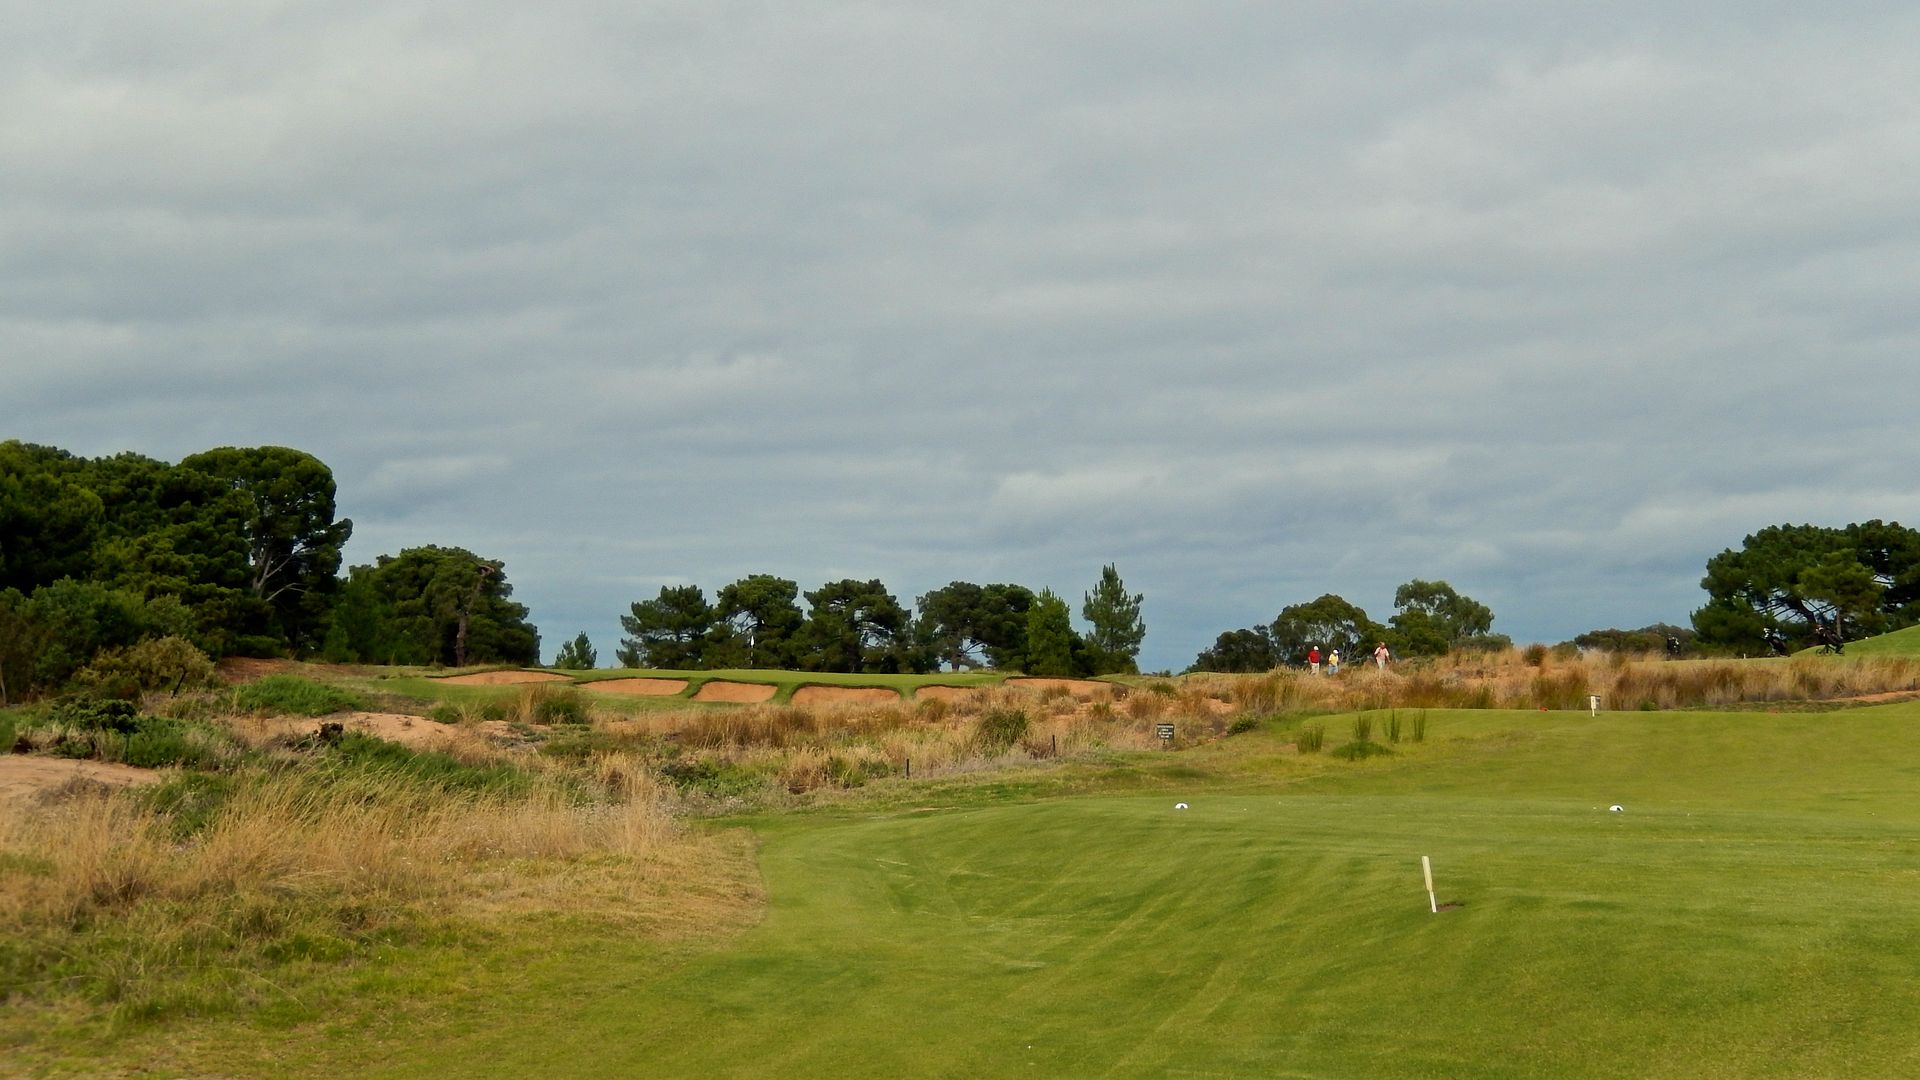
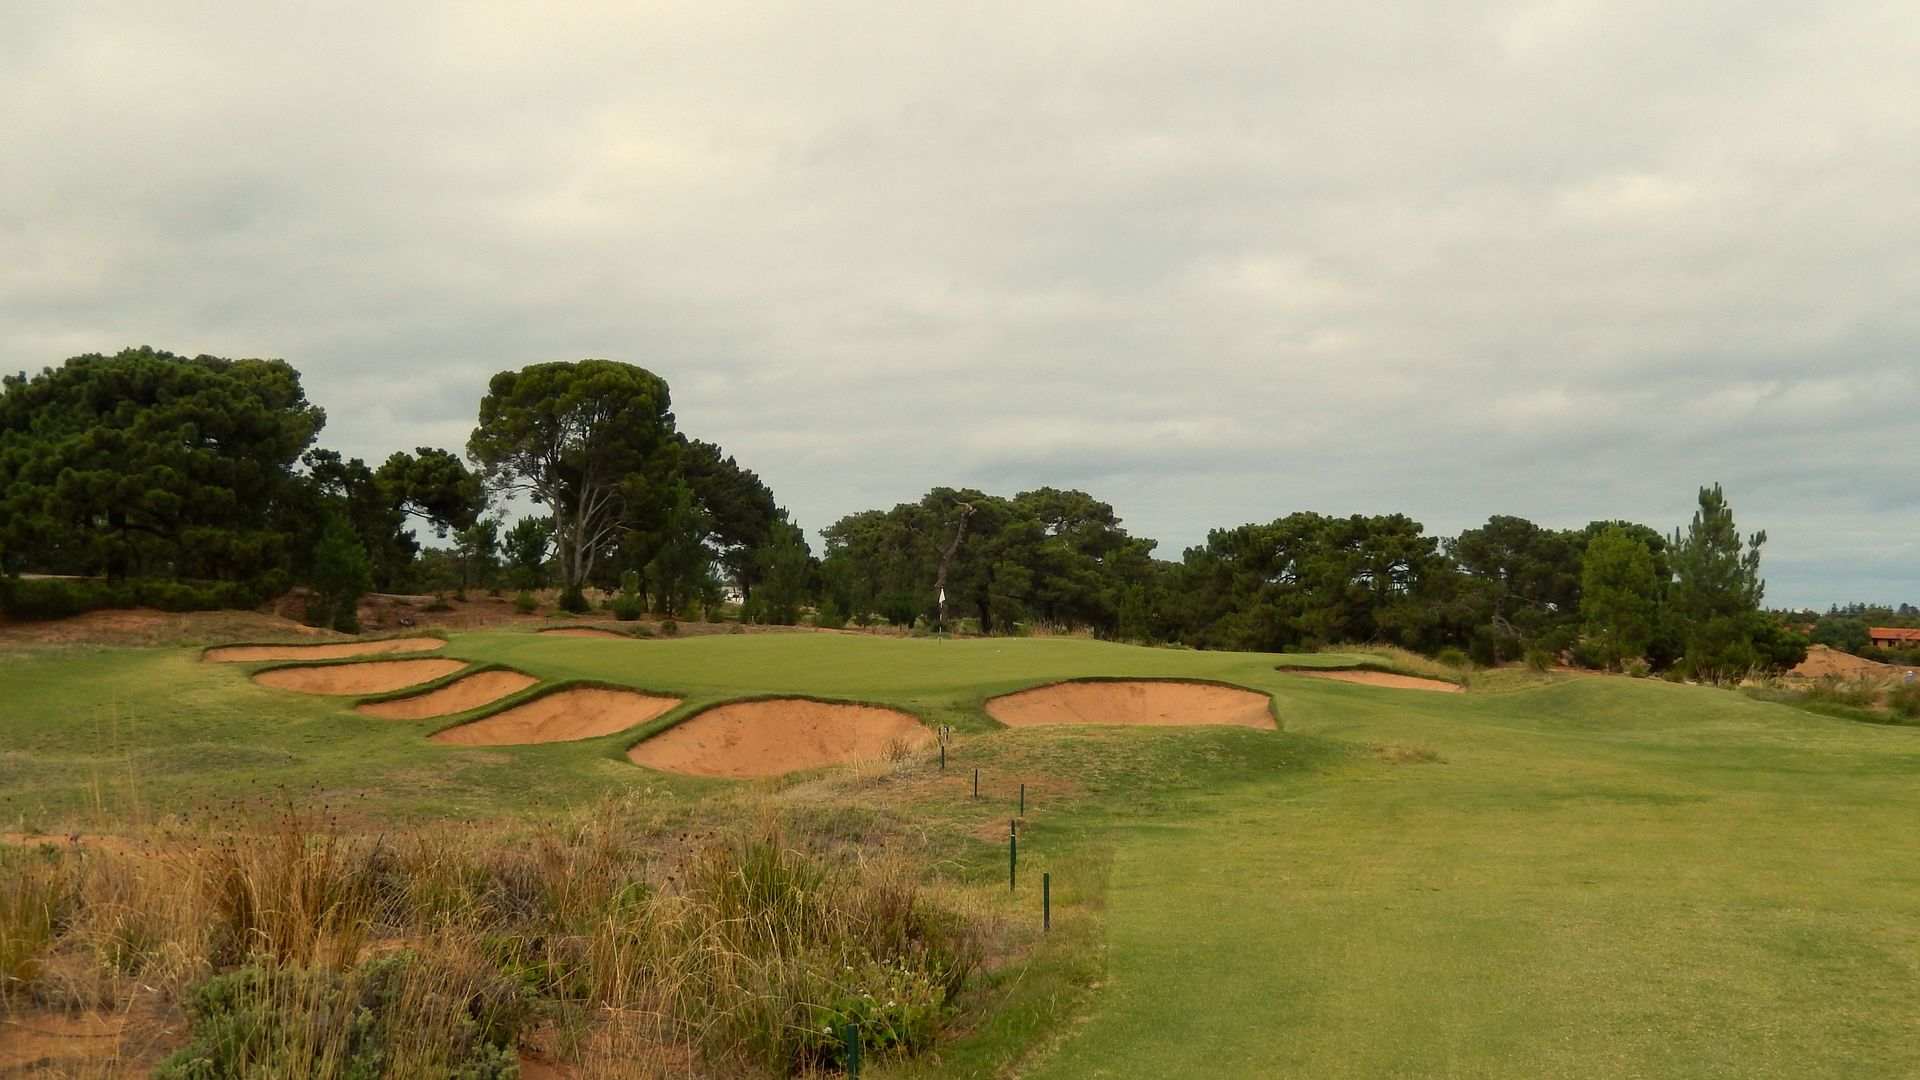
 Hole 7: Par 3, 164 Metres
The first par-3 of the round is a good one. The hole is a remnant from the Seaton Links with the only square green at Royal Adelaide. There were always bunkers beyond the green and now there are a series of bunkers short of the green as well. It seems the only continuous change is the location of the teeing ground, which shifts from left of the 6th green to right of the 6th green, and back again.
Hole 7: Par 3, 164 Metres
The first par-3 of the round is a good one. The hole is a remnant from the Seaton Links with the only square green at Royal Adelaide. There were always bunkers beyond the green and now there are a series of bunkers short of the green as well. It seems the only continuous change is the location of the teeing ground, which shifts from left of the 6th green to right of the 6th green, and back again.
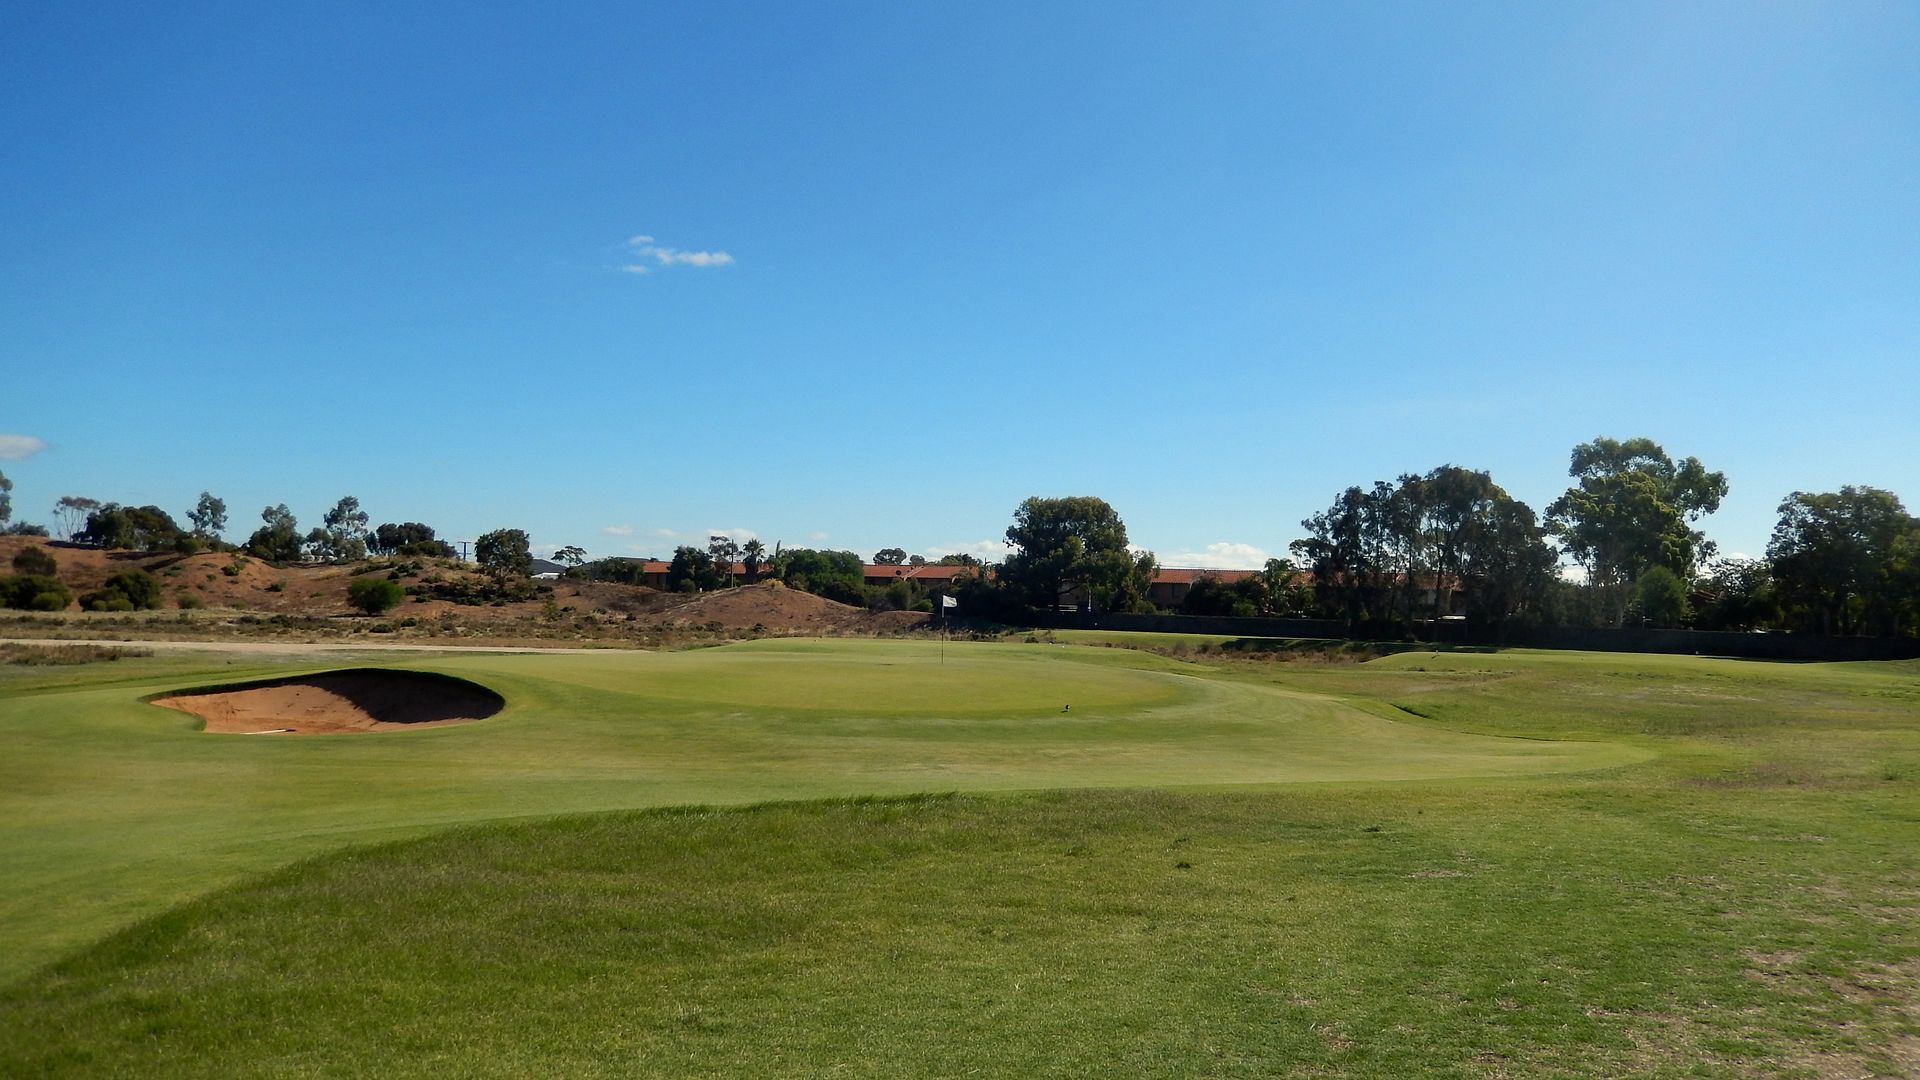
 The not particularly long on paper, the third is a very demanding par-3. Yes, the green is large, but the uphill nature of the hole hides the green's depth. Add to that a severely back-to-front tilted front portion of the green, the requirement for an all-carry tee shot, and disaster behind the green, and a par is a well-earned score.
 Hole 8: Par 4, 356 Metres
Though less intimidating, the tee shot at the 8th is similar to the tee shot at the 4th demanding a mostly blind shot through a chute of trees. The blindness is the result of a long runway tee combined with a steep drop to the fairway, and it is mostly eliminated when playing from the Member's or Forward tees.
Hole 8: Par 4, 356 Metres
Though less intimidating, the tee shot at the 8th is similar to the tee shot at the 4th demanding a mostly blind shot through a chute of trees. The blindness is the result of a long runway tee combined with a steep drop to the fairway, and it is mostly eliminated when playing from the Member's or Forward tees.
 Whether the right side of the green is protected by bunkering as depicted by MacKenzie, or mounding as it sits today, the hole has always favored an approach from the left. Yet again, and unfortunately, the fairway bunkering is oddly placed. Rather than placing the bunkers to protect the ideal line, they are placed in a position that will push golfers towards the ideal line. Perhaps the bunkers should be moved to the other side of the fairway, or even better, removed completely, thus tempting the unthinking golfer into playing on the directly line and leaving a treacherous approach to a green that will require an aerial approach and which falls off long.
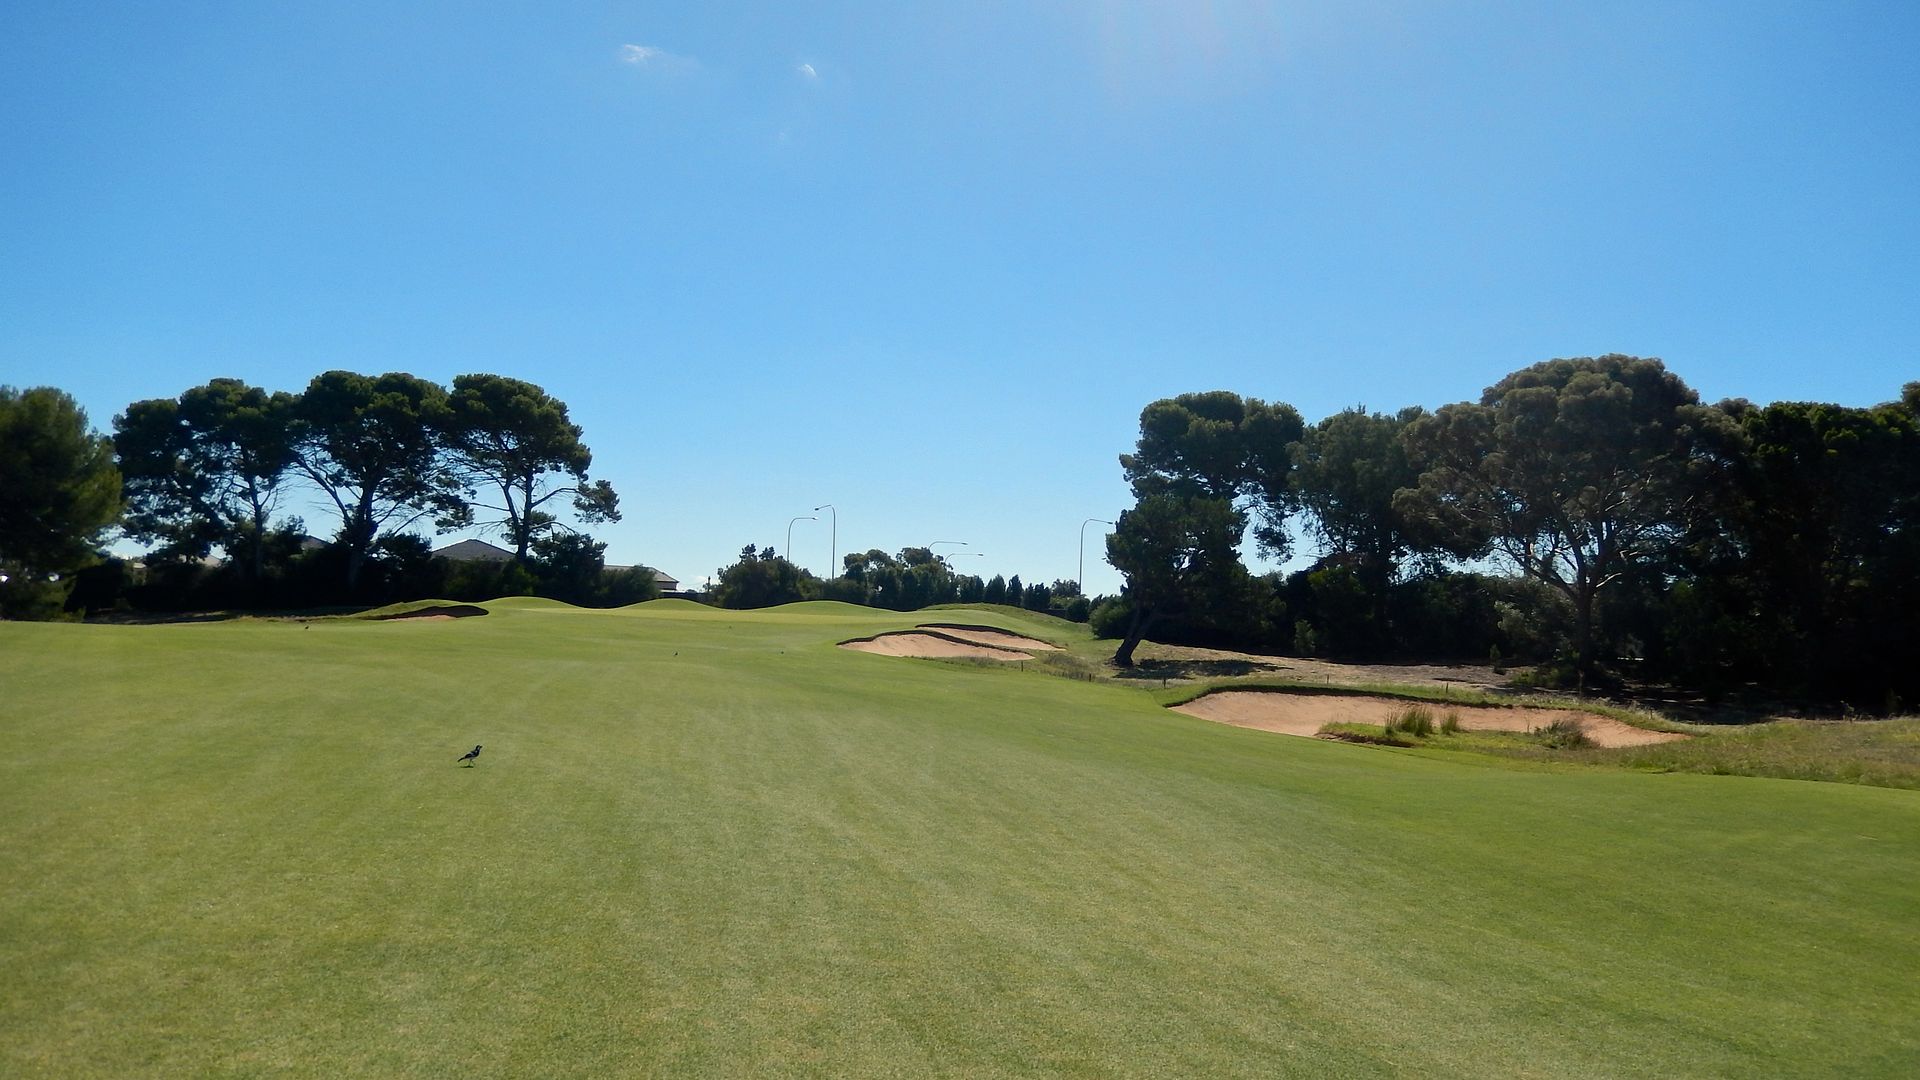
 Hole 9: Par 5, 493 Metres
The 9th doglegs slightly to the right and a pair of bunkers 210m and 230m from the tee protect the short line. The bunker on the left, a Thompson addition, was added 275m from the tee to reintroduce the challenge for longer hitters who were driving well past the bunkers on the right.
Hole 9: Par 5, 493 Metres
The 9th doglegs slightly to the right and a pair of bunkers 210m and 230m from the tee protect the short line. The bunker on the left, a Thompson addition, was added 275m from the tee to reintroduce the challenge for longer hitters who were driving well past the bunkers on the right.
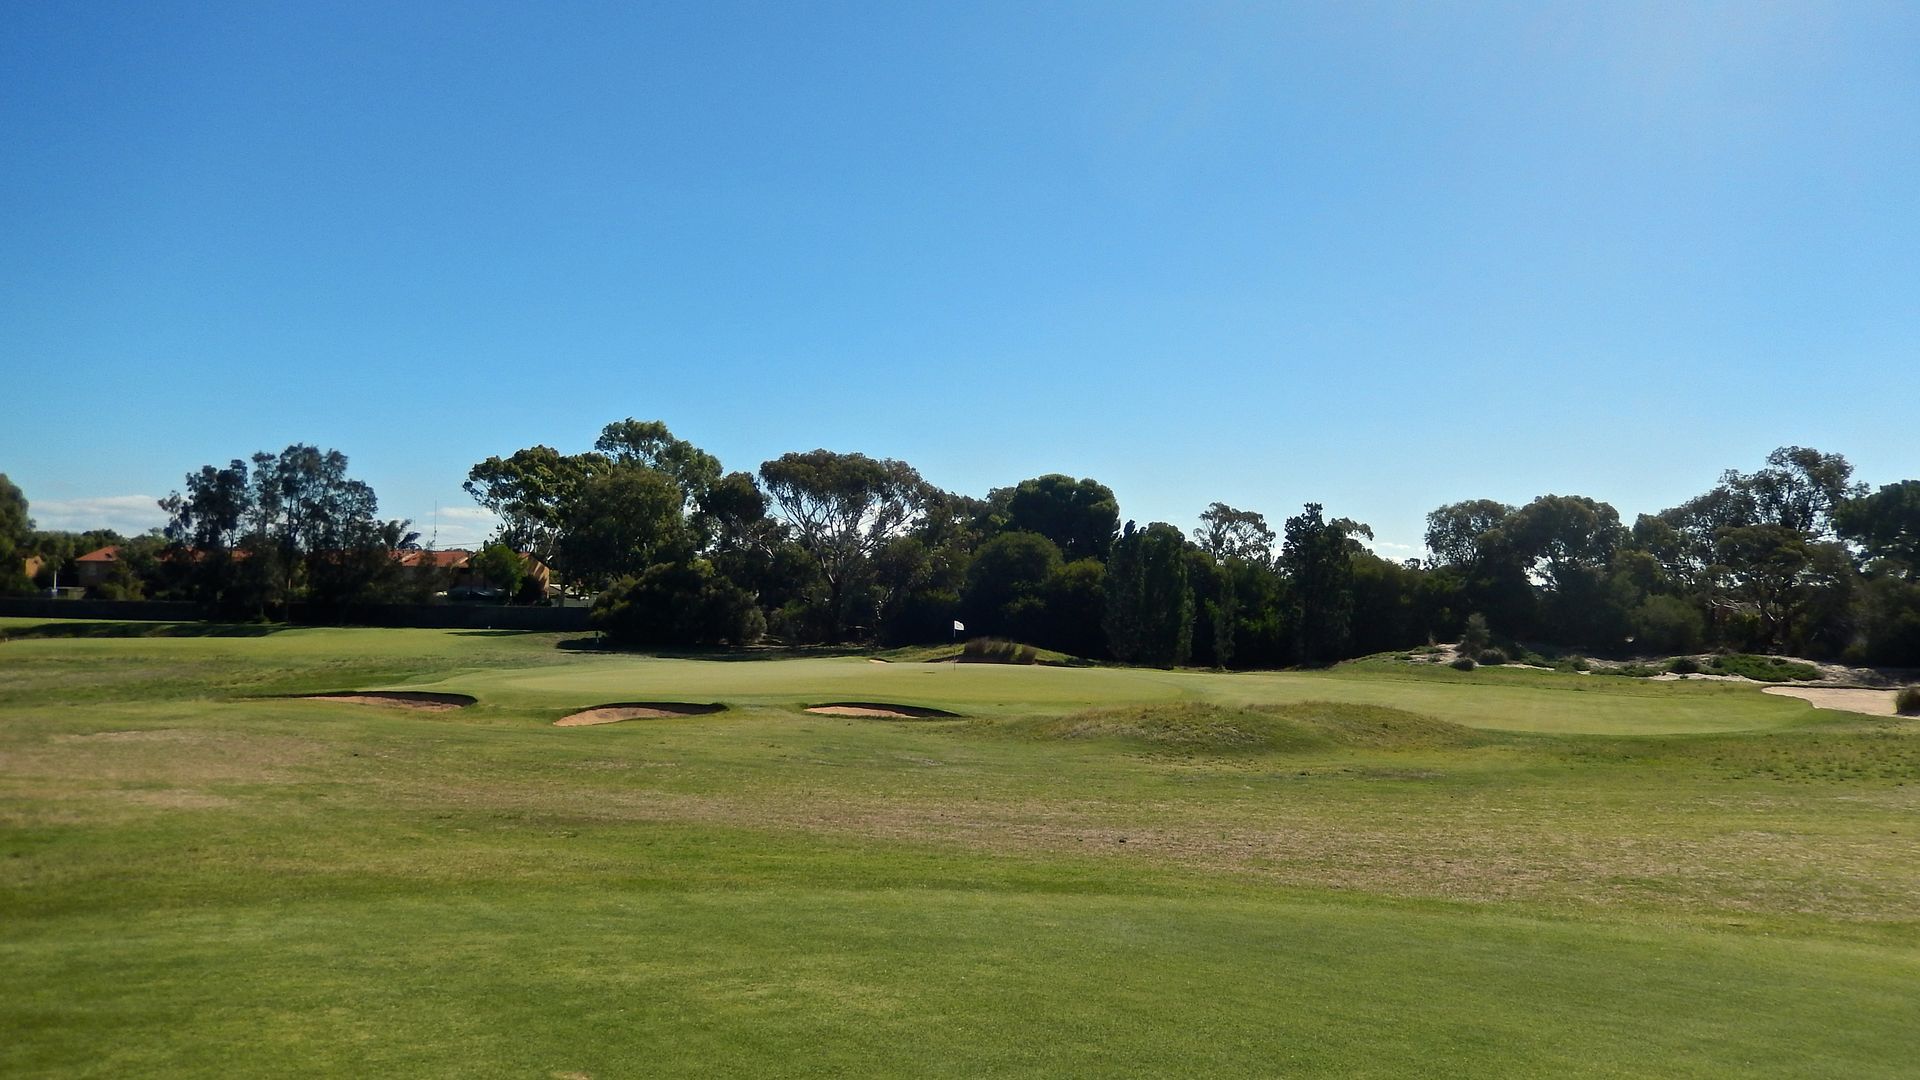
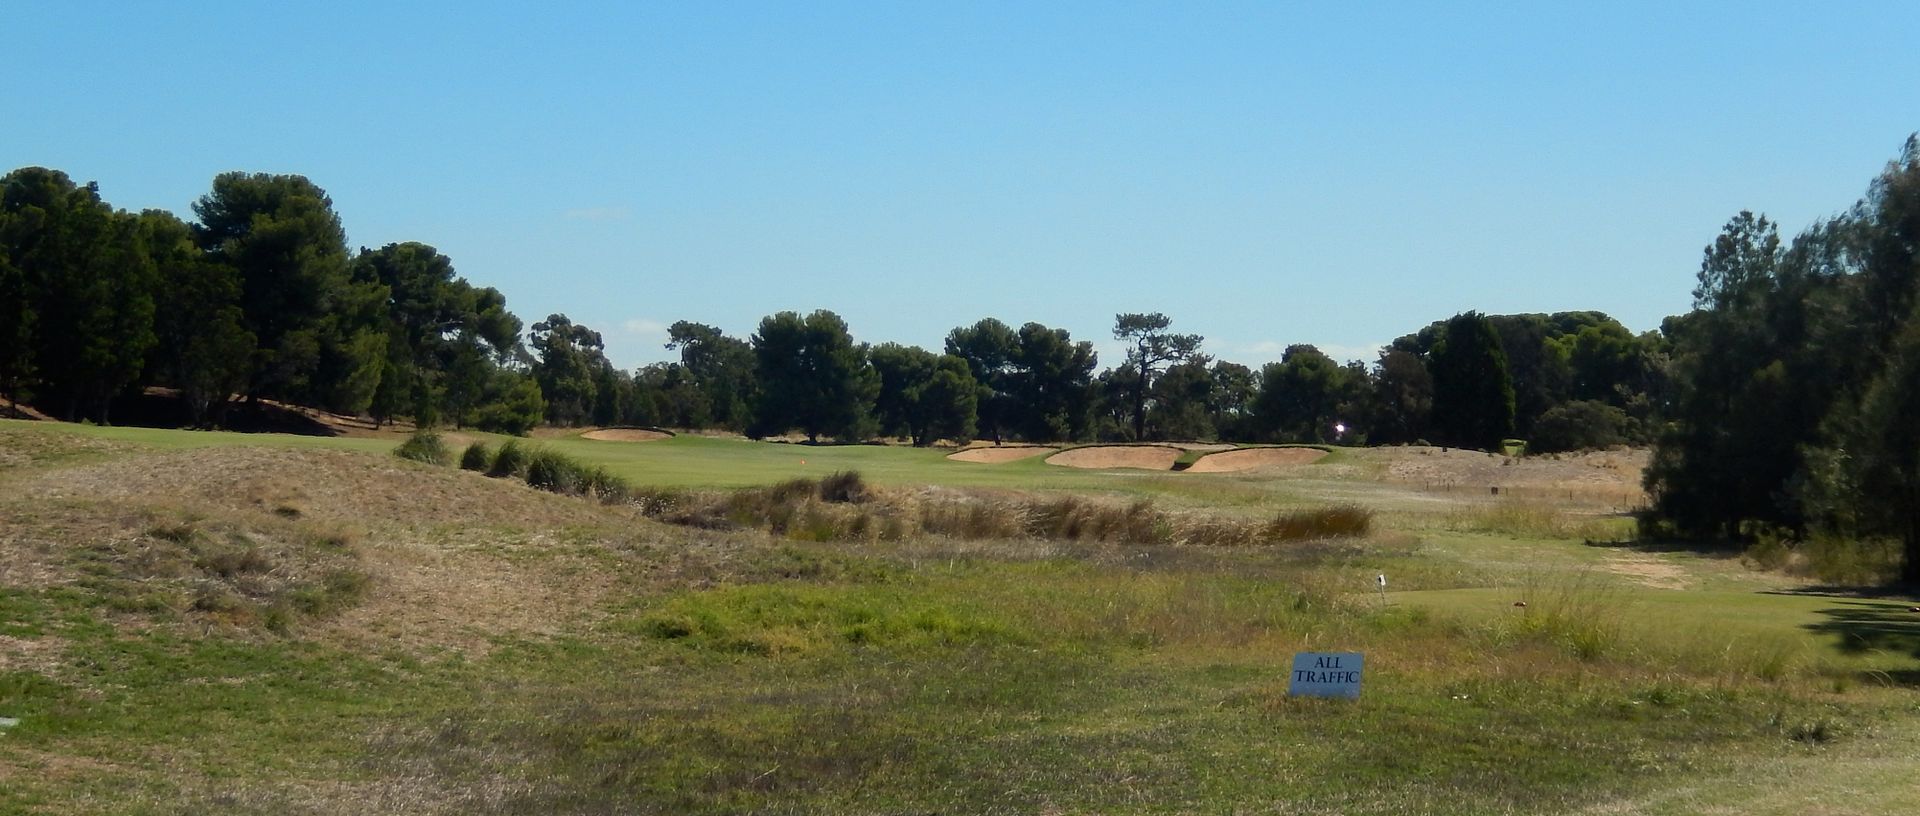 Bunkers flank the fairway left and right from 100m short of the green. Golfers willing to lay back short of the 100m mark are offered additional fairway width, but the longer approach will be challenging. The green is shallow at only 22m in depth (15m deep on the right), and made shallower by a false-front and ridge that runs across the green.
 Hole 10: Par 4, 335 Meters
A remnant from the Seaton Links, the 10th hole is a mid-length par-4 that plays along the club's western boundary. MacKenzie's plan would have seen the hole dogleg to the left to a green in the location of the famous Crater Hole. Even in the 1920s the Crater Hole was well-known and one could suspect that the membership would not accept a change that would result in its modification. As it sits today, the drive is played blind over the crest of a hill. A tee shot of only 190m is required to find the downslope on the right side, but on the safer line to the left, a shot of well over 200m is required. On days when the hole plays into the wind, few golfers will have a clear look at the hole as failure to crest the hill leaves a completely blind approach.
Hole 10: Par 4, 335 Meters
A remnant from the Seaton Links, the 10th hole is a mid-length par-4 that plays along the club's western boundary. MacKenzie's plan would have seen the hole dogleg to the left to a green in the location of the famous Crater Hole. Even in the 1920s the Crater Hole was well-known and one could suspect that the membership would not accept a change that would result in its modification. As it sits today, the drive is played blind over the crest of a hill. A tee shot of only 190m is required to find the downslope on the right side, but on the safer line to the left, a shot of well over 200m is required. On days when the hole plays into the wind, few golfers will have a clear look at the hole as failure to crest the hill leaves a completely blind approach.
 A treacherous green at the 10th. The first 10m or so tilt back to the tee before a small (and I mean tiny!) plateau is formed with a maximum total depth of 7m. Past the plateau the green tilts hard away from the tee. The fall offs short and long mean the possibility of 'ping pong' is high.
 Hole 11: Par 4, 356 Metres
Often we see architects creating a hub of tees and greens around a high point, but at Royal Adelaide the 10th green, 11th tee, 12th green and 13th tee form a hub in a low point on the property.
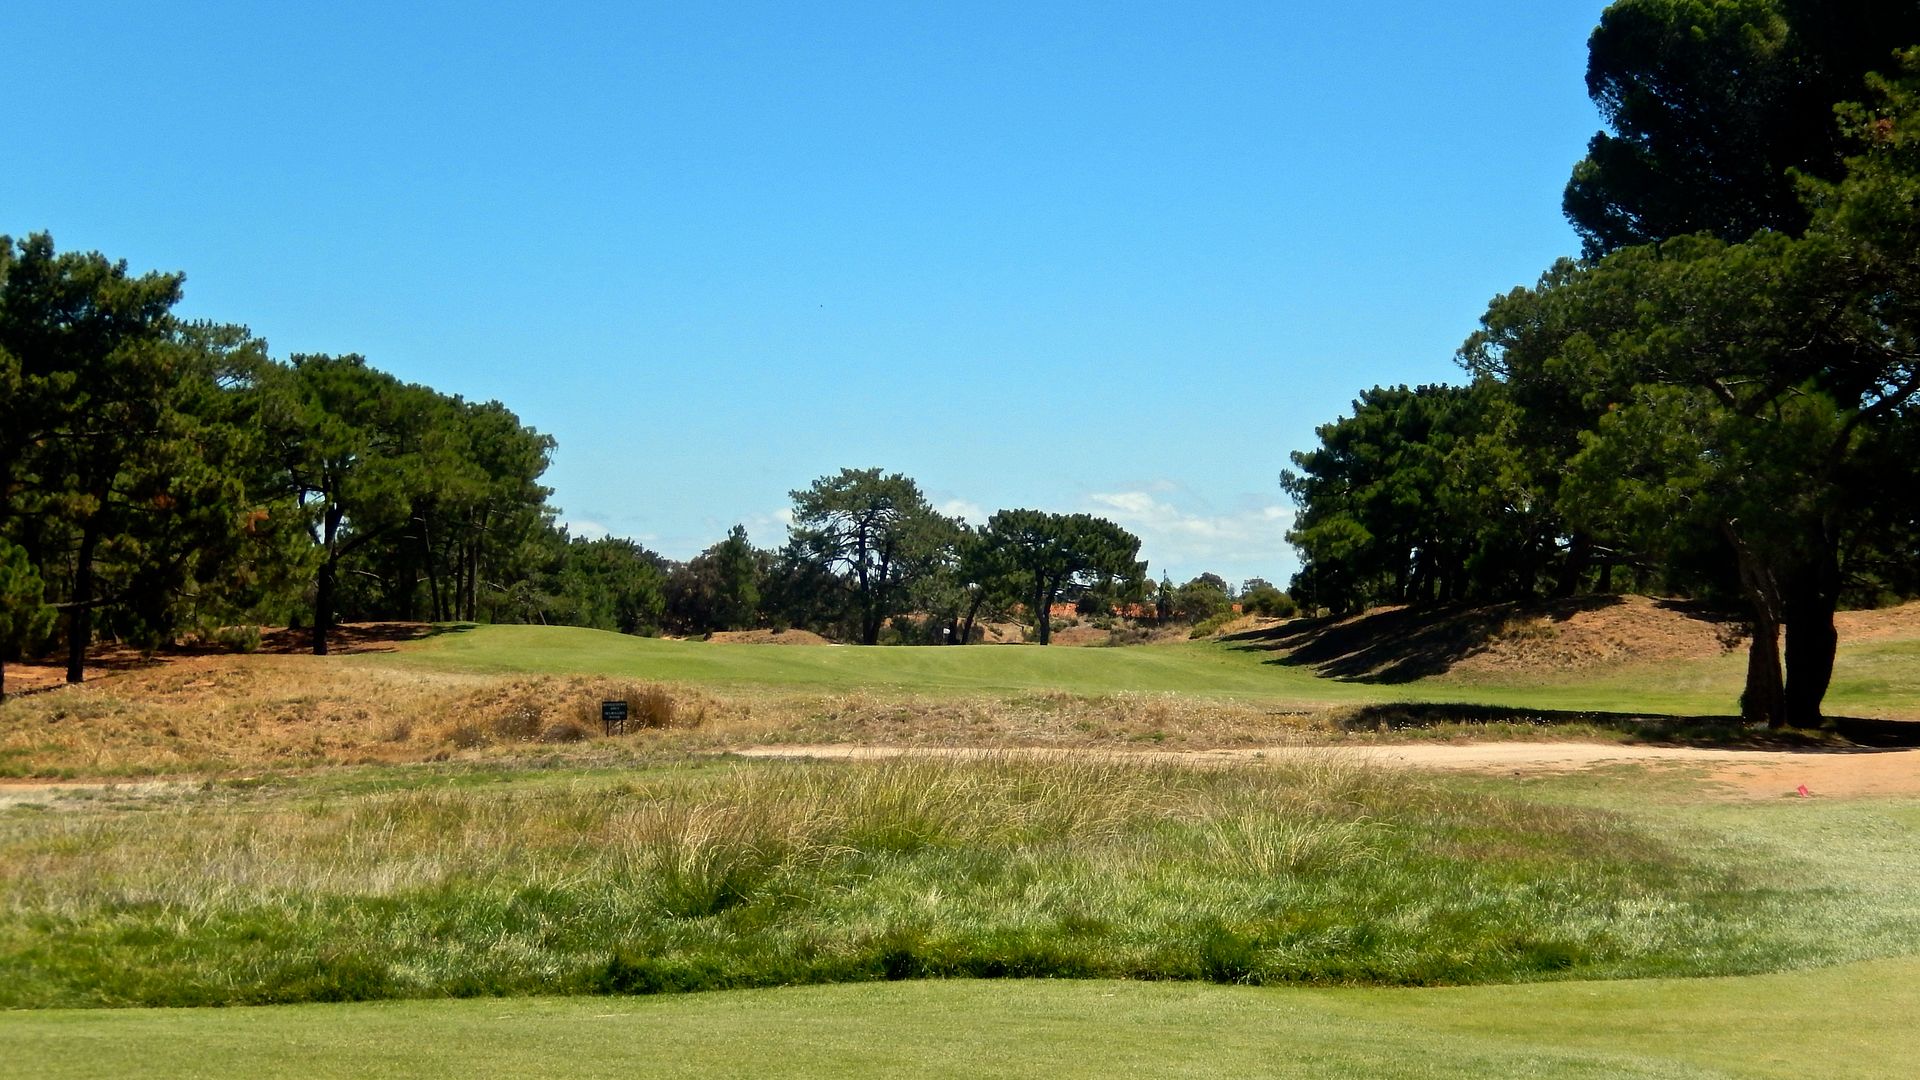
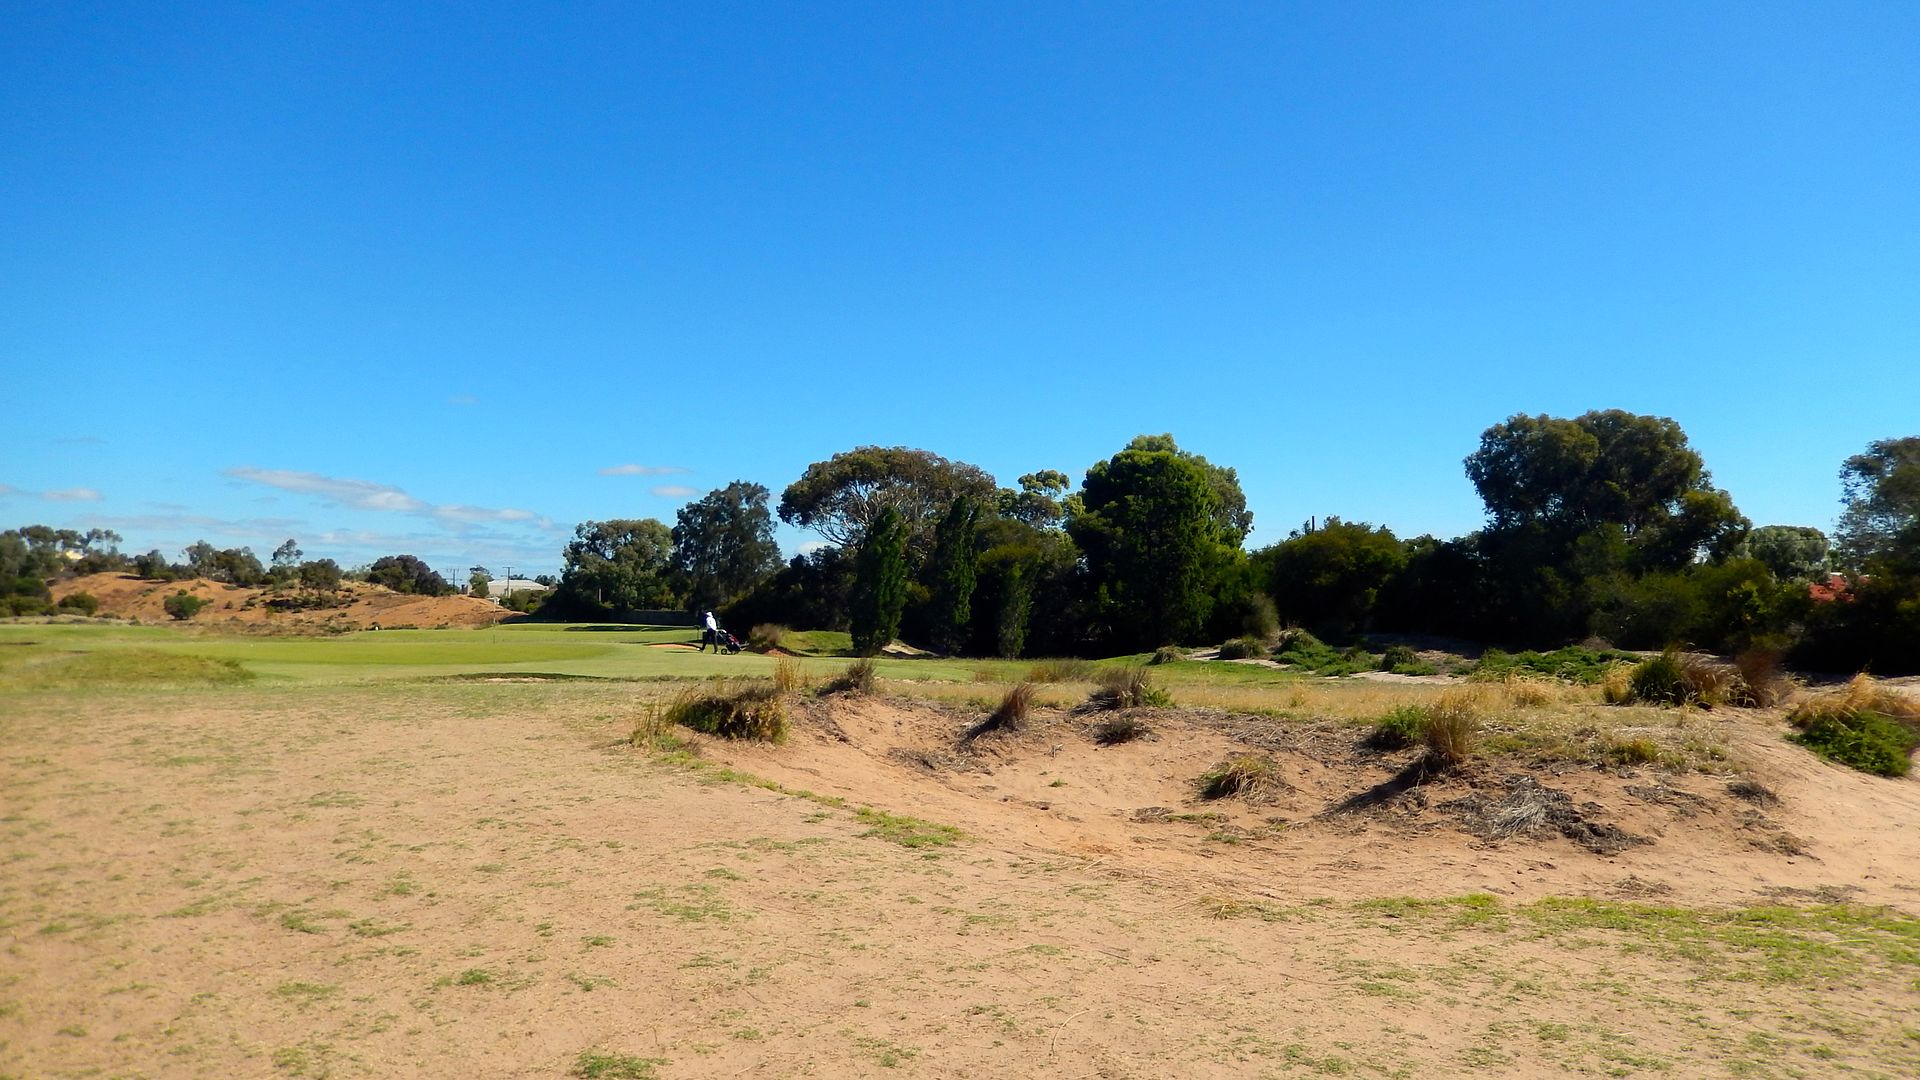
Along with the 3rd, the 11th hole - The Crater Hole - is the most well-known at Royal Adelaide. The landing area is blind from the tee and a carry of 140m of a bunker set into the dune is a must if the golfer hopes to find the fairway.
Hole 11: Par 4, 356 Metres
Often we see architects creating a hub of tees and greens around a high point, but at Royal Adelaide the 10th green, 11th tee, 12th green and 13th tee form a hub in a low point on the property.
Along with the 3rd, the 11th hole - The Crater Hole - is the most well-known at Royal Adelaide. The landing area is blind from the tee and a carry of 140m of a bunker set into the dune is a must if the golfer hopes to find the fairway.
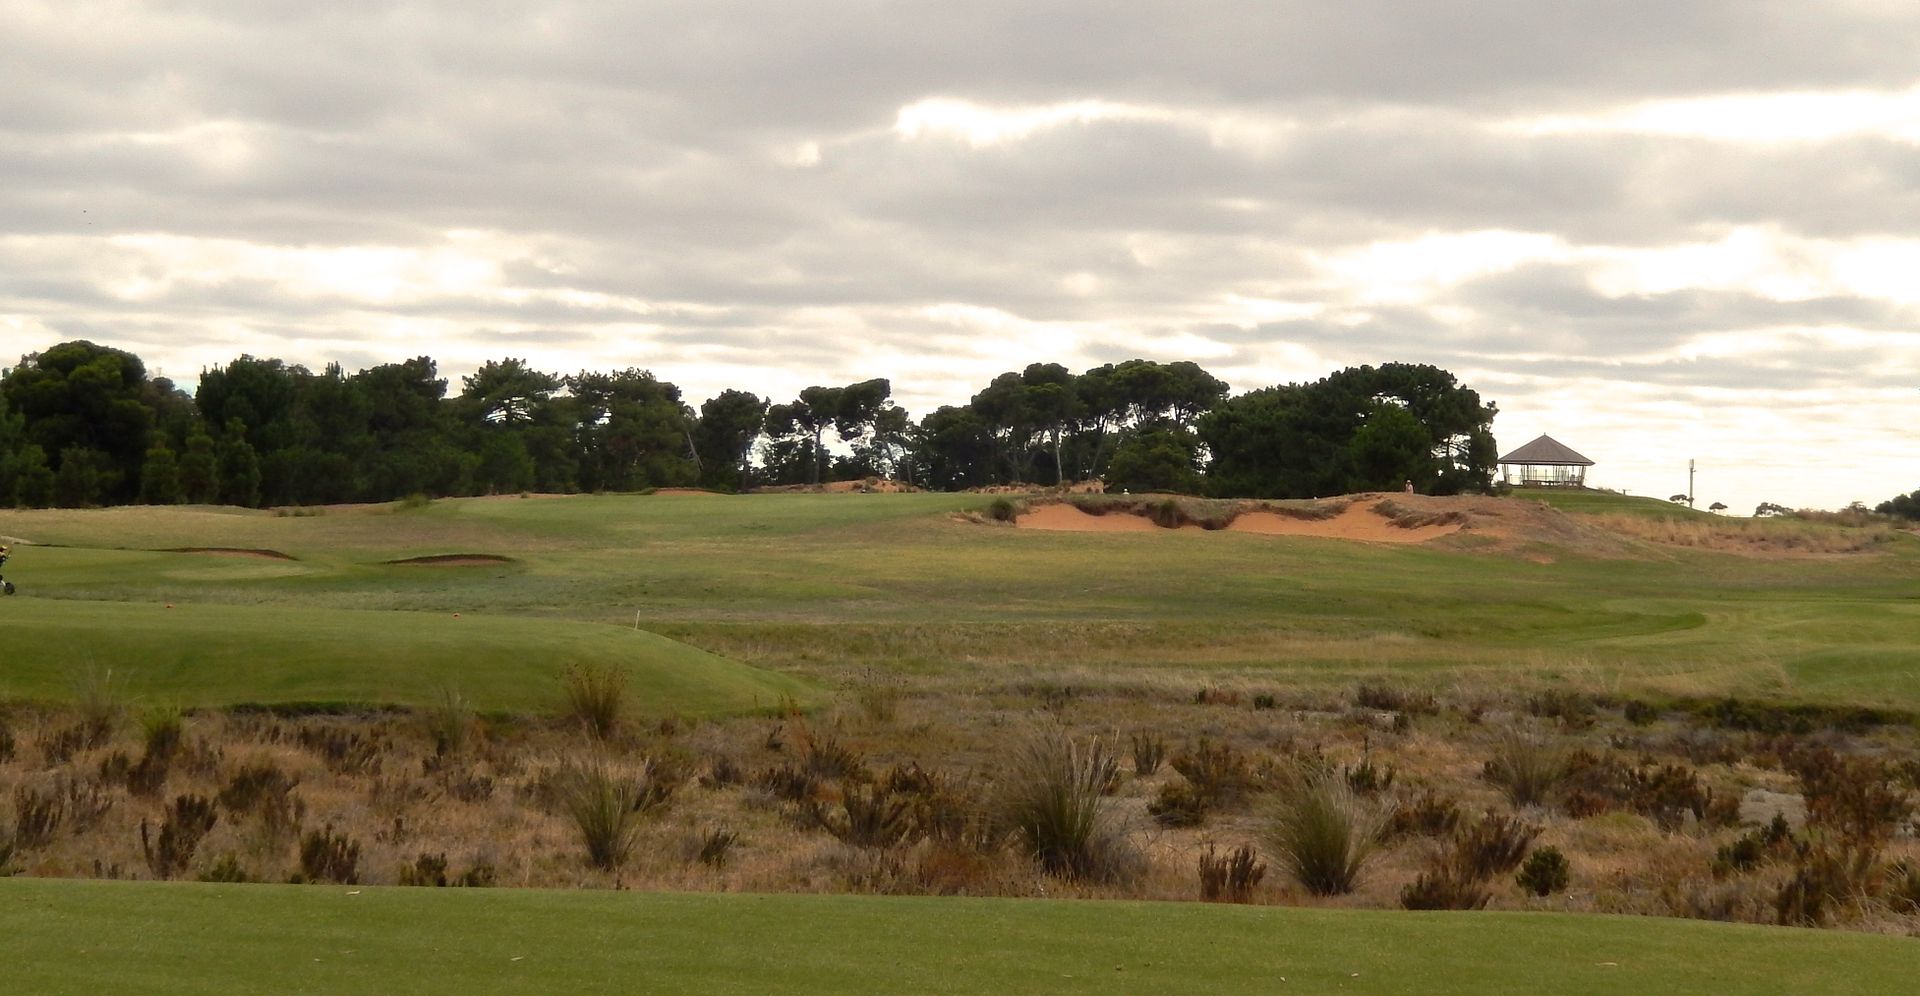 Impossible to see from the tee, the fairway tilts from right-to-left, emphasizing the importance of carrying the large fairway bunker. A pair of fairway bunkers flank the fairway 210m from the Championship tee. With only 20m of fairway between them and a fairway that runs out beyond them, it must be the norm for golfers to hit less than driver from the tee. The removal of both fairway bunkers would return the incentive to hit driver.
 I was disappointed that I could not find a picture of the Crater Hole from early in the 20th century, or even one from pre-2010 which showed a forested green site, but from what I've seen the approach as it sits today is little changed from it's early days -- a wonderful sandy amphitheatre.
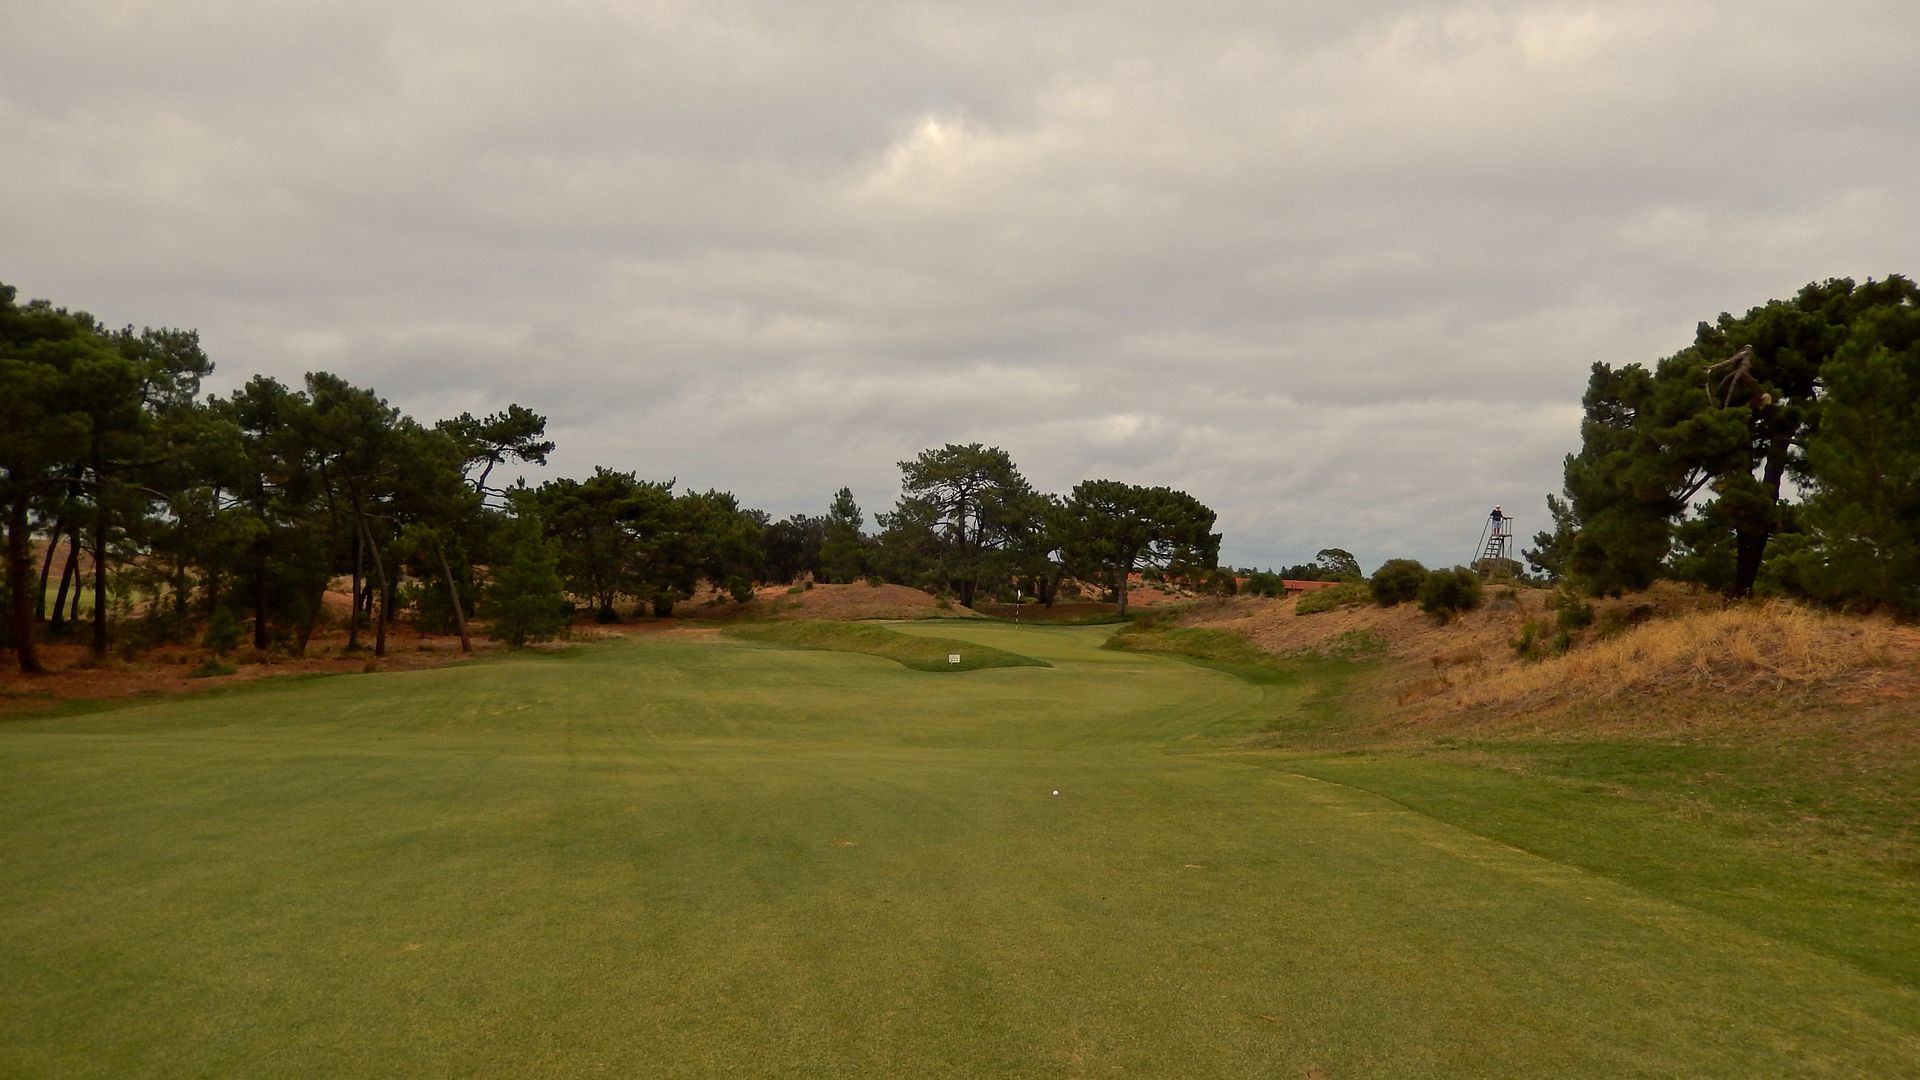
 Hole 12: Par 3, 204 Metres
Probably the most difficult green in regulation at Royal Adelaide, the 204m 12th hole plays downhill and into the wind to a Pinehust-esque turtleback green. For such a long approach, the green is curiously small, but given the lack of overt hazards surrounding the green, the concept works well here. If anything, an expansion of the fairway short of the green would help, if nothing else, to decrease search time for (very) poorly struck tee shots.
Hole 12: Par 3, 204 Metres
Probably the most difficult green in regulation at Royal Adelaide, the 204m 12th hole plays downhill and into the wind to a Pinehust-esque turtleback green. For such a long approach, the green is curiously small, but given the lack of overt hazards surrounding the green, the concept works well here. If anything, an expansion of the fairway short of the green would help, if nothing else, to decrease search time for (very) poorly struck tee shots.
 As seen from short-right, the green opening is only 11m wide (!!) and shots landing in the right half of that opening will more than likely funnel off the green to the right.
 As seen from behind, the green offers a maximum width of 20m and falls long and left as well. The members I played with said less than 20% of tee shots will find this green. Indeed.
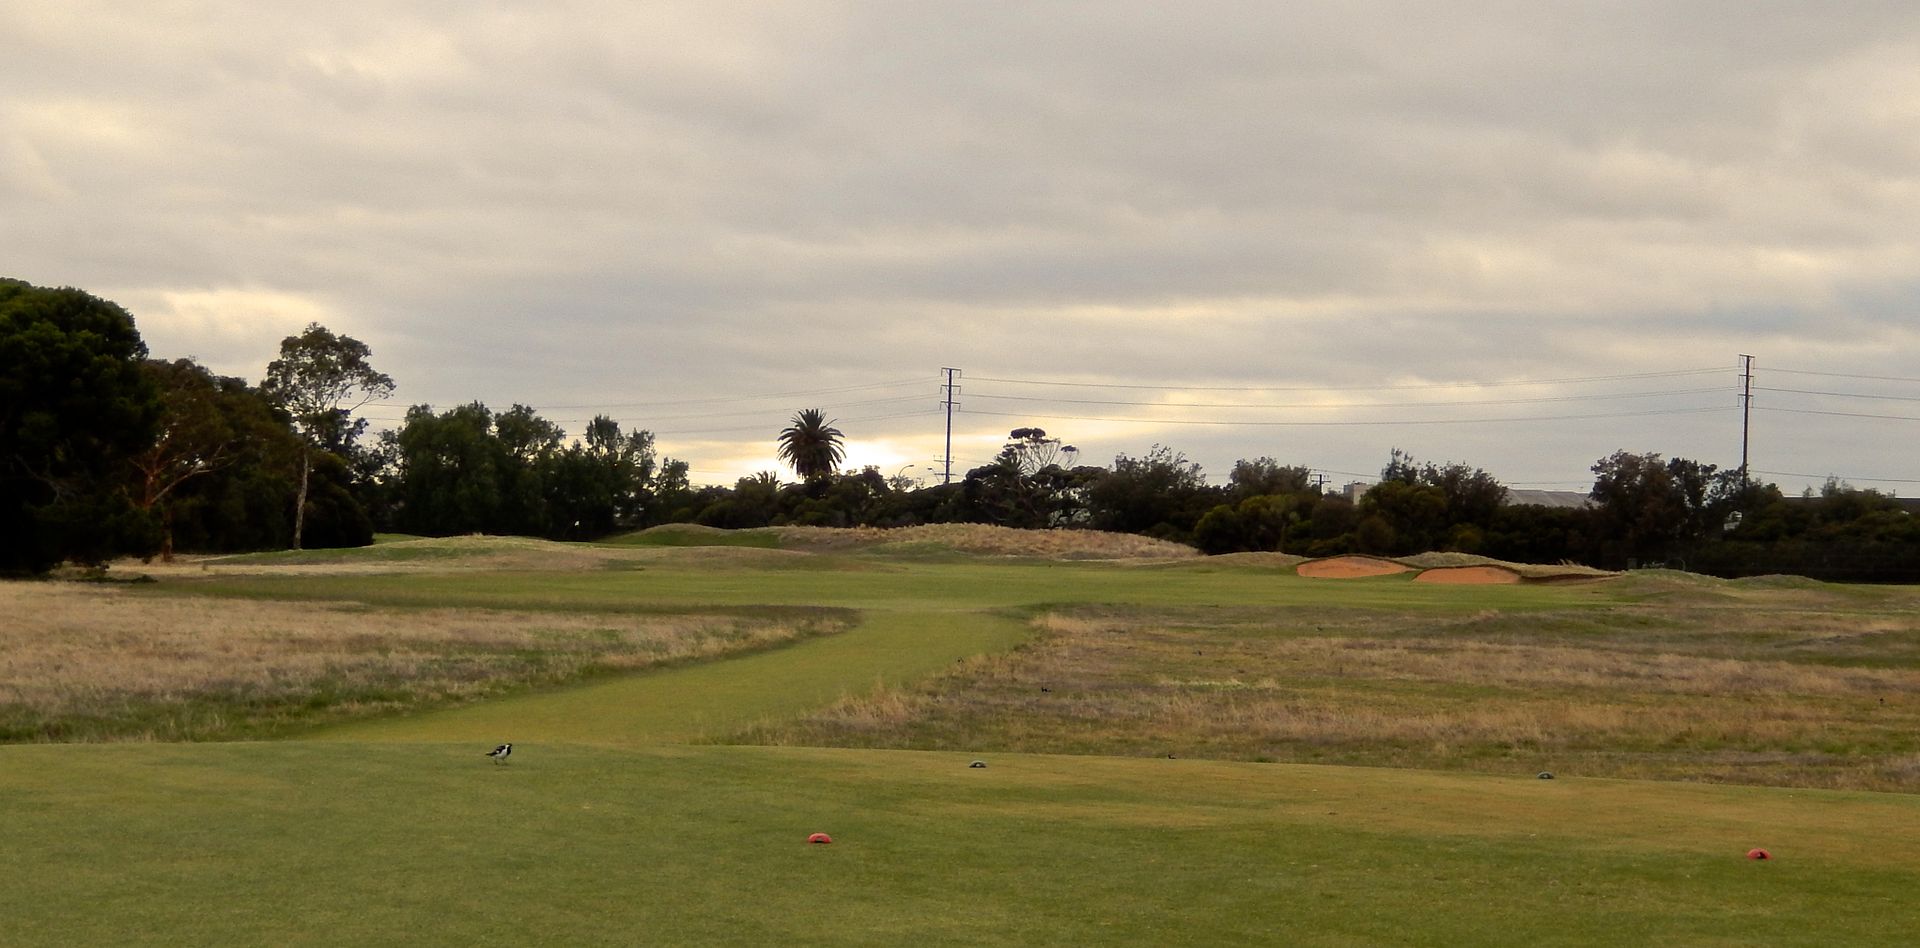
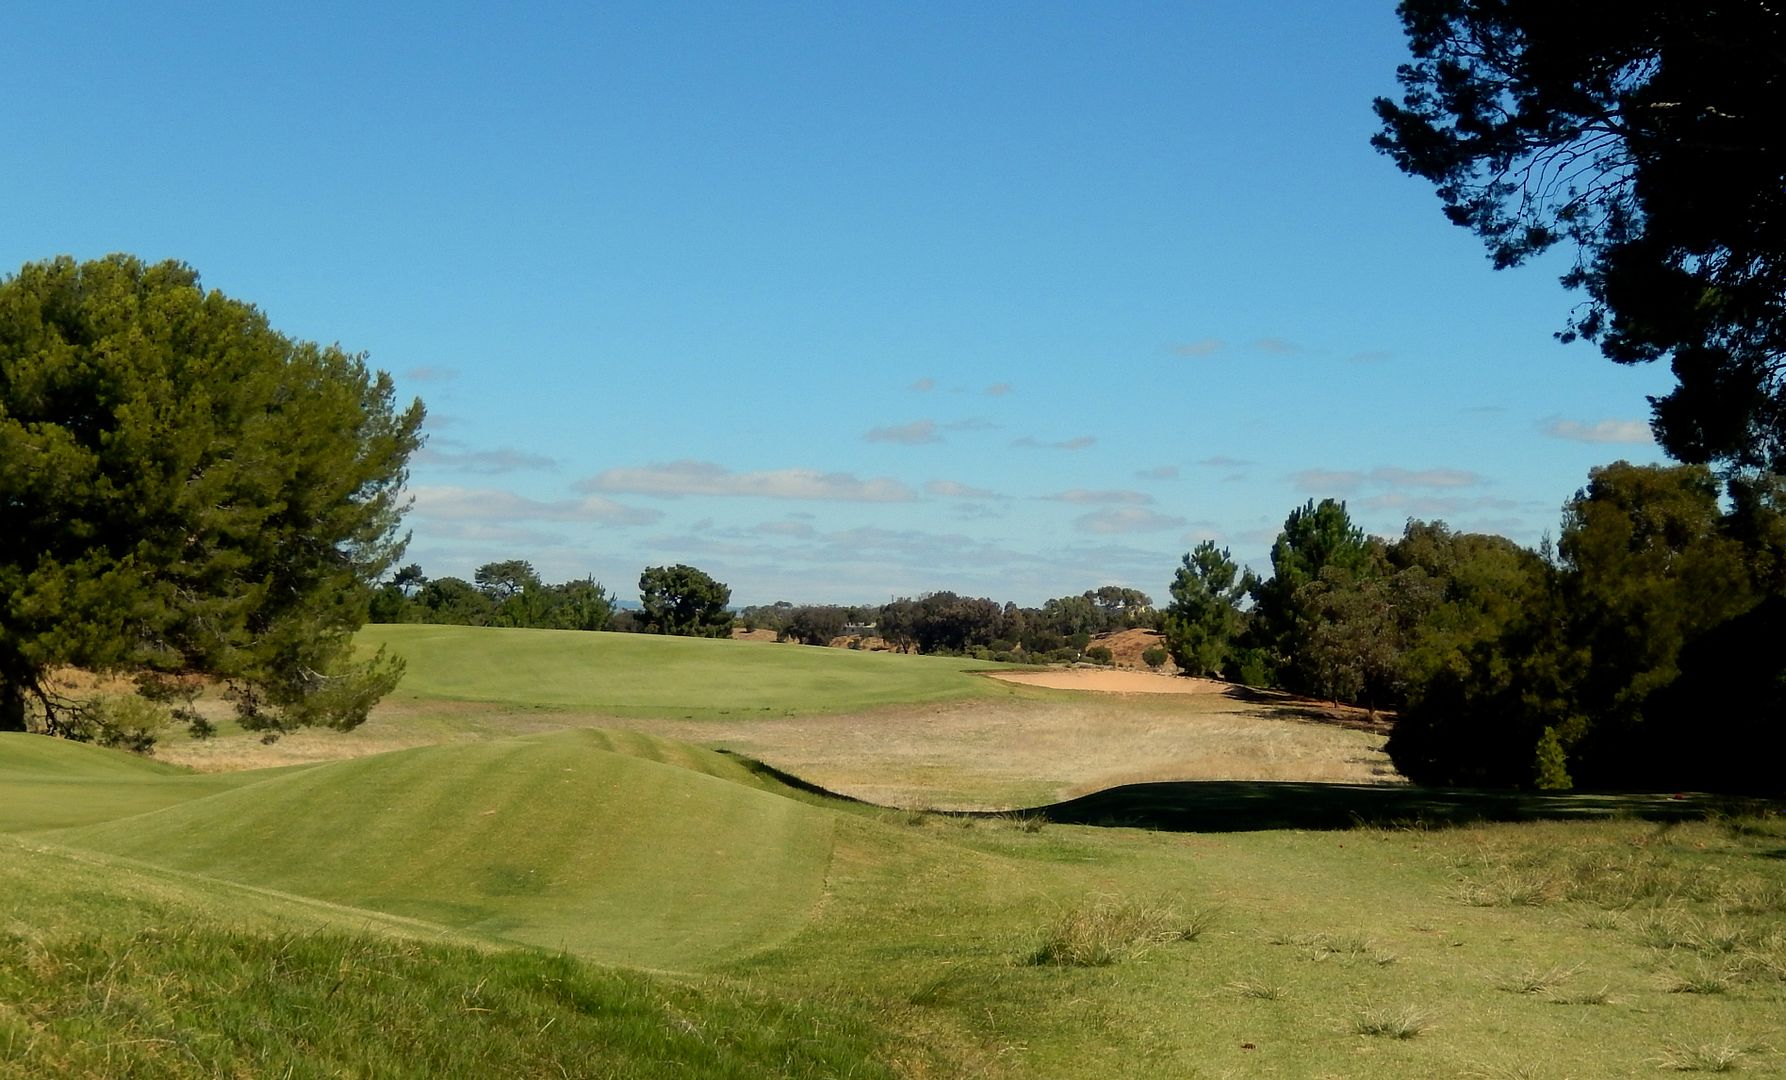
 Hole 13: Par 4, 395 MetresReturning back to the lower hub, the championship tee on 13 plays across the line of play from the tee on 11. The hole will play very differently whether playing the Championship tee or the Member's tee. From the back set, many golfers will struggle to find a view of the green as a wooded dune on the left juts into the line of play. They are forced to either play right, leaving a much longer approach, or play left, leaving a blind and shorter approach with a poor angle into the green.The entire hole falls left to right off of the dune -- both in the reverse camber fairway and the primary tilt of the green. Curiously, the golfer able to play to the high side of the fairway is not rewarded.
 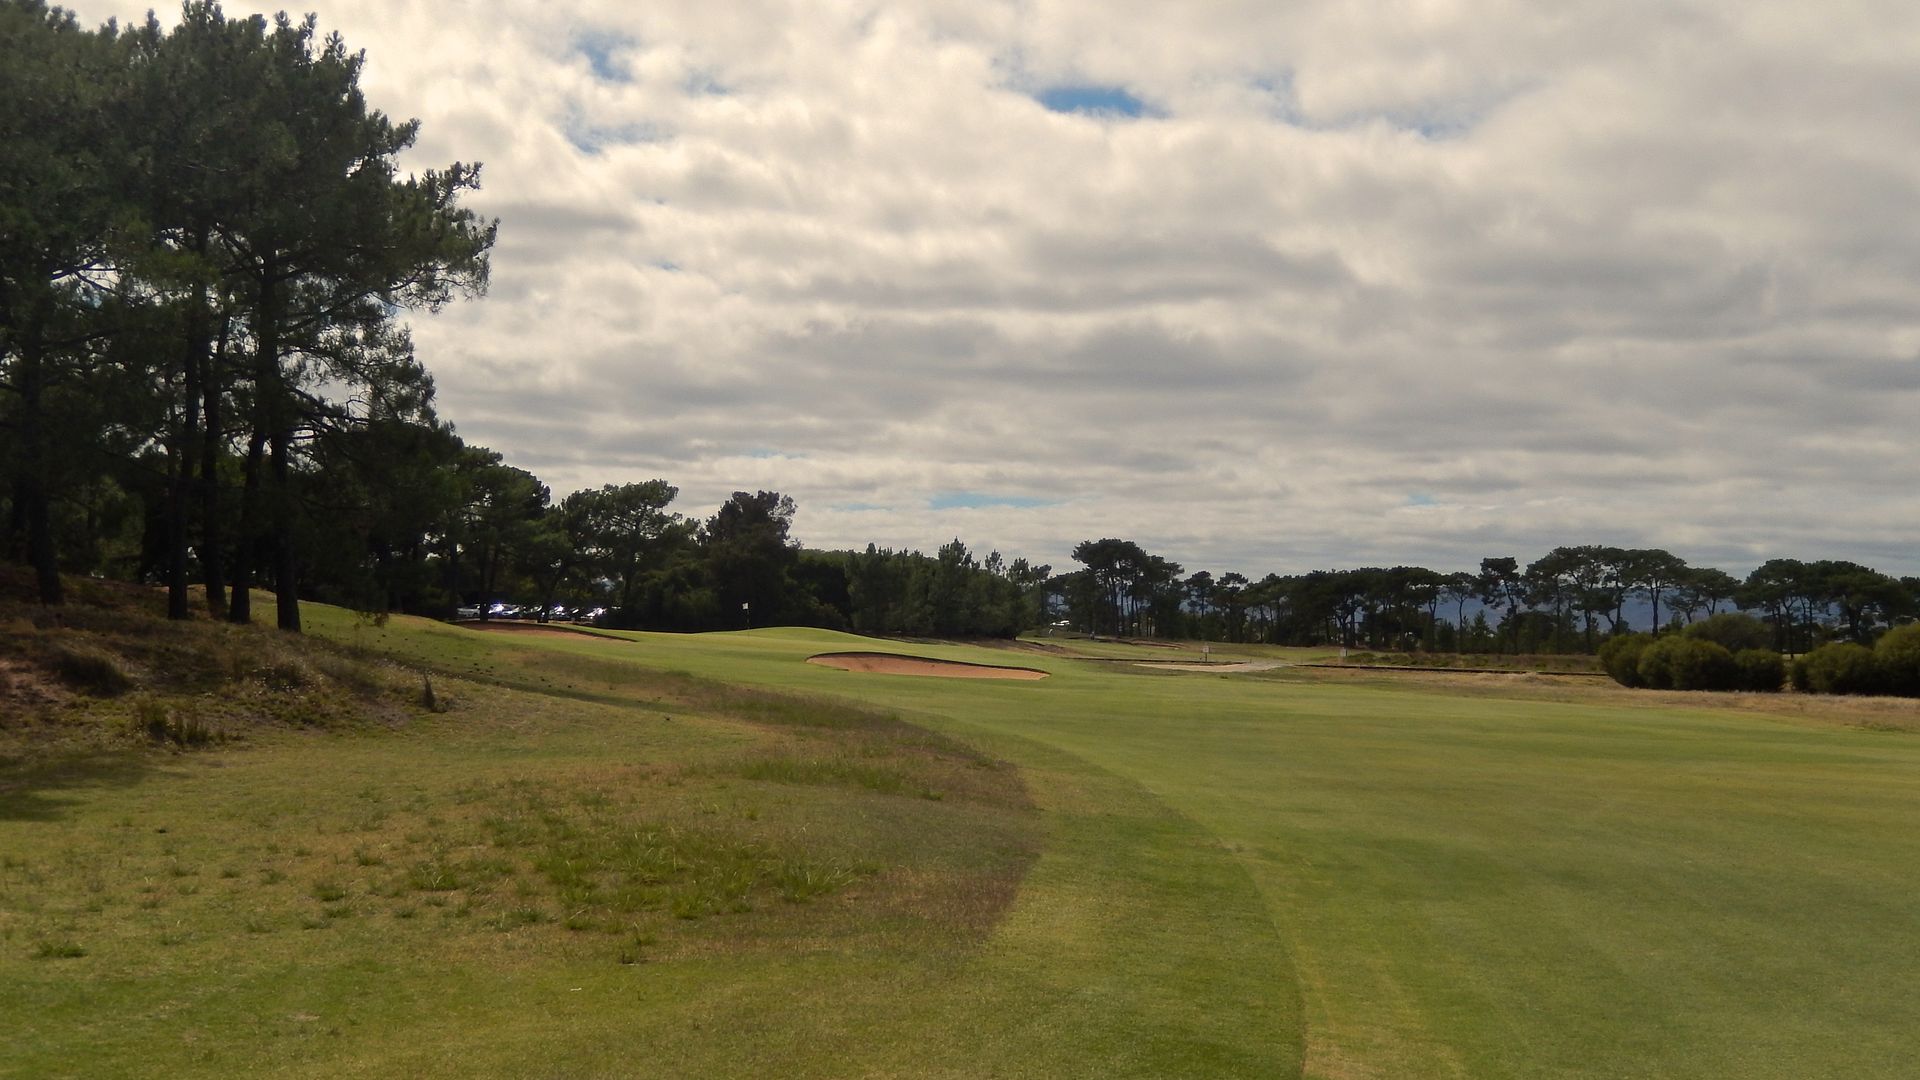 Like the fairway, the green falls left to right. Approaching from the left makes the already narrow target extremely difficult and the shot to a back or left pin impossible.
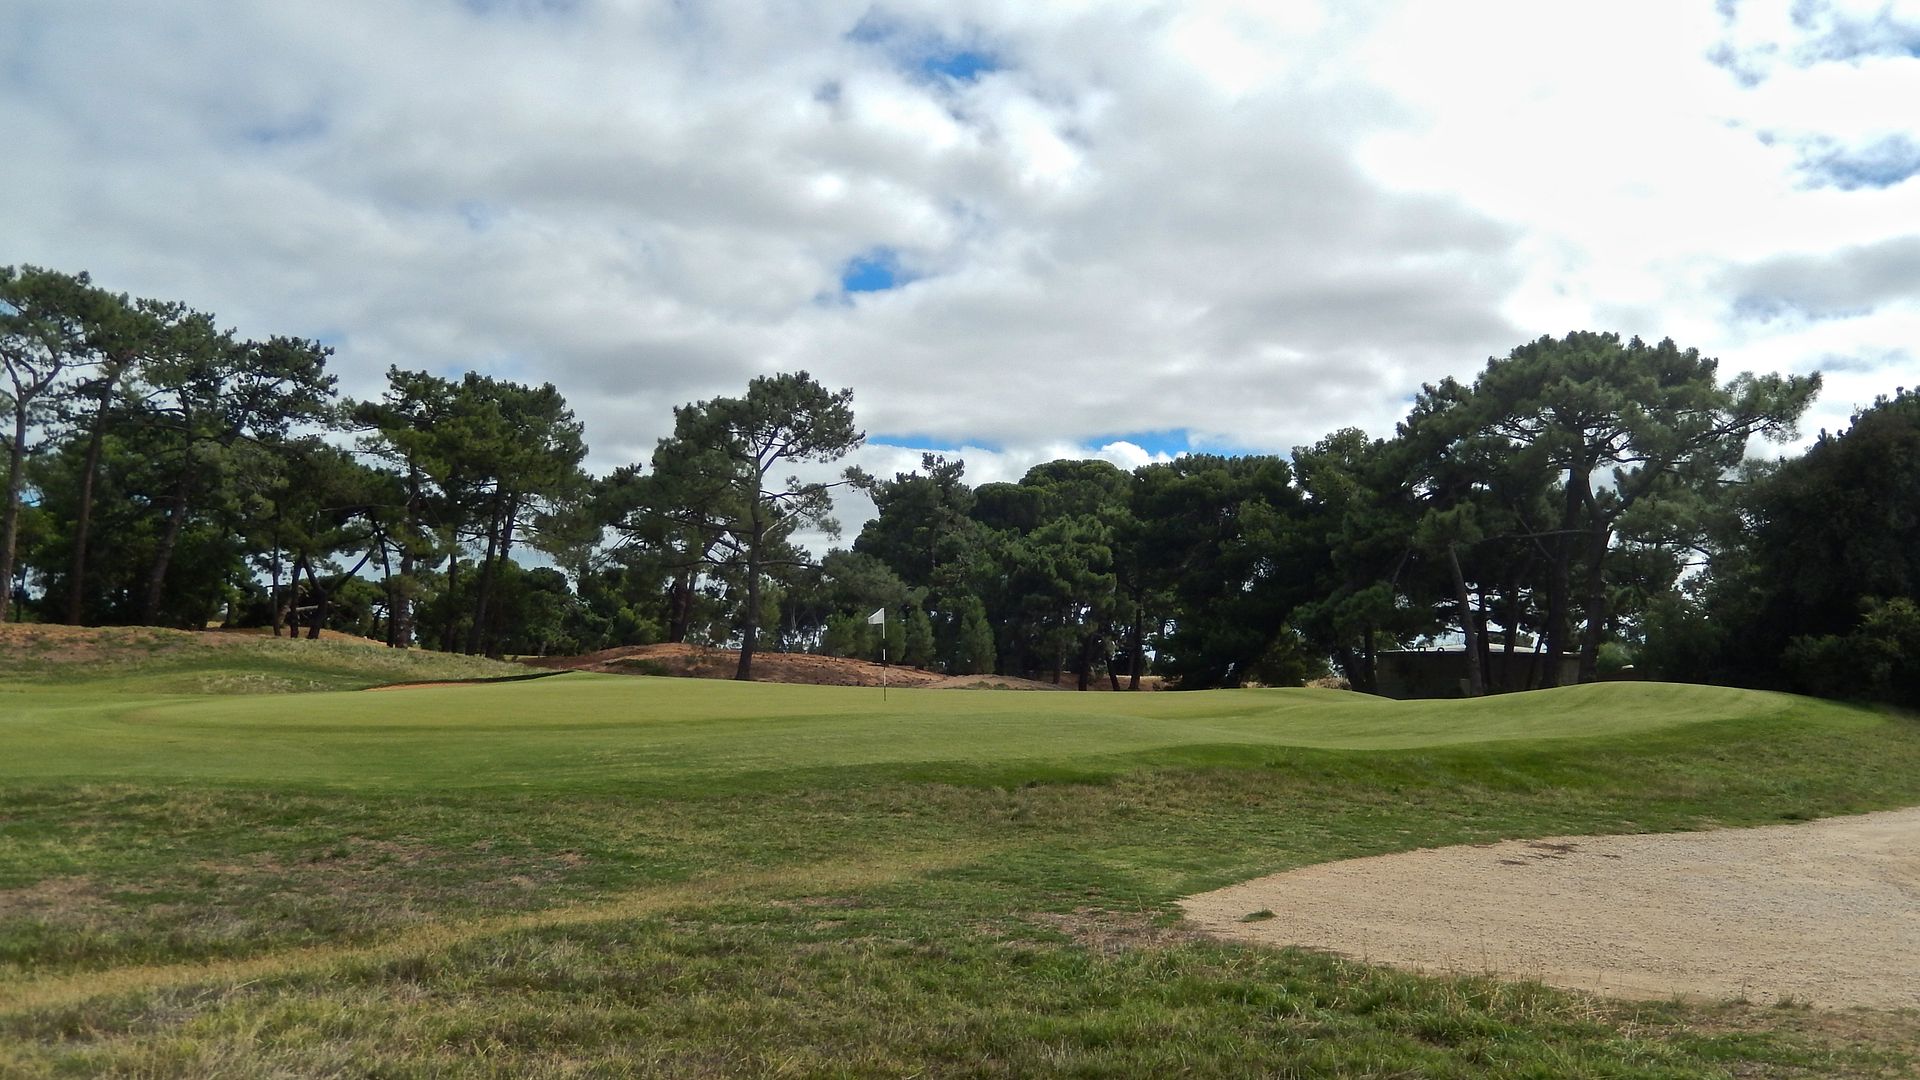 Hole 14: Par 4, 442 MetresAnother very different hole based on the tee played as the Championship tee sits across the railroad tracks and some 70m behind the Members tee. A bunker on the right side of the hole, as can be seen from the tee, makes good strategic sense and protects the shortest line on this long par-4. There is ample room to play to the left side of the hole, though the parking lot awaits for the very wayward miss and the prospect of hitting your tee shot into a member's windshield may steer golfer's toward the aggressive line!
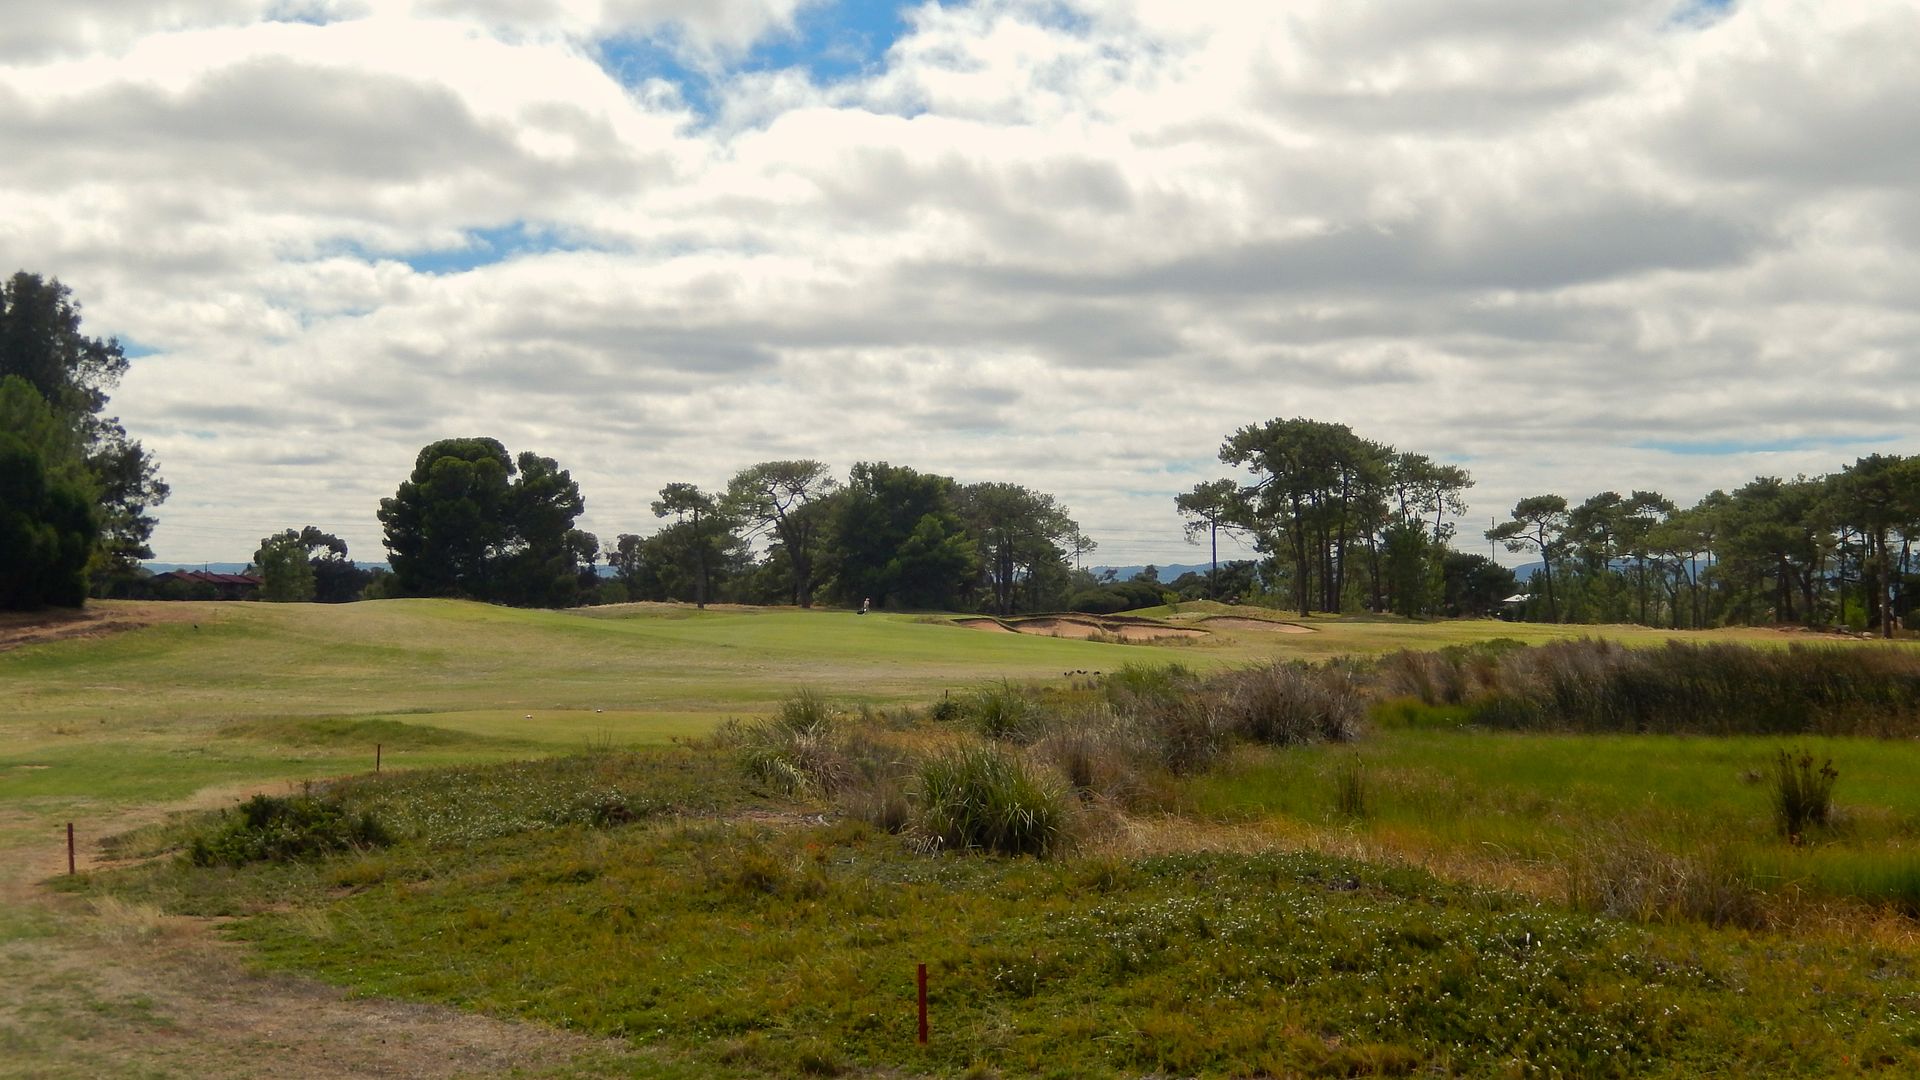 Likely in an attempt to add difficulty to an already great and challenging hole, a series of bunkers have been added beyond the initial bunker on the right. The 190m carry over the bunker from the Members tee was once enticing but with the additional bunkers must rarely be taken on.
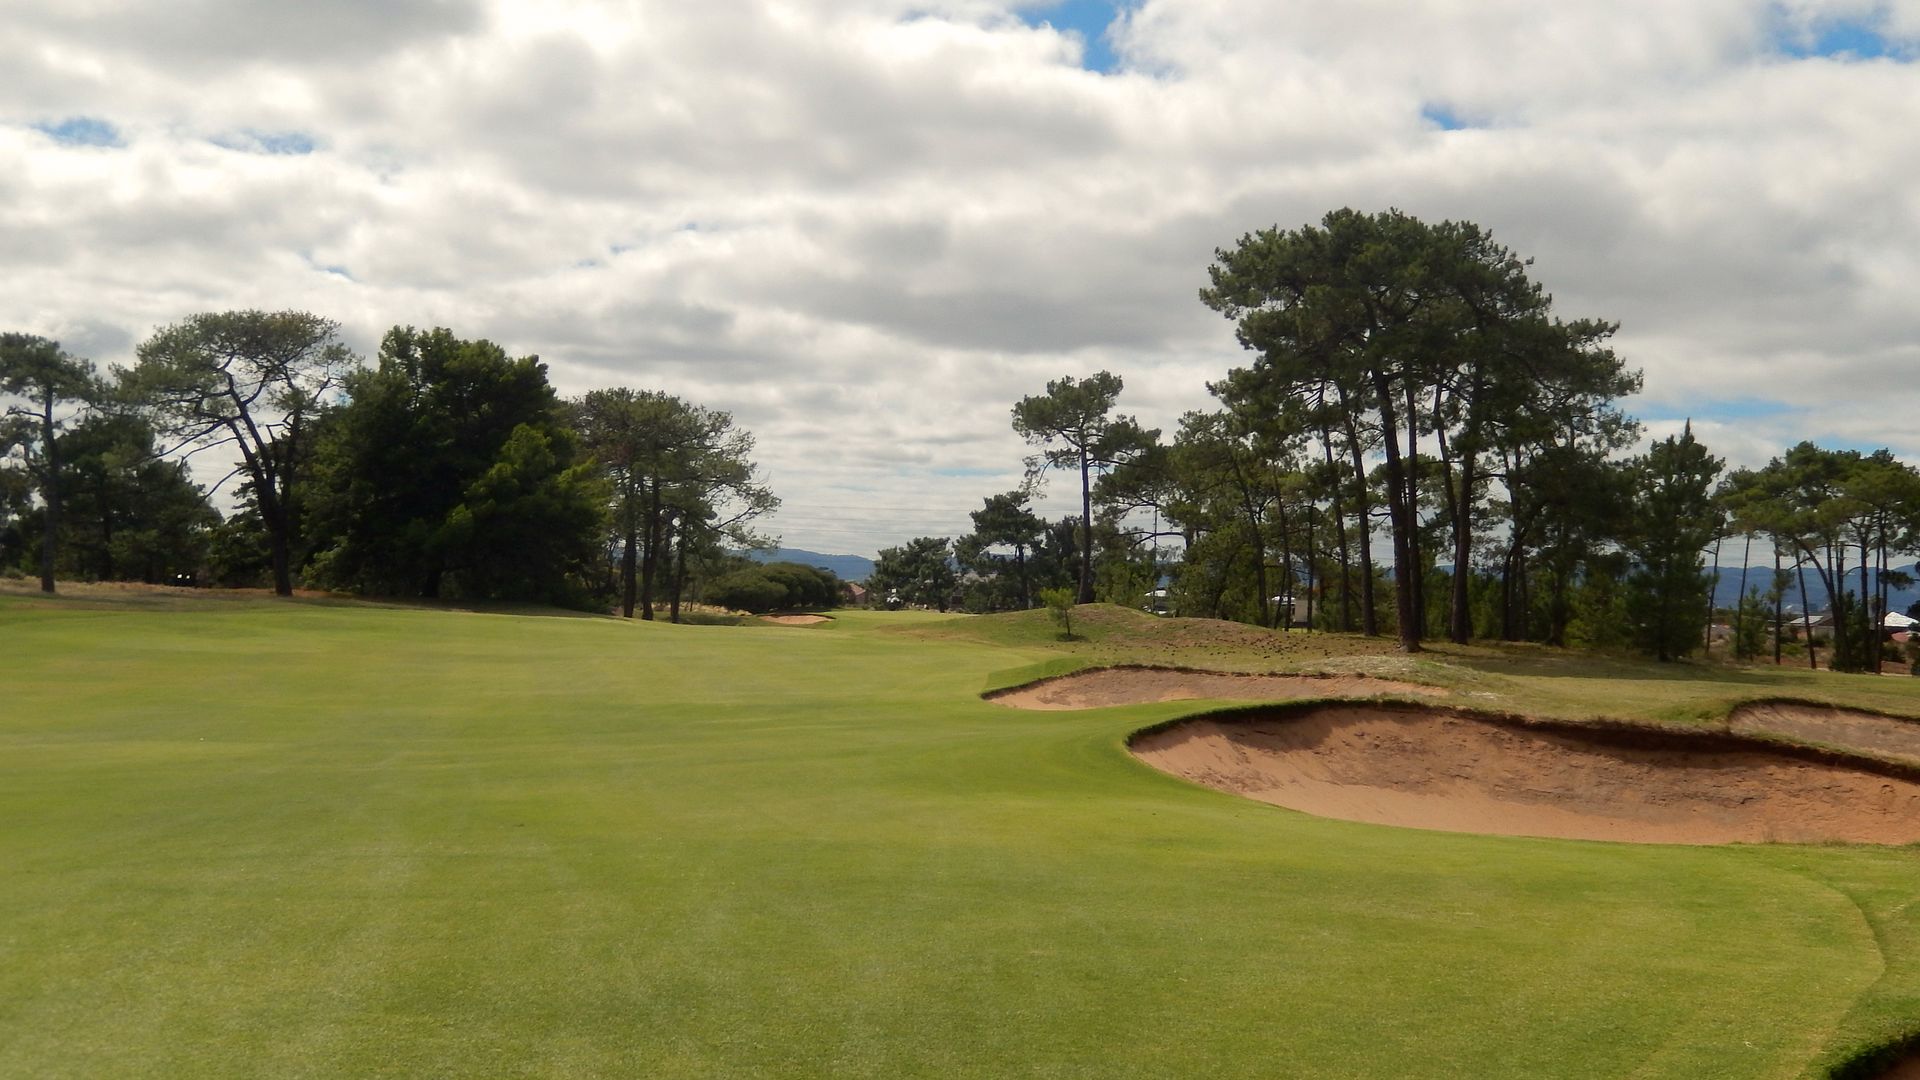 Playing an approach from the fairway is very important as the land from 100m short of the green dips sharply into broken ground that is a sand and grass mix. This dip, combined with some overhanging trees on the left, mean that a poor tee shot will more than likely mean a lay-up second shot. Even with a wedge, finding this small green with a false-front and run-offs left and long is a challenge. Like the 12th, this green is a departure from the norm that says long approach = large green.
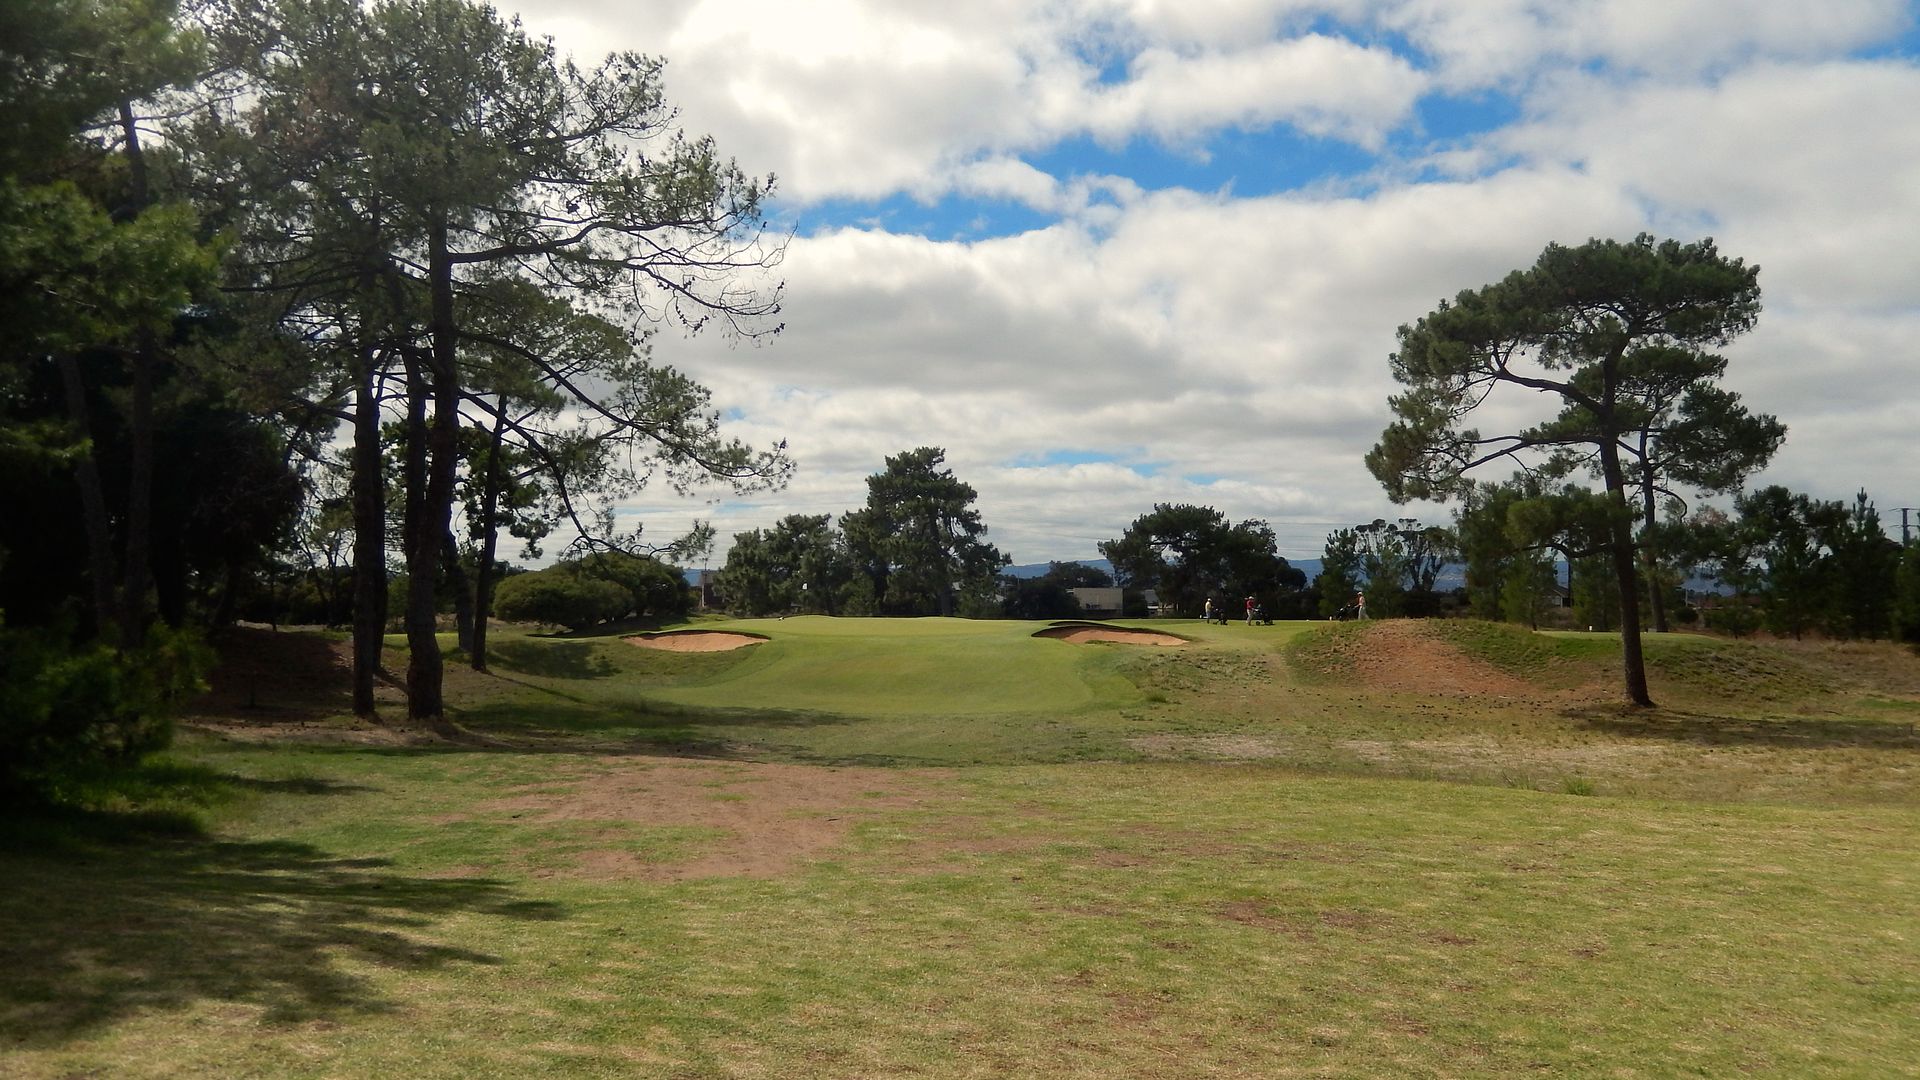 Hole 15: Par 5, 467 MetresThe tee shot at the 15th is over the same broken ground as the approach to 14 and through a narrowed chute of trees. It seems that there have been change through the years that make the hole harder, though not necessarily better. Longer hitters have almost no opportunity to hit driver as the fairway is narrowed on the left by mounding, and water on the right at 240m from the tee.
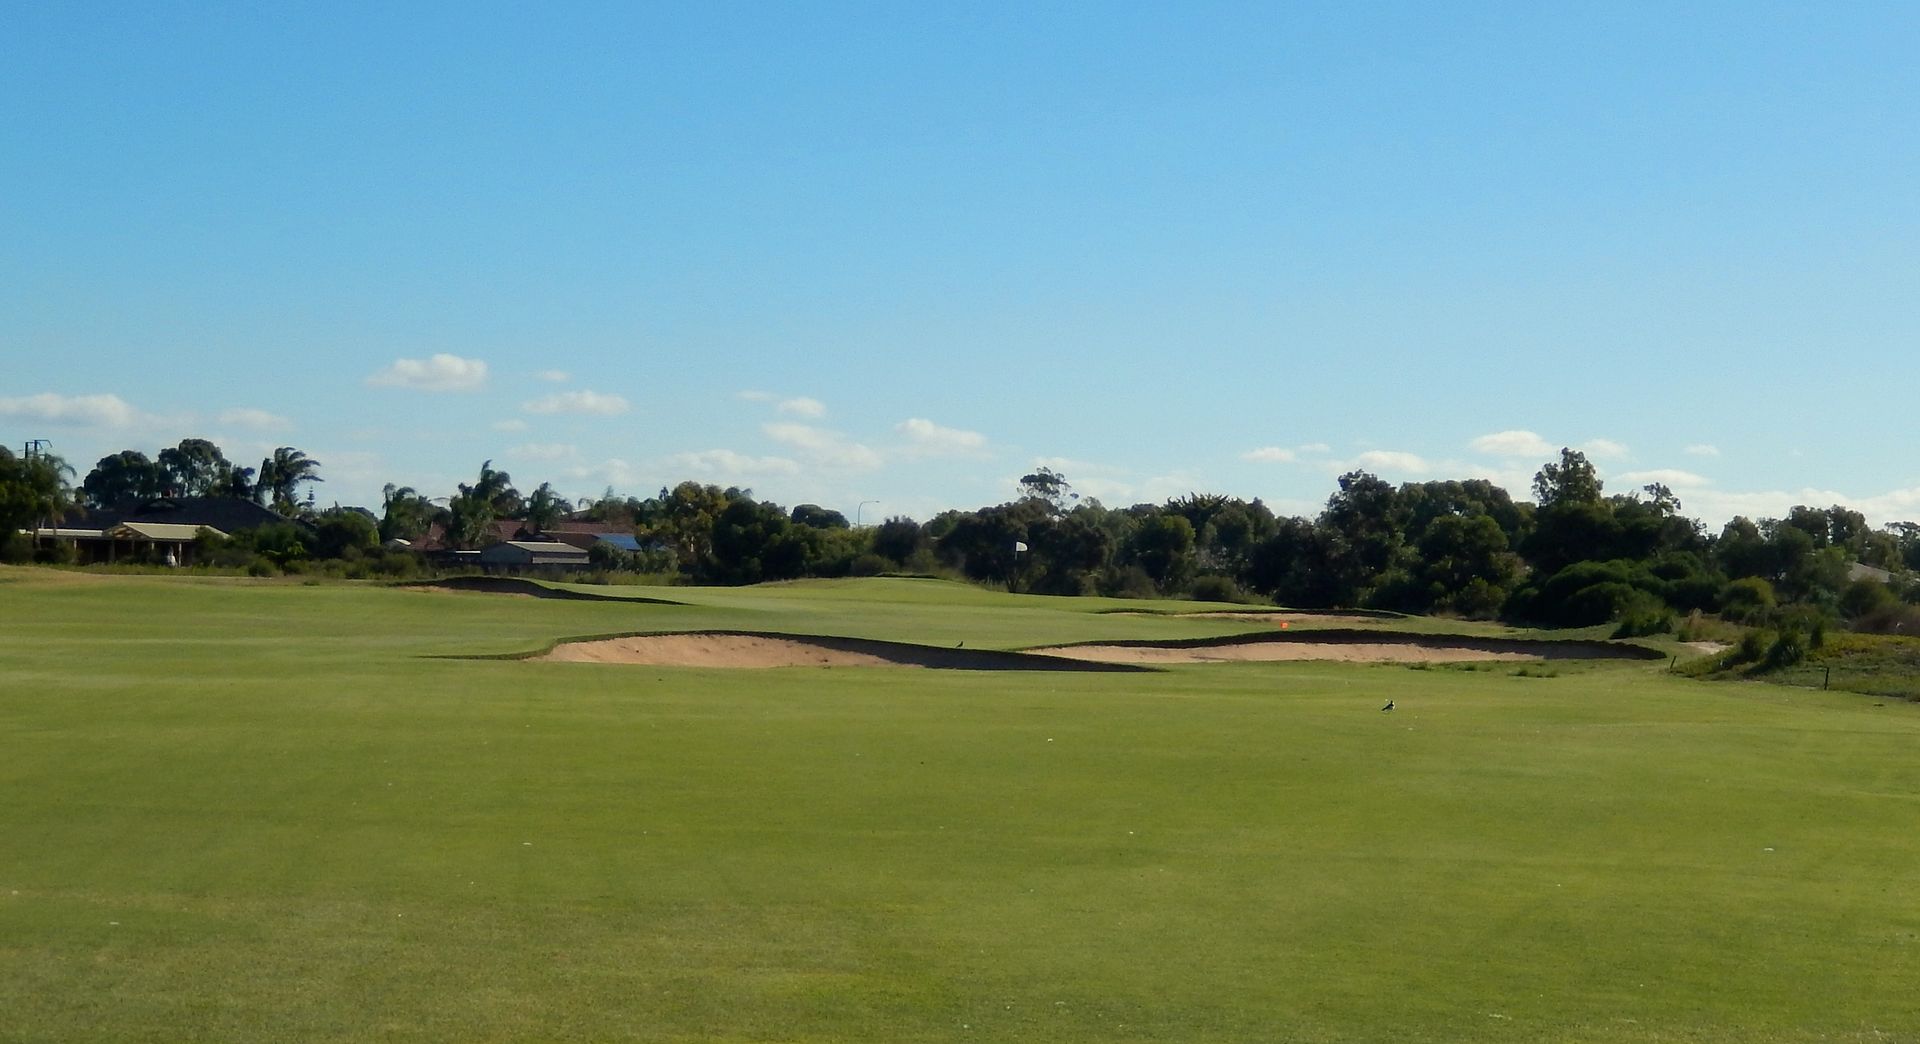
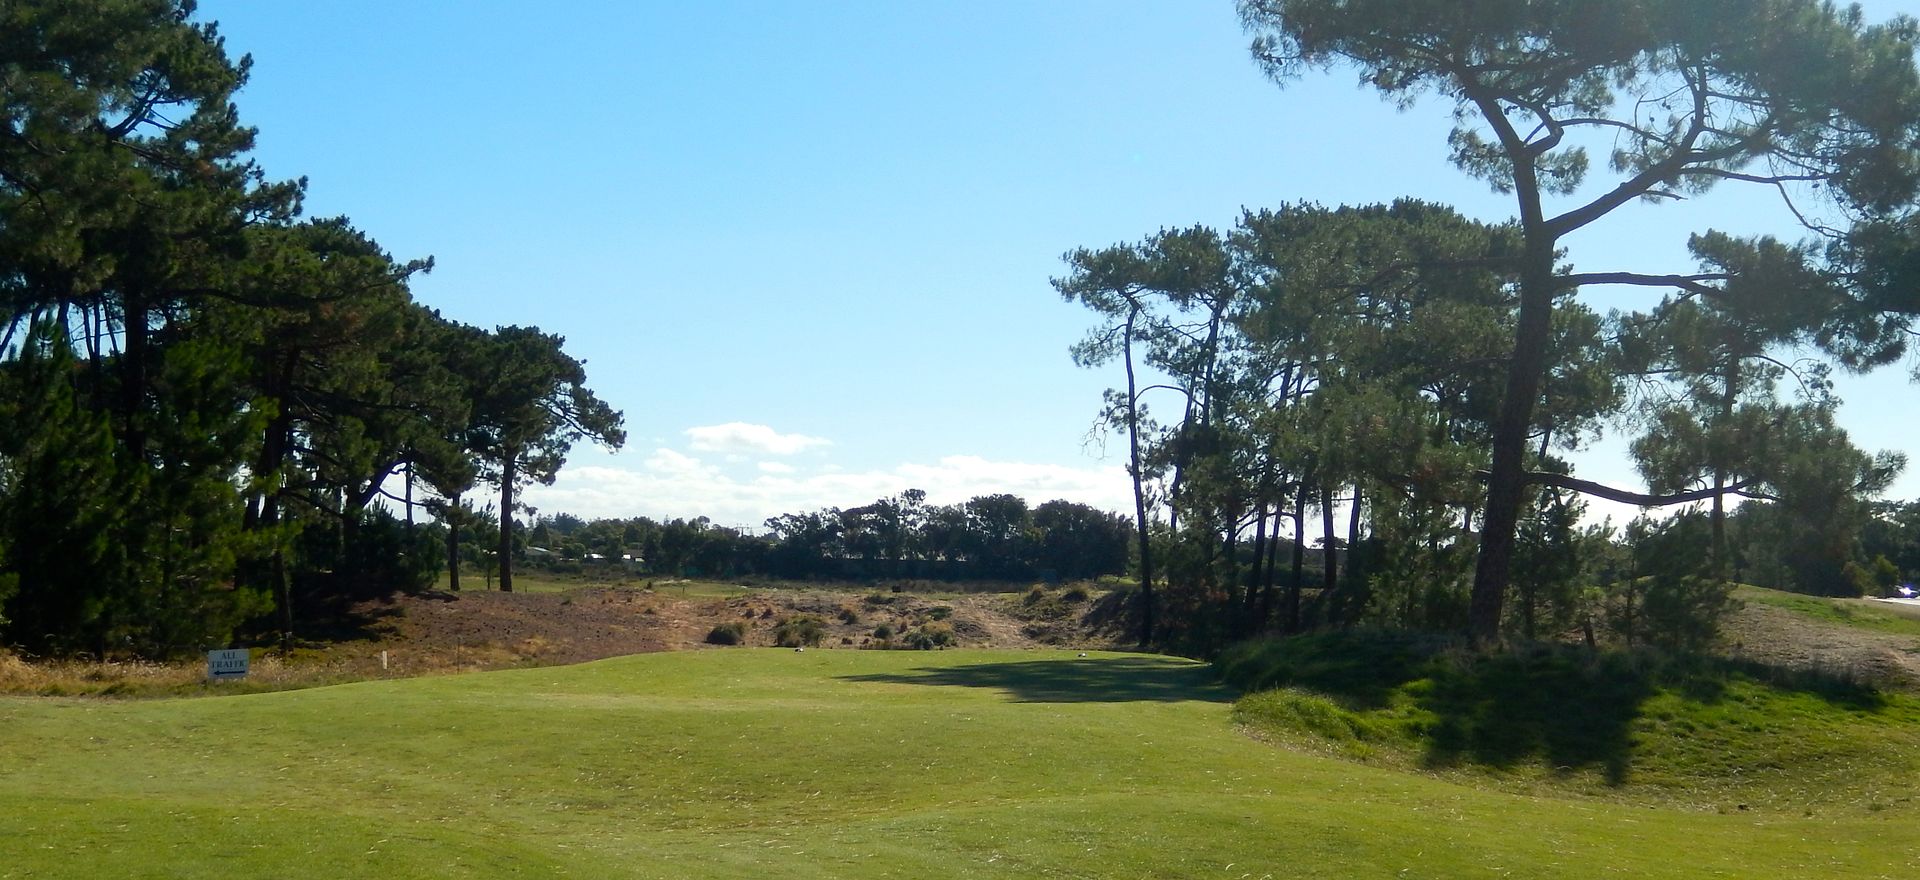 Despite the utterly flat land, the composition of the fairway bunkering and the angled green serve to make a compelling second half to this hole. Those intending to play a full third shot into the green will lay well back, short of a bunker 70m from the green that cuts the fairway in half. Challenging the bunker means the golfer will have a pitch up the length of the green, but he will struggle to keep his second shot short of a left fairway bunker that is deceptively short of the putting surface.