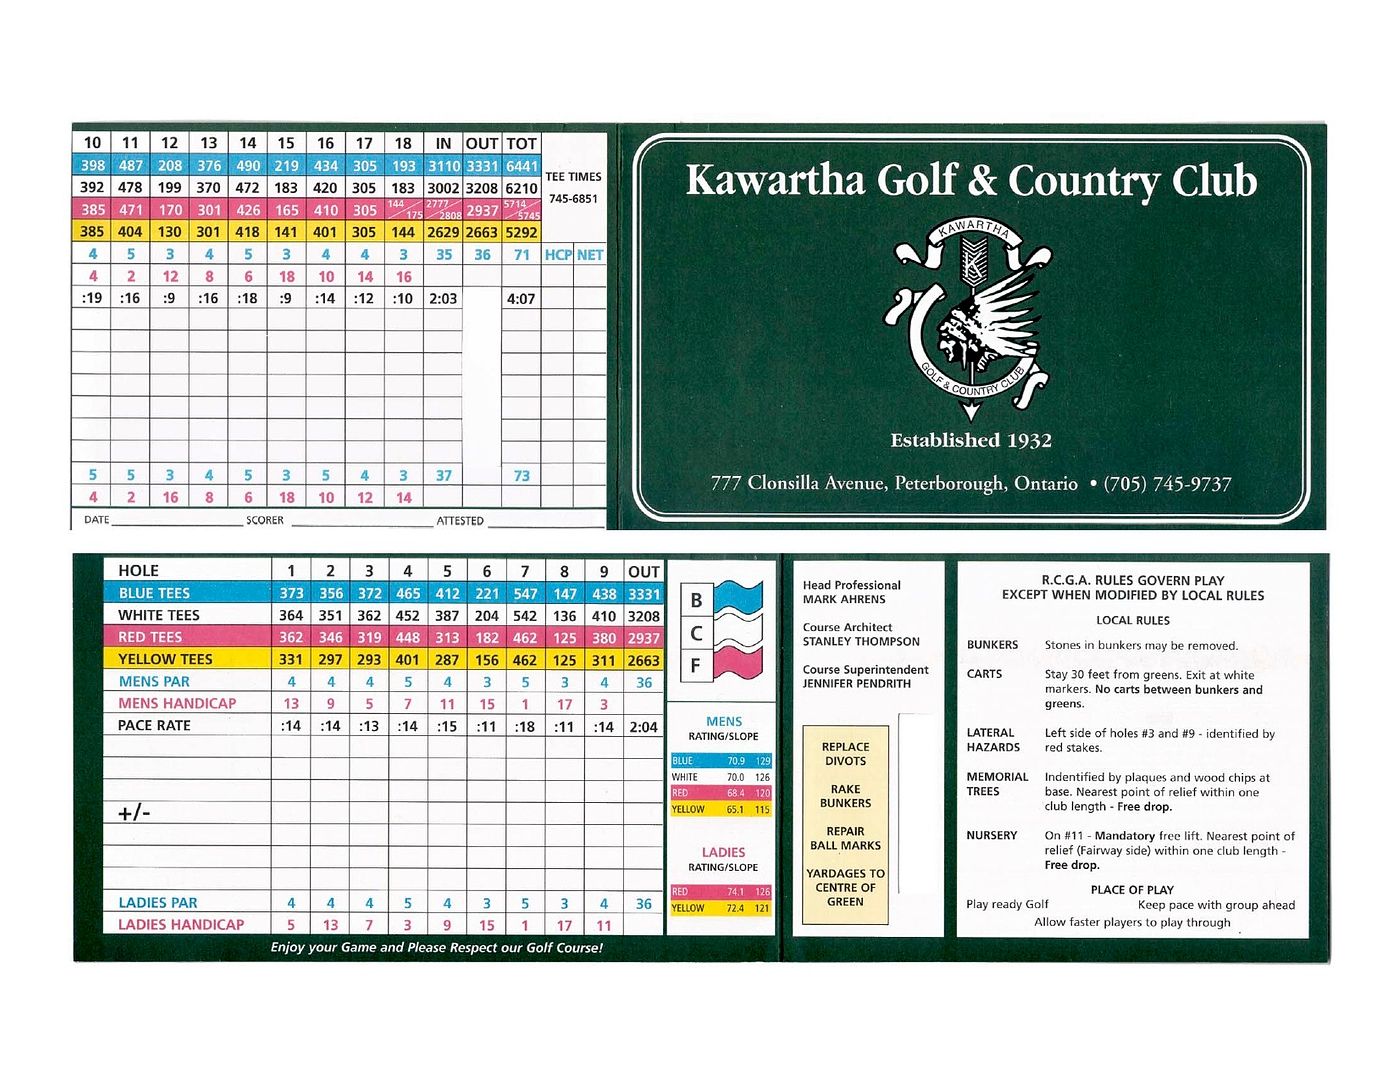
Kawartha G&CC
Peterborough, Ontario, Canada
Architect: Stanley Thompson (1931), Restoration by Ian Andrew (2006)
Yardage: 6,458, Par 71
Slope/Rating: 71.6/125
My Quick Review: Certainly one of Canada's 50 best -- too bad course rating panelists won't get in the car!
My Thoughts
Kawartha was a course that came highly recommended to me by people that had seen many great courses. It required convincing to make the two-hour drive to Peterborough, but now I am certainly a believer. Kawartha easily belongs among the 50 best courses in Canada, and could be higher, yet it's nowhere to be found in the magazine rankings.
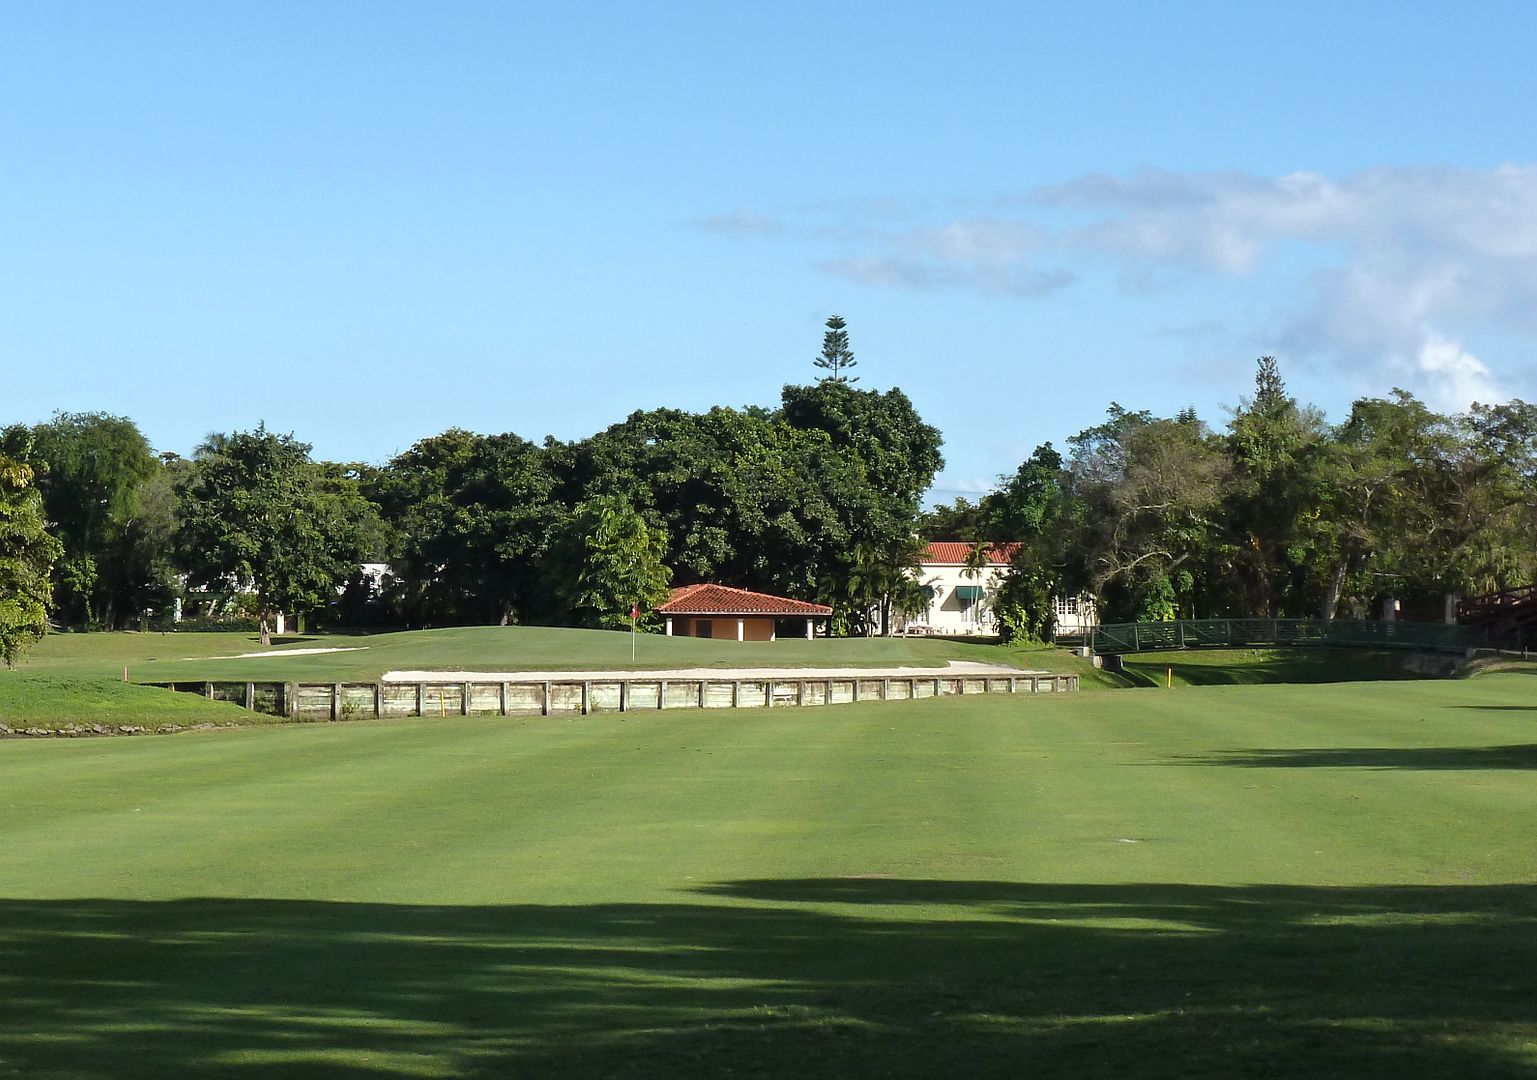
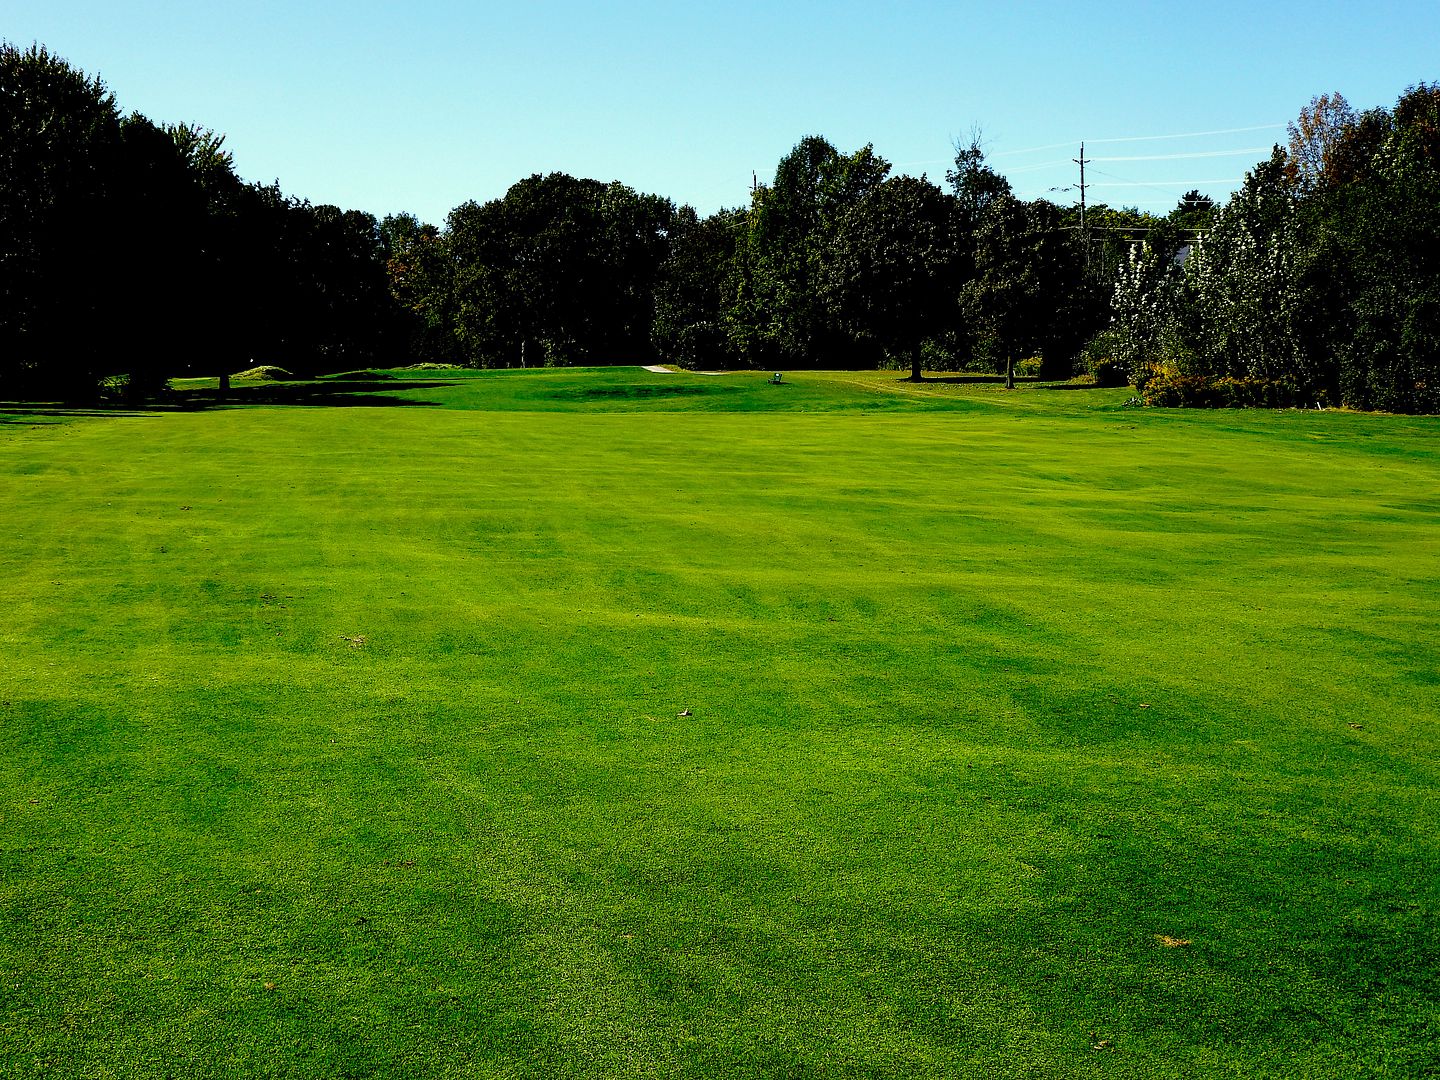
The Routing is exceptional. Thompson moves you around this wonderfully rolling piece of land with ease. Elevation changes are substantial but gradual and walking Kawartha is a joy. Perhaps there are a couple of kinks, such as the walks to 8 tee and 14 tee, but fortunately these are scenic walks through the woods, which do not detract from the experience. Somehow, even crossing the entrance road to play the 17th and 18th holes, has an intimate experience.
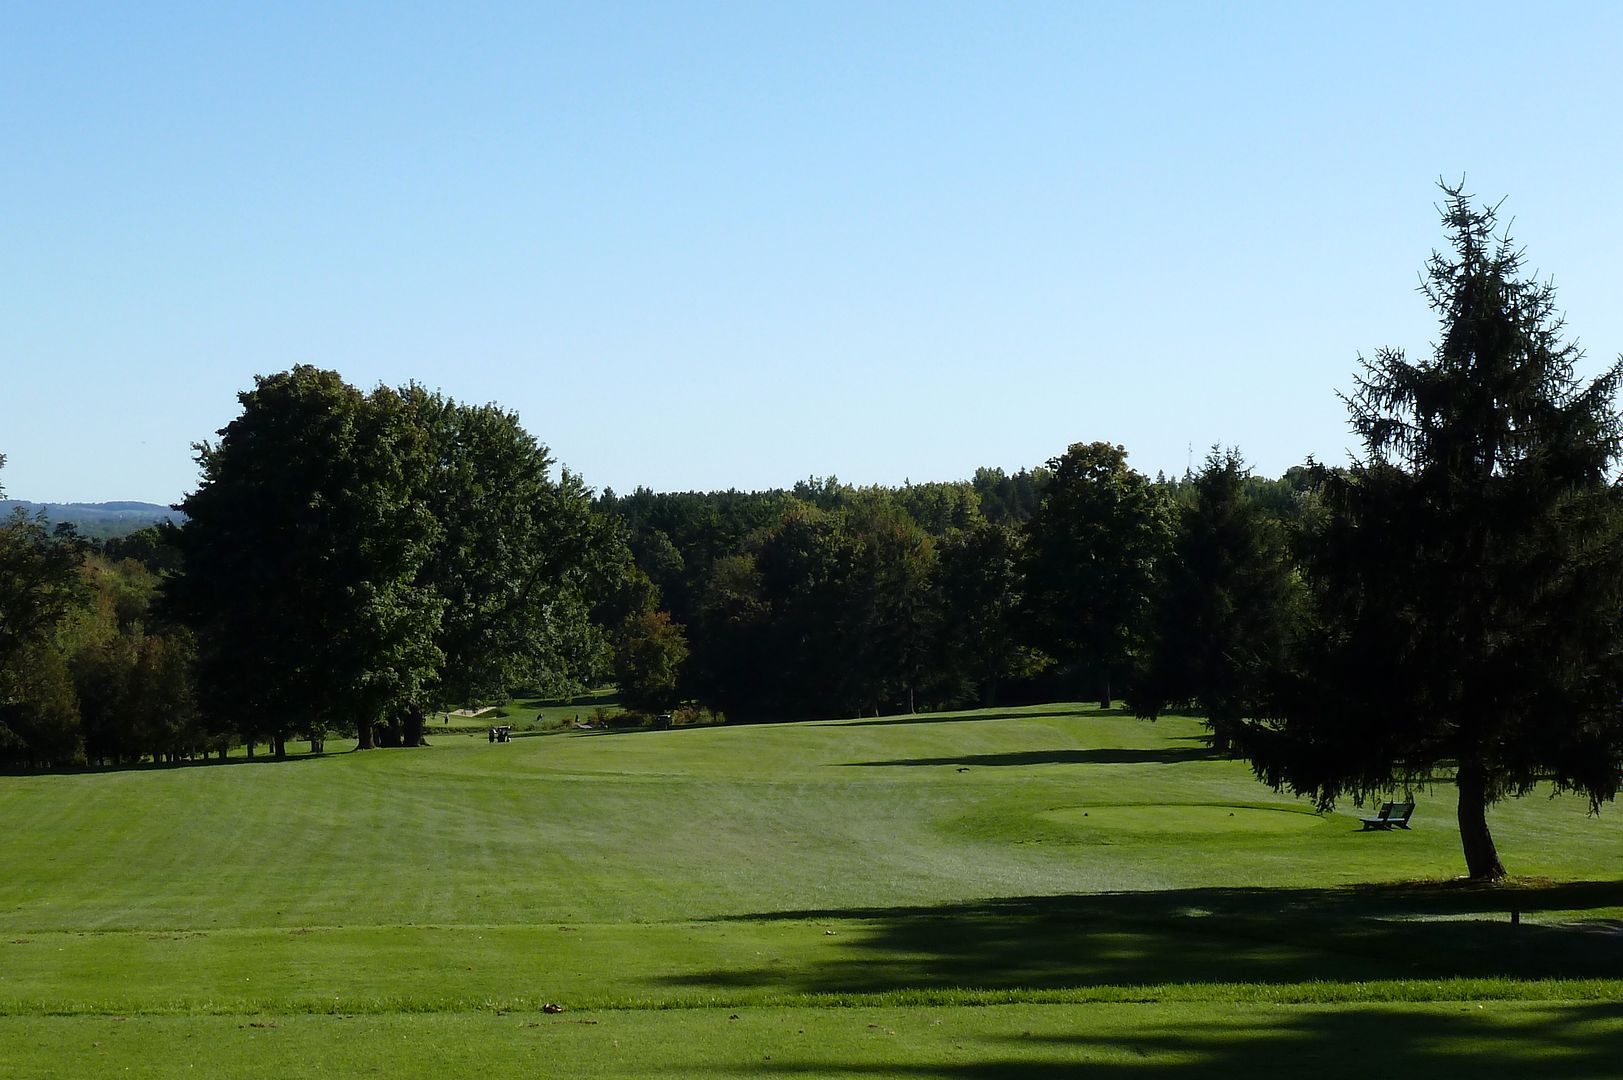
 |
| Entrance |
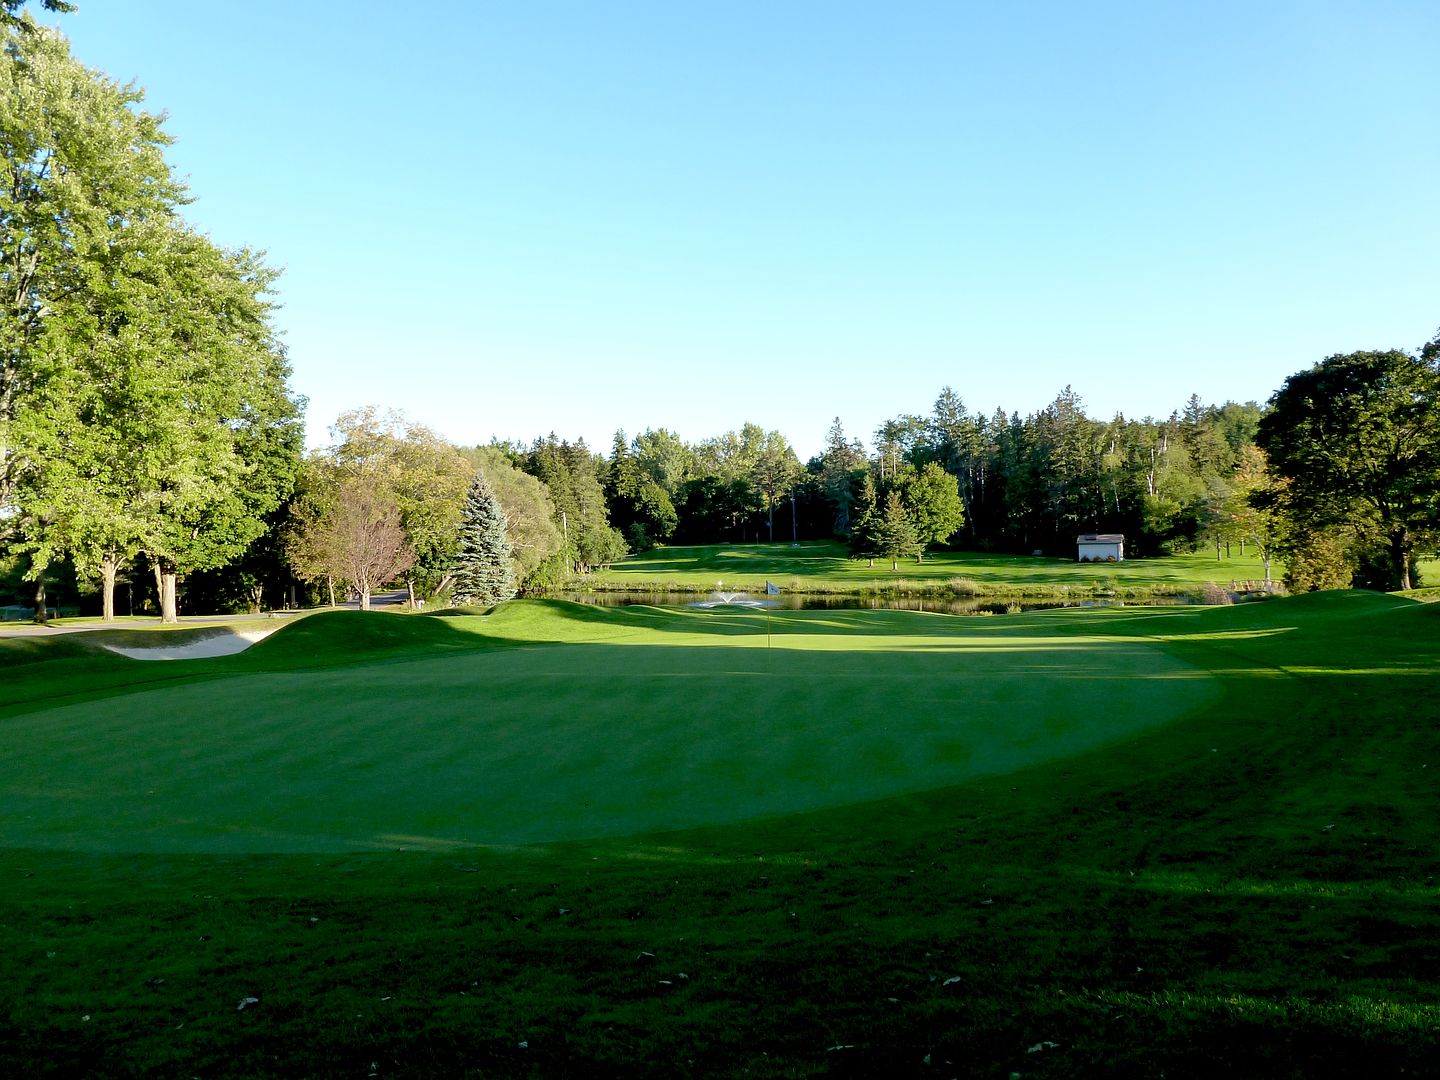
No doubt the highlight of the golf course is the set of par-3s. Traditionally we see the short par-3 play uphill and the long ones downhill, making all of the holes play similar yardages -- not so at Kawartha! The par-3 6th is an absolute devil of a hole, playing 223 yards straight uphill. A very strong hole. Though the course finishes with a par-3, those looking for a 'memorable finish' will not be disappointed.
If in the Toronto Area, Kawartha is absolutely a must-play. And the best part? It's semi-private and reasonably priced. Don't bother having your pro try to call to get you on one of the courses in the GTA, just get in your car and drive -- you will not be disappointed.
Holes to Note
Hole 2: Par 4, 355 Yards
The second is all about the green. The hole moves to the left, begging the golfer to challenge the left side, but a tee shot to short on that line will be blocked out by trees. The smart golfer will play down the right side, using the natural fairway contours to bring his ball into the centre of the fairway and closer to the green.
 |
| 2nd Tee |
Once in the fairway, the golfer is challenged to find a green that is guarded by bunkers short-left and long-right. The green flows naturally from the fairway and once again, using the ground contours, balls can land short and right of the green and can feed all the way to the difficult to access back-left portion of the green.
 |
| Approach to the 2nd |
The green and surrounds are nothing less than exceptional. I have seen over 20 Thompson designed golf courses, and I believe this to be the boldest and best green on any them. The bunkering demands that the player get both line and distance correct. Shots long enough to reach the back portion of the green must be exceptionally precise, as a push into the right bunker leaves a very difficult recovery.
 |
| 2nd Green from Right |
The green is two-tiered with a significant ridge bisecting it. Putting from one section to the other is extremely difficult.
 |
| 2nd Green |
 |
| 2nd Green from Behind |
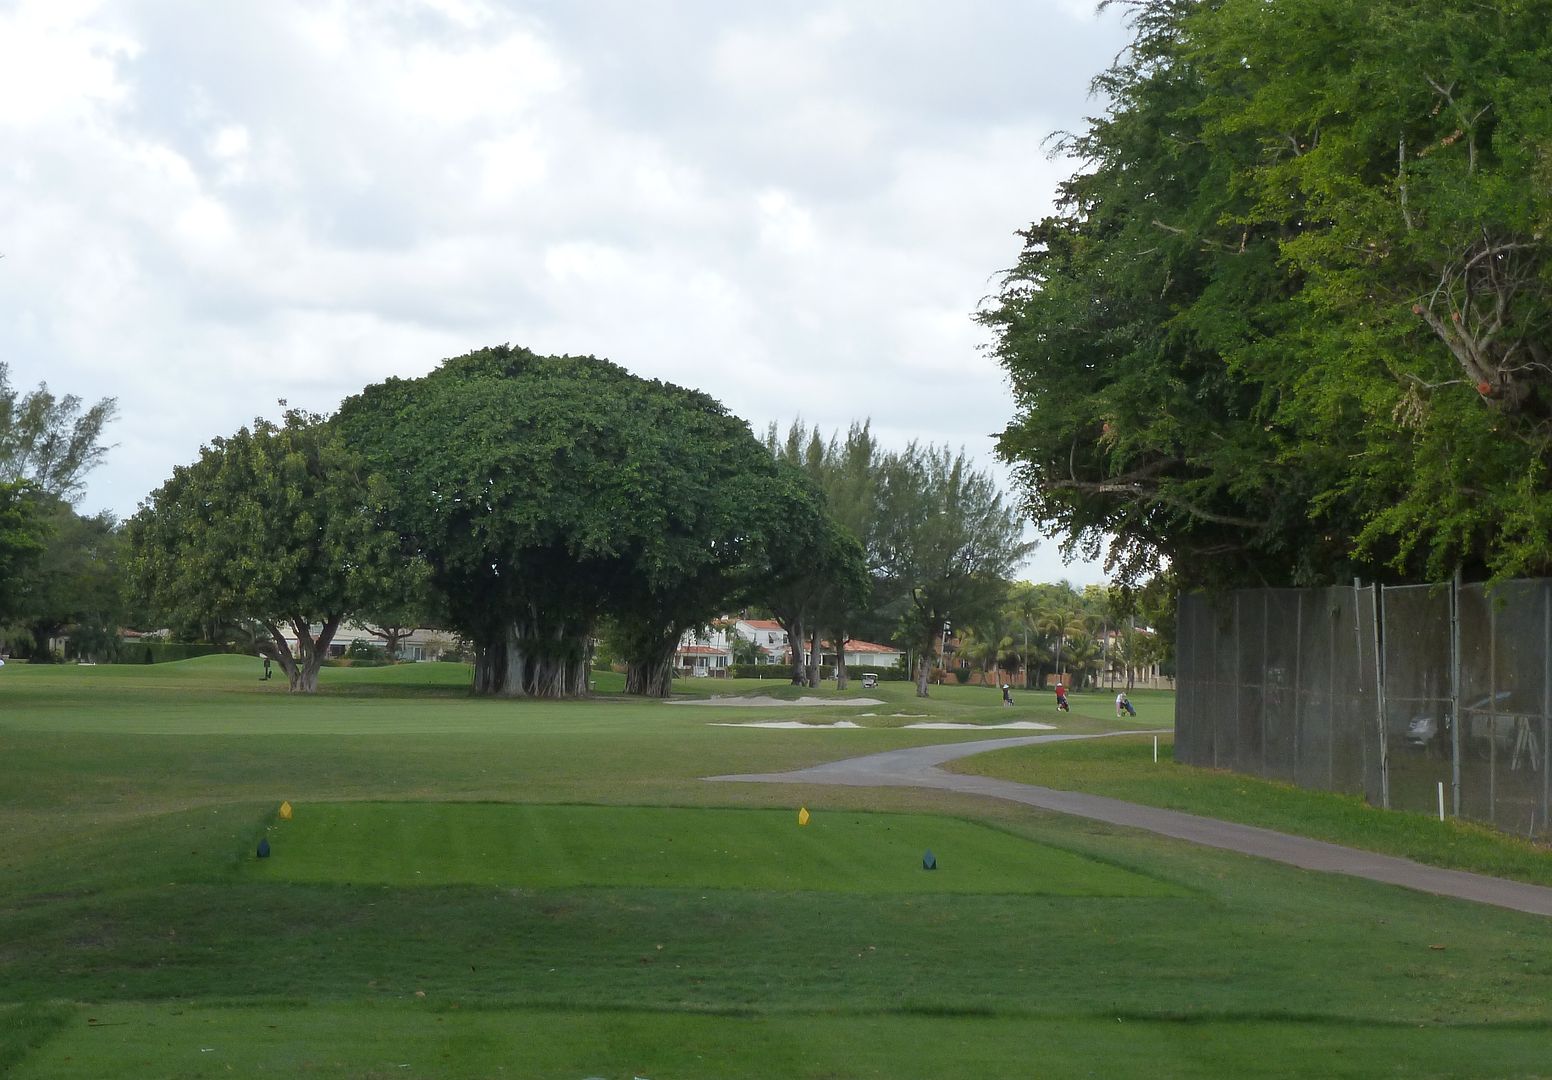
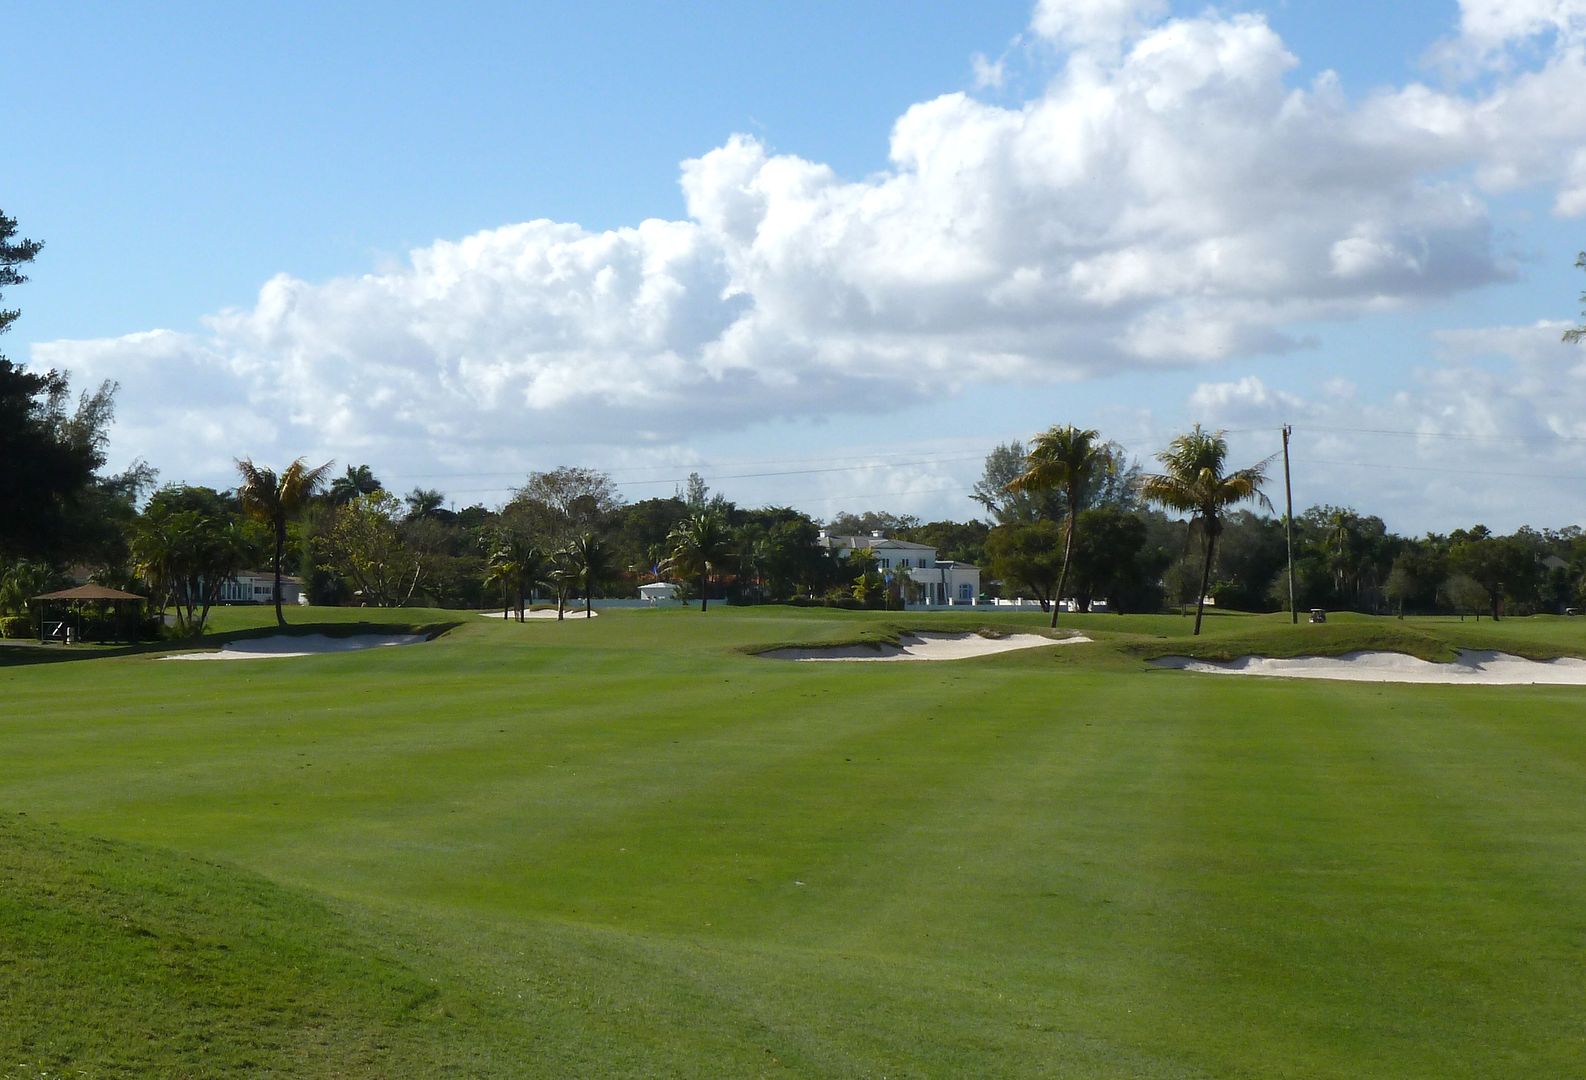
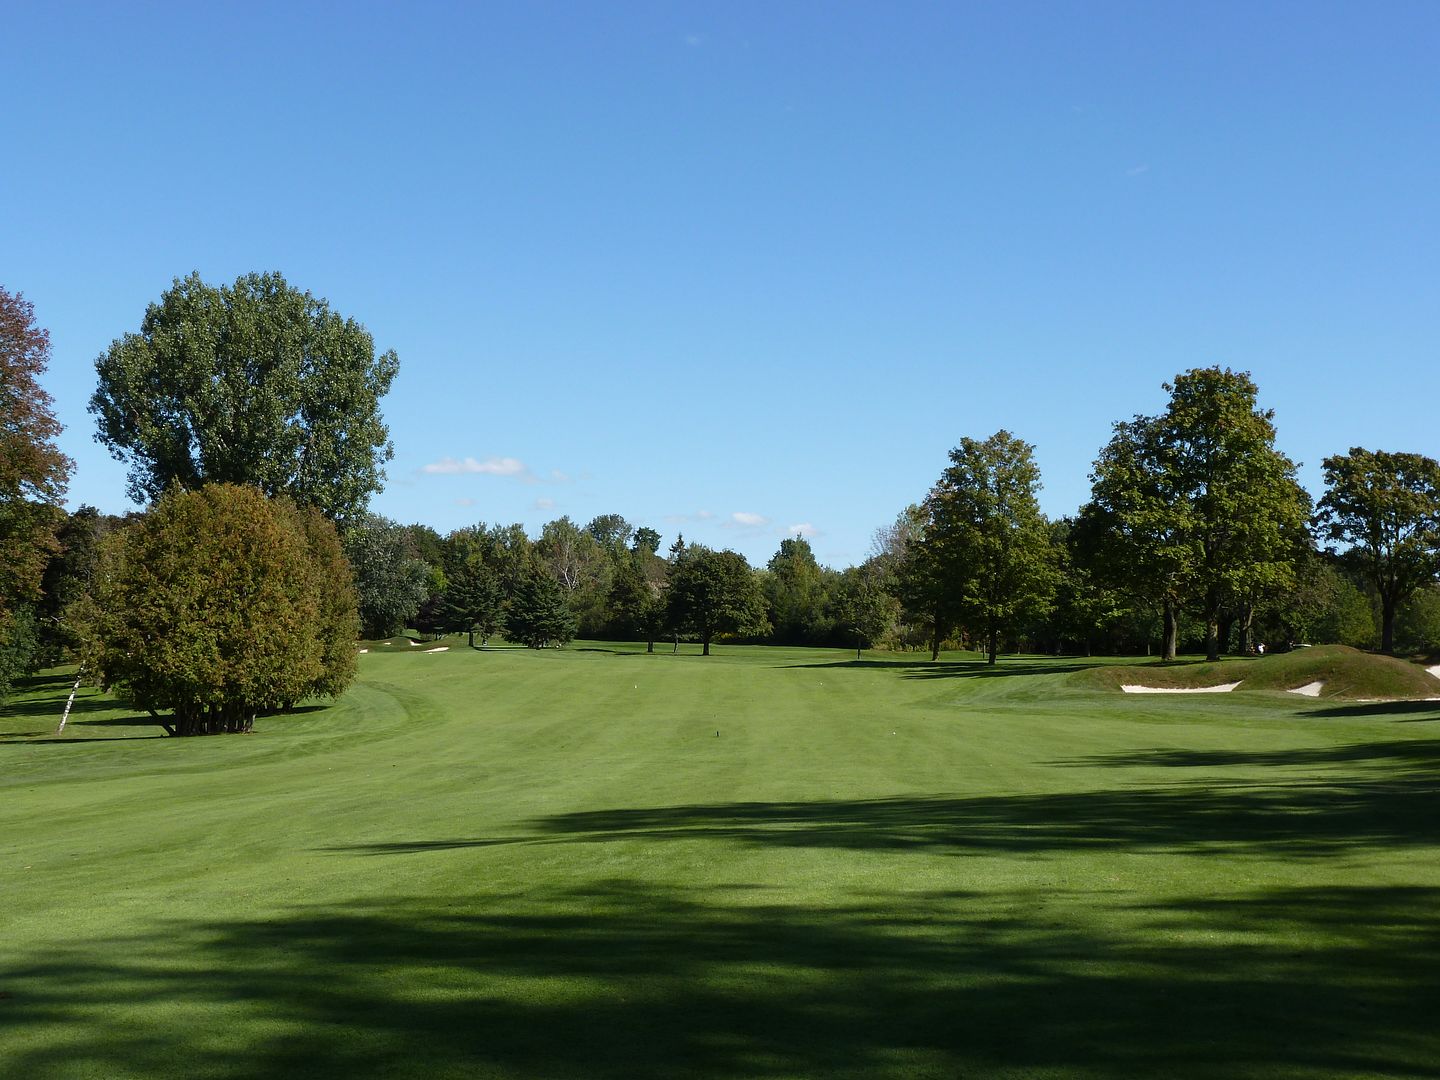
Hole 4: Par 5, 456 Yards
This is really a par 4.5, but it's a very good hole -- a down then up par 5 that moves to the left and climaxes with a great green.
The tee shot is played downhill to a wide fairway that is pinched by a grouping of fairway bunkers about 250 yards off the tee. Players can try to skirt the left side of the fairway for a shorter approach into the green, but shots that flirt with the fairway bunkers have the preferred angle.
 |
| 4 Tee |
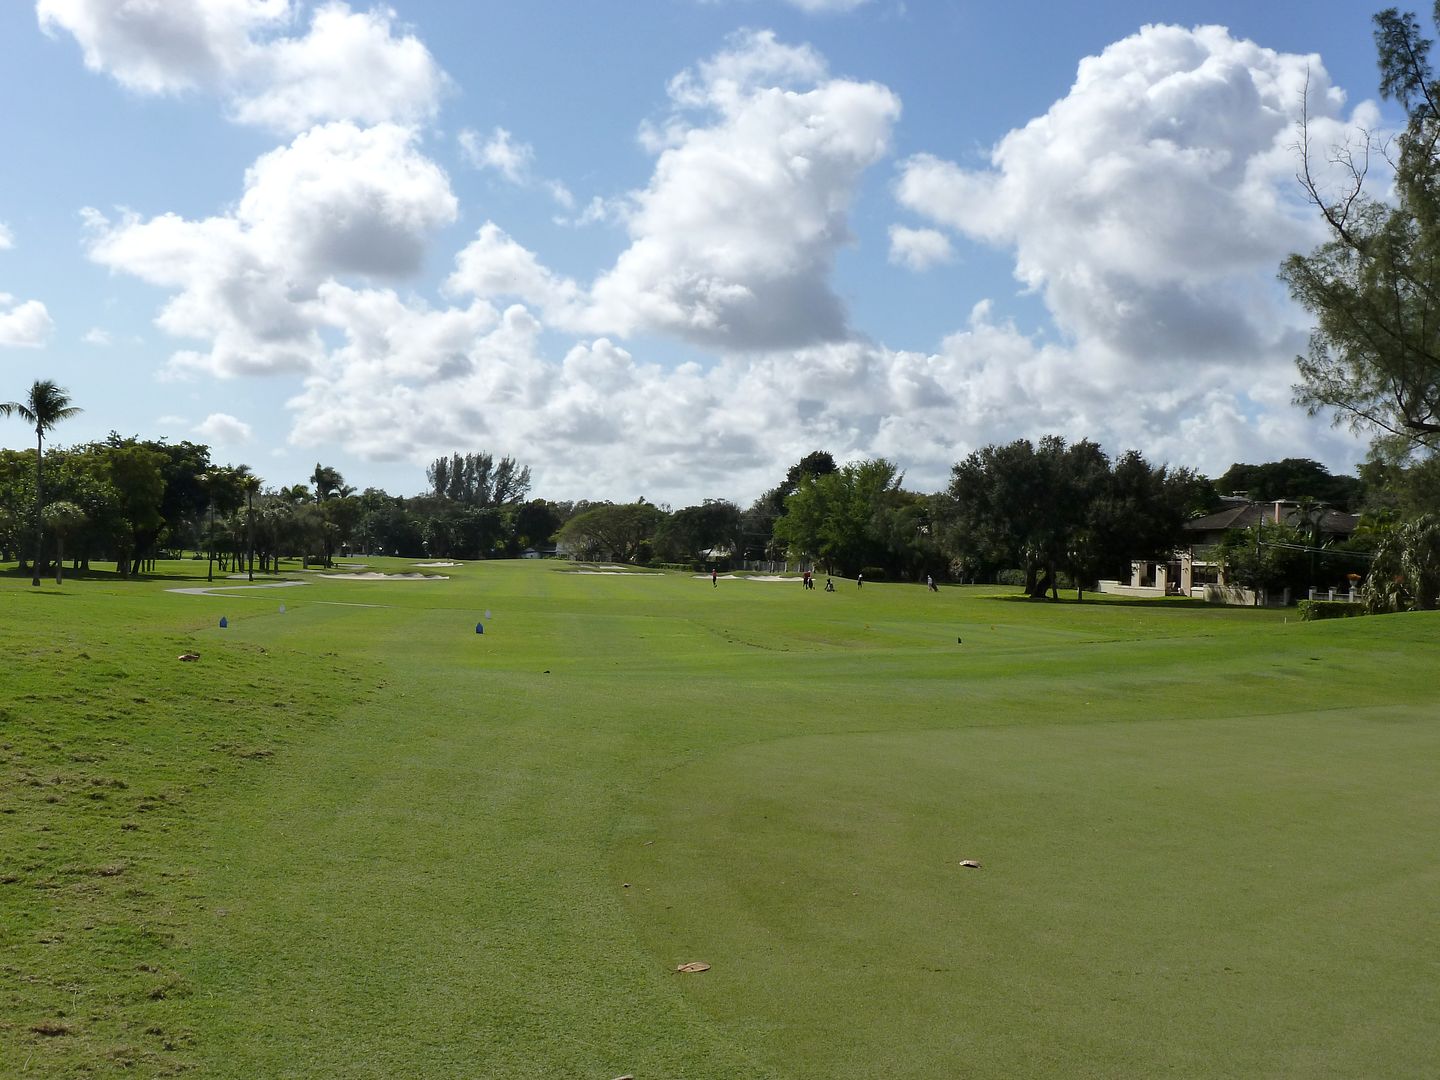
One thing found at Kawartha, but almost never found at modern courses, is micro-contouring in the fairway. The ground is gently rumpled, keeping the golfer always on his toes with an awkward stance.
 |
| The Gently Contoured 4th Fairway |
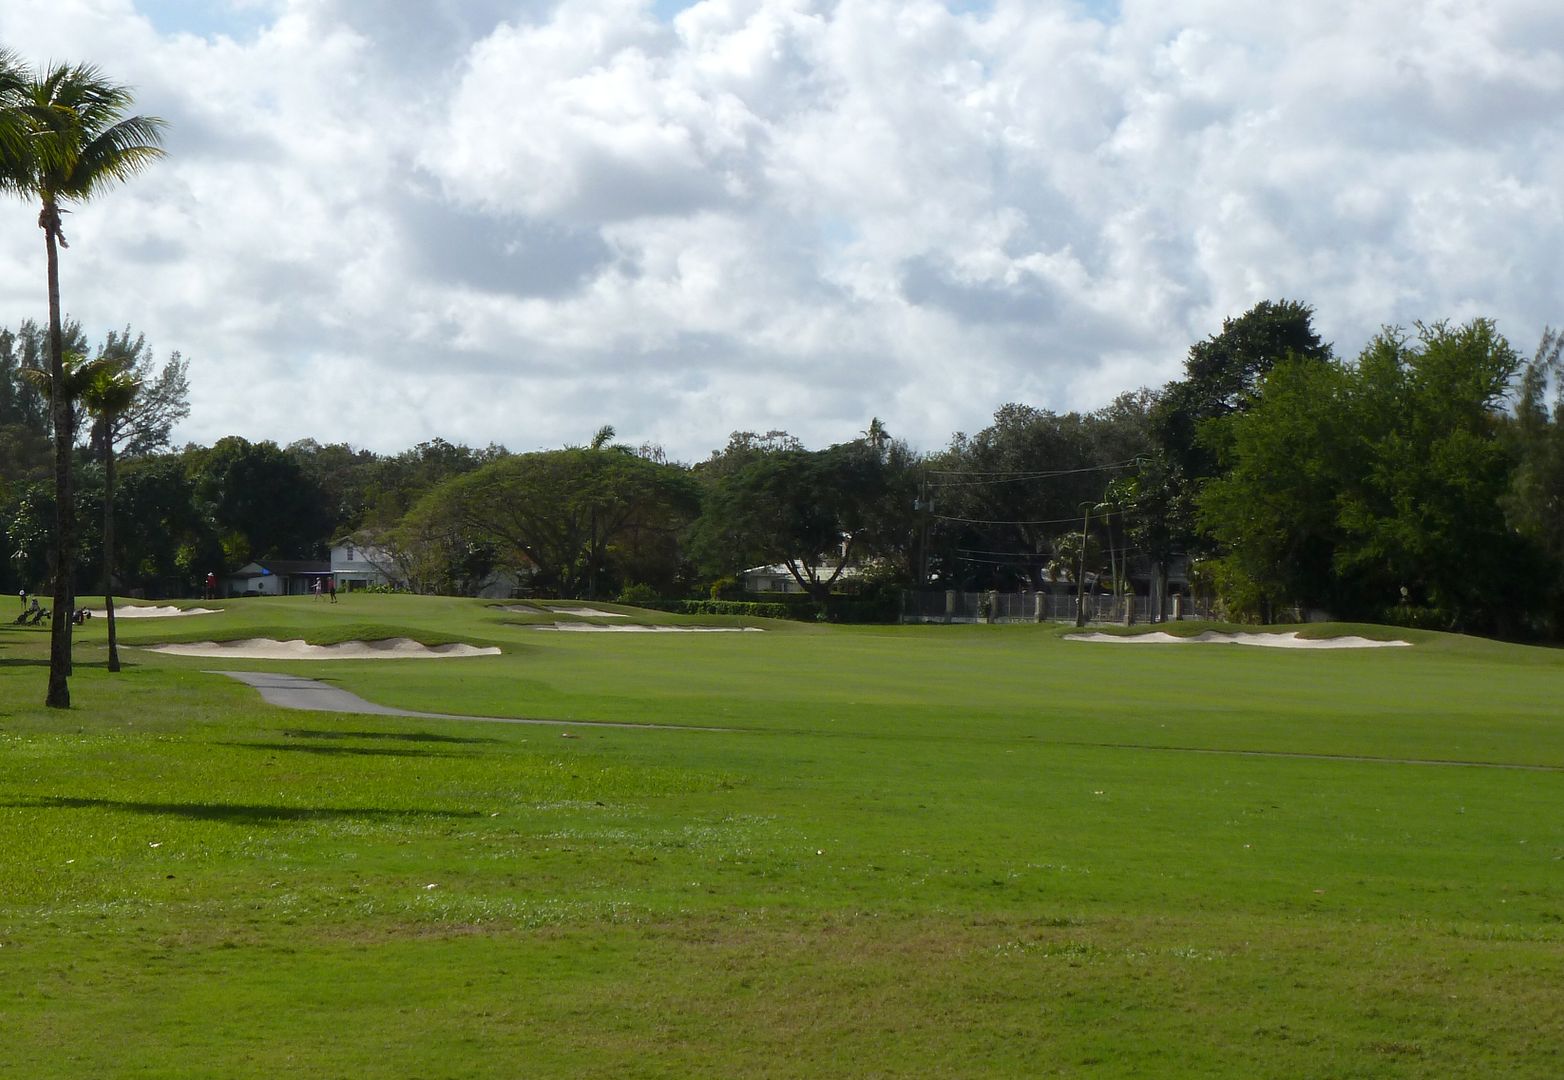
 |
| The Approach from 250 Yards |
To have any chance of reaching the green, the player must have 220 yards or less into the green. From there, the green starts to come into view.
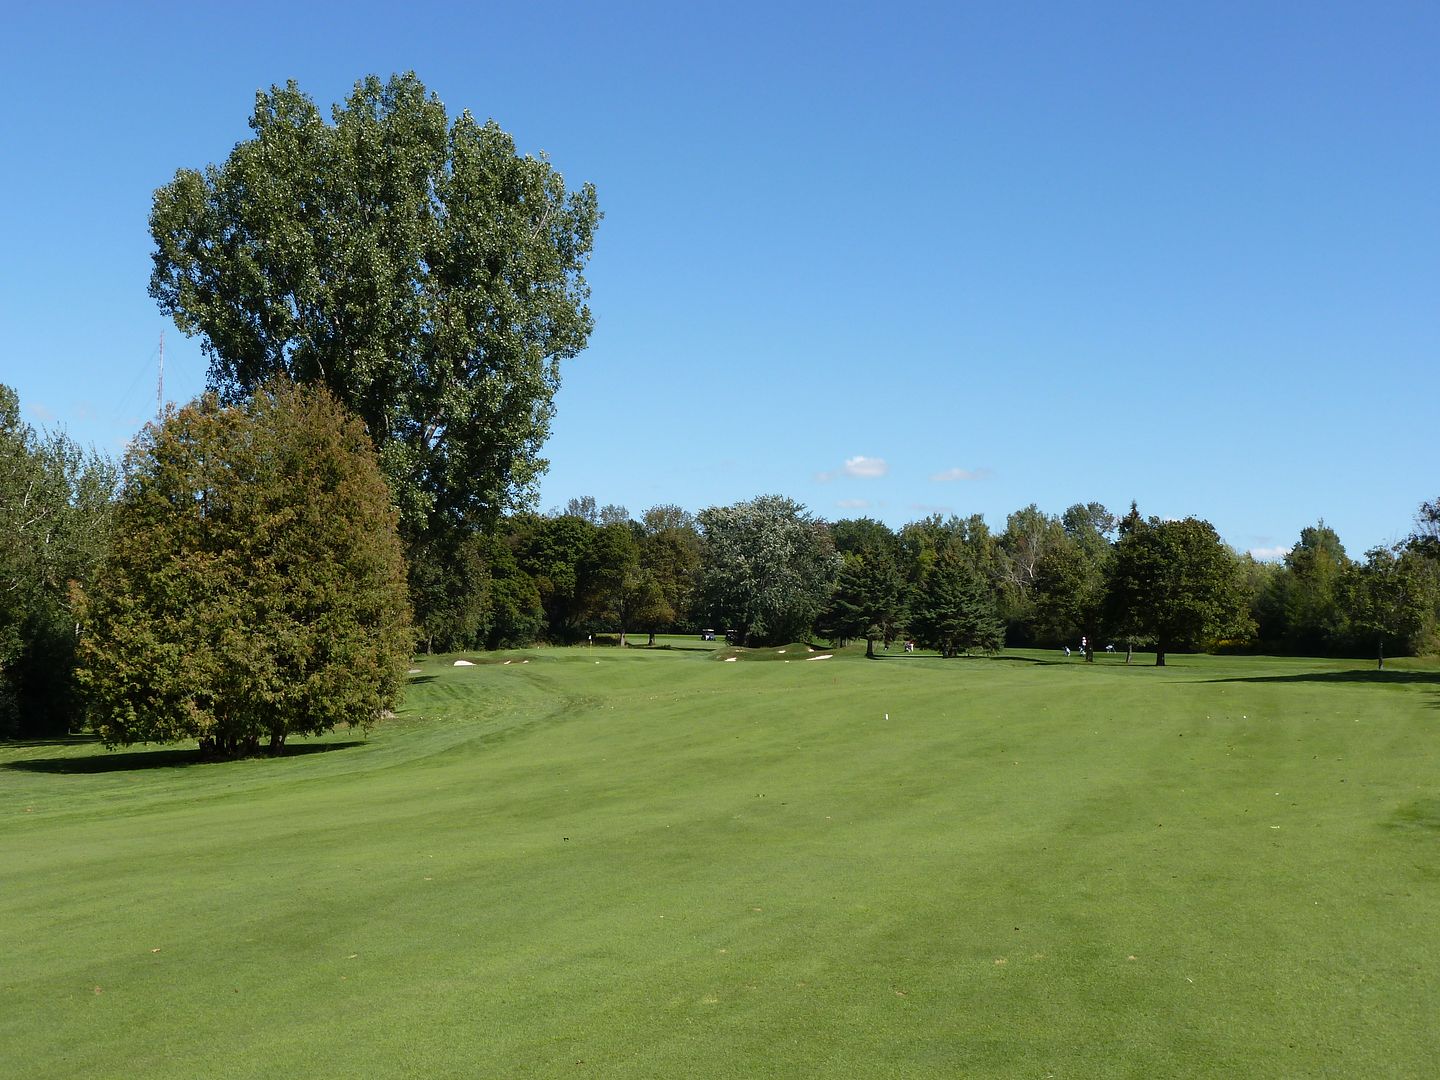 |
| The Approach from 210 Yards |
The 4th green is fantastic. The whole green slopes toward a small bowl in the middle-left portion of the green. A pin location in the bowl is easy, every other possible pin position is tough!
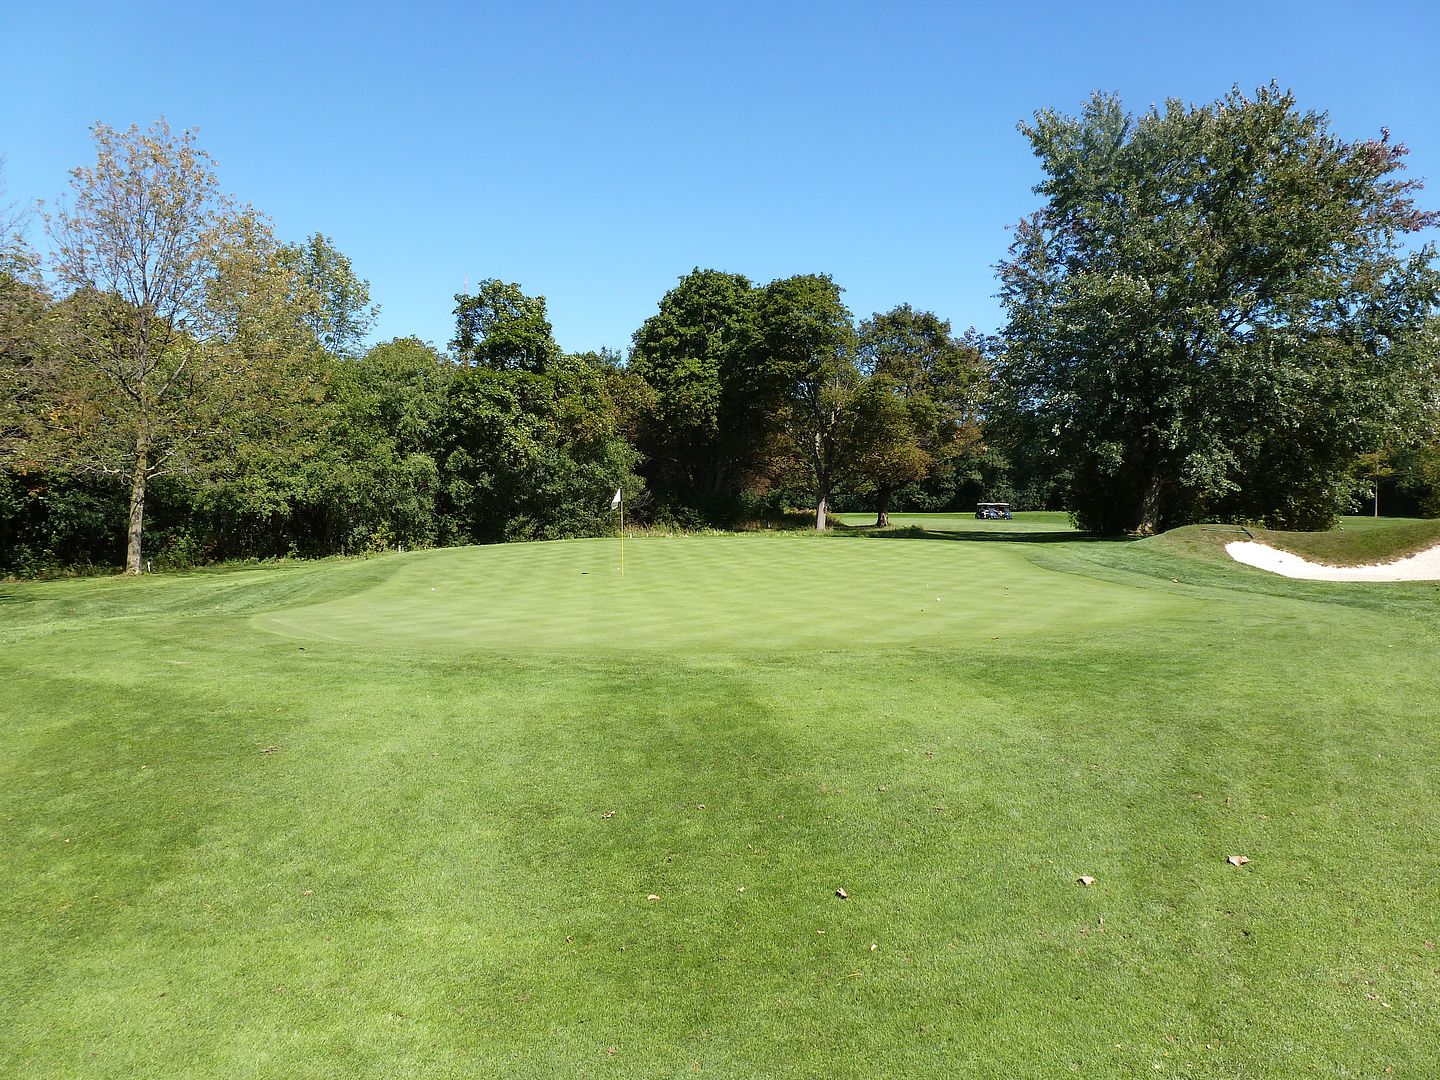 |
| 4th Green |
 |
| 4 From Behind |
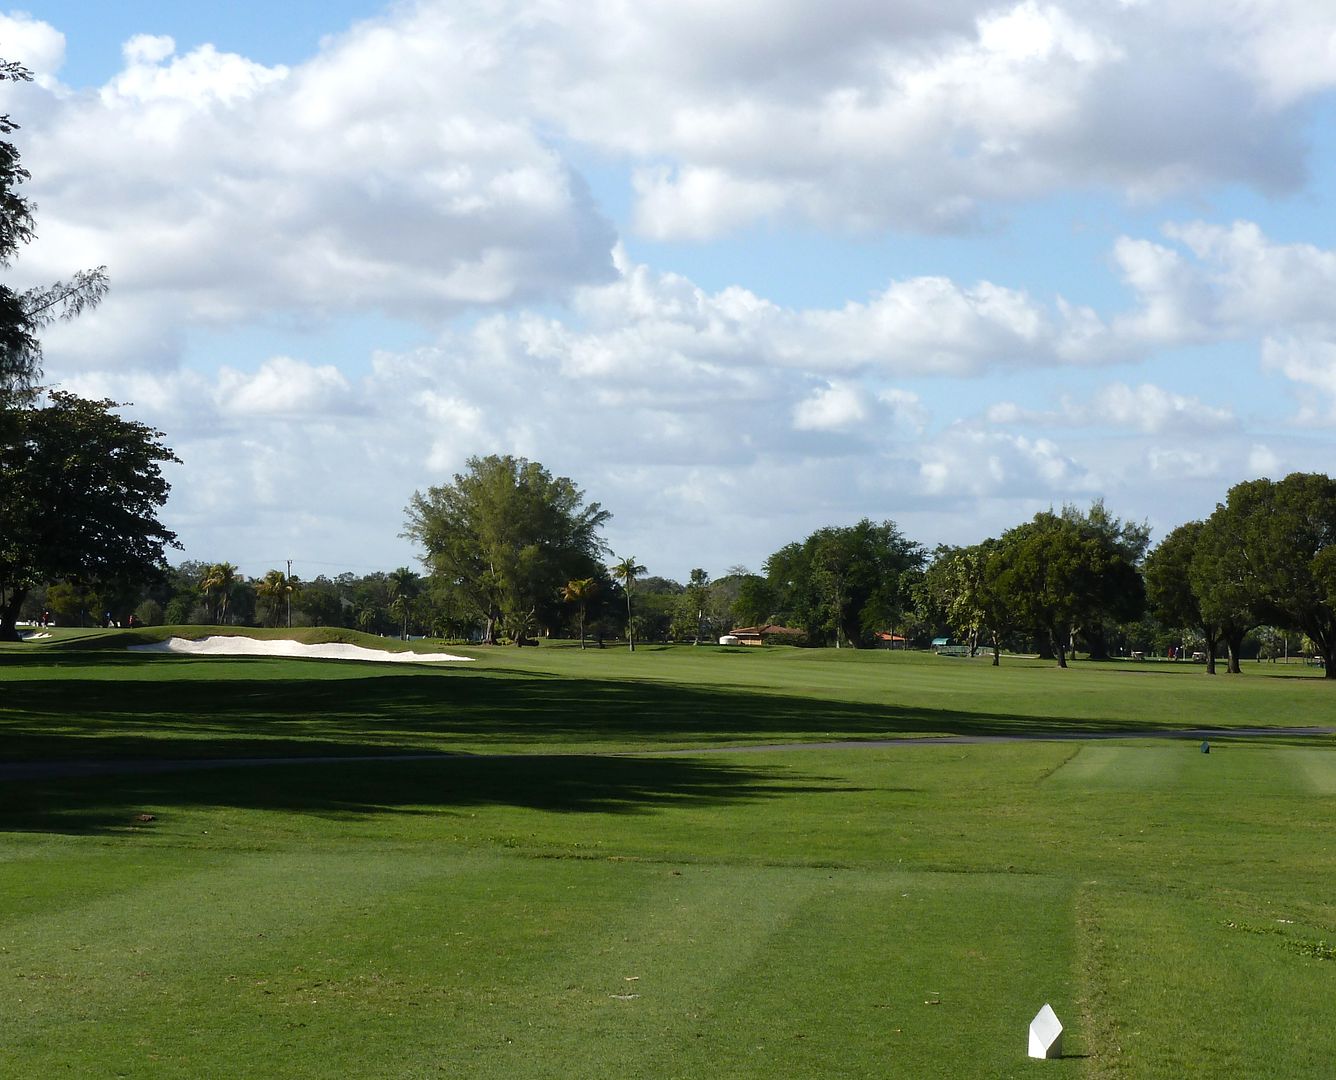
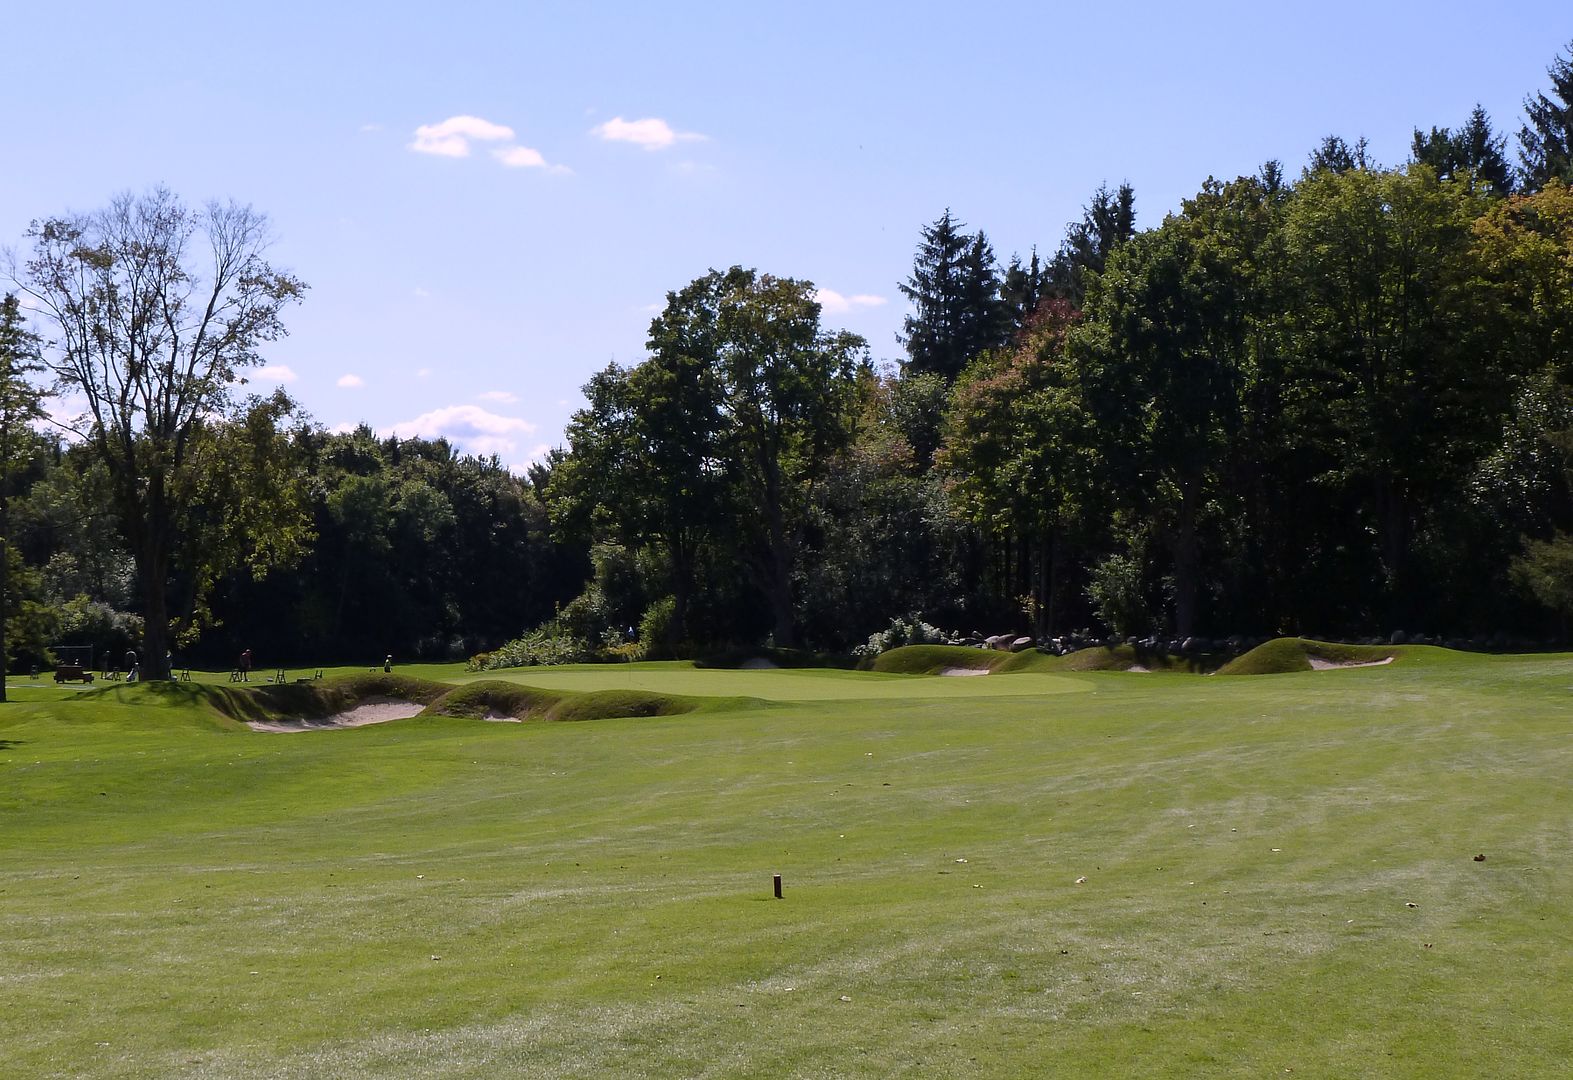
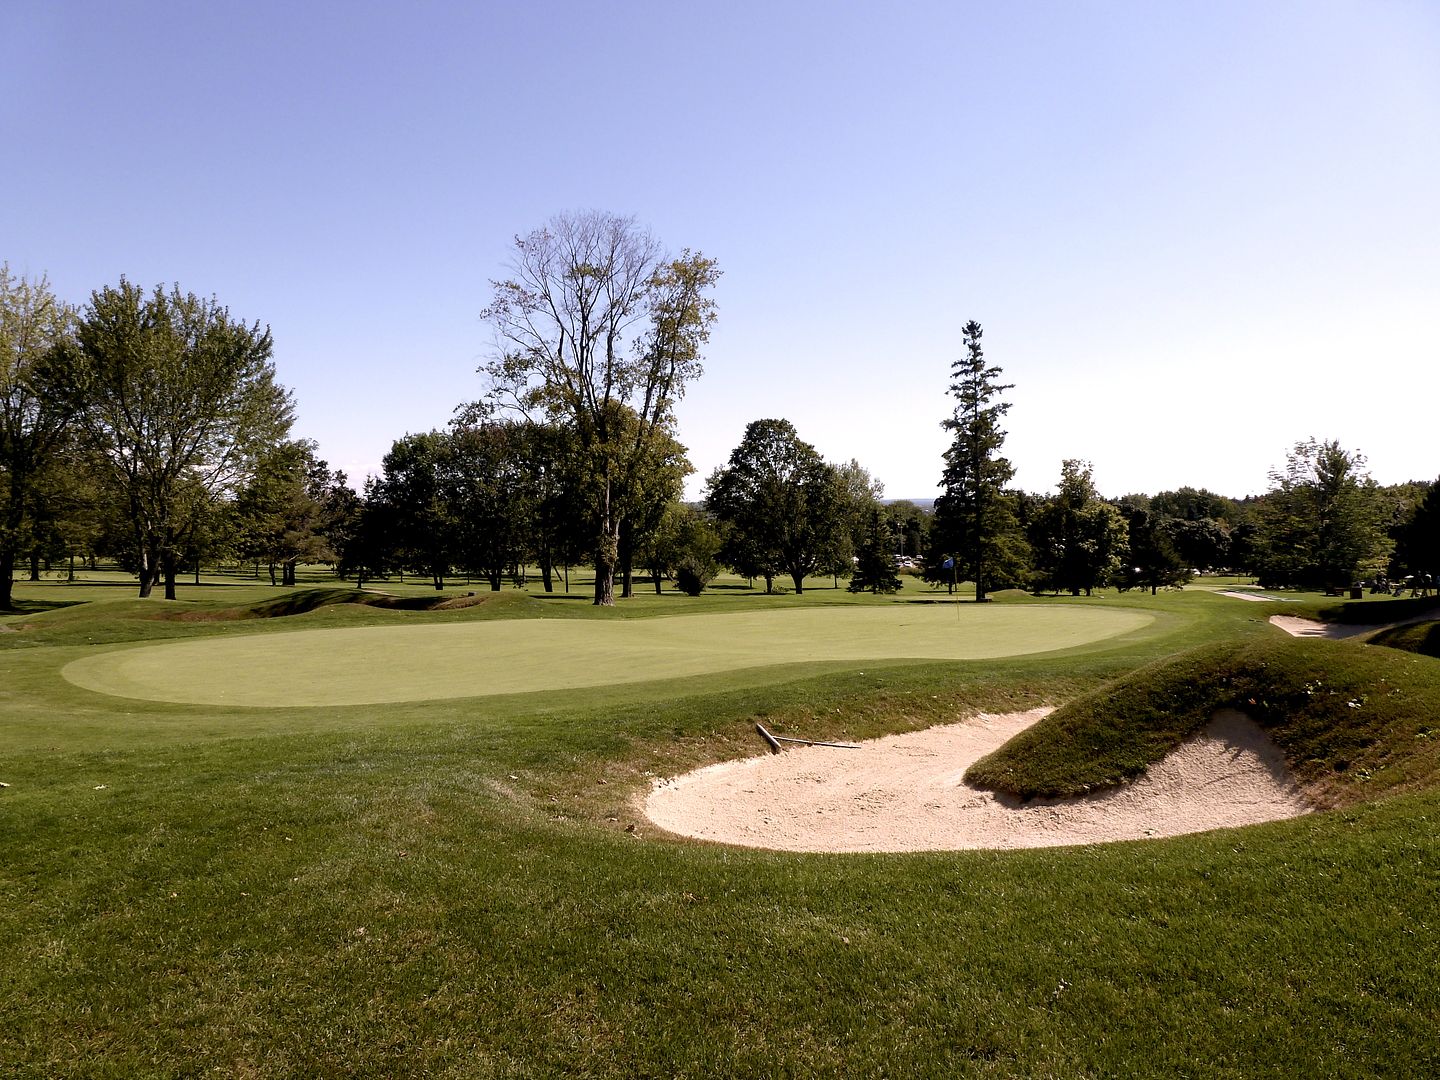
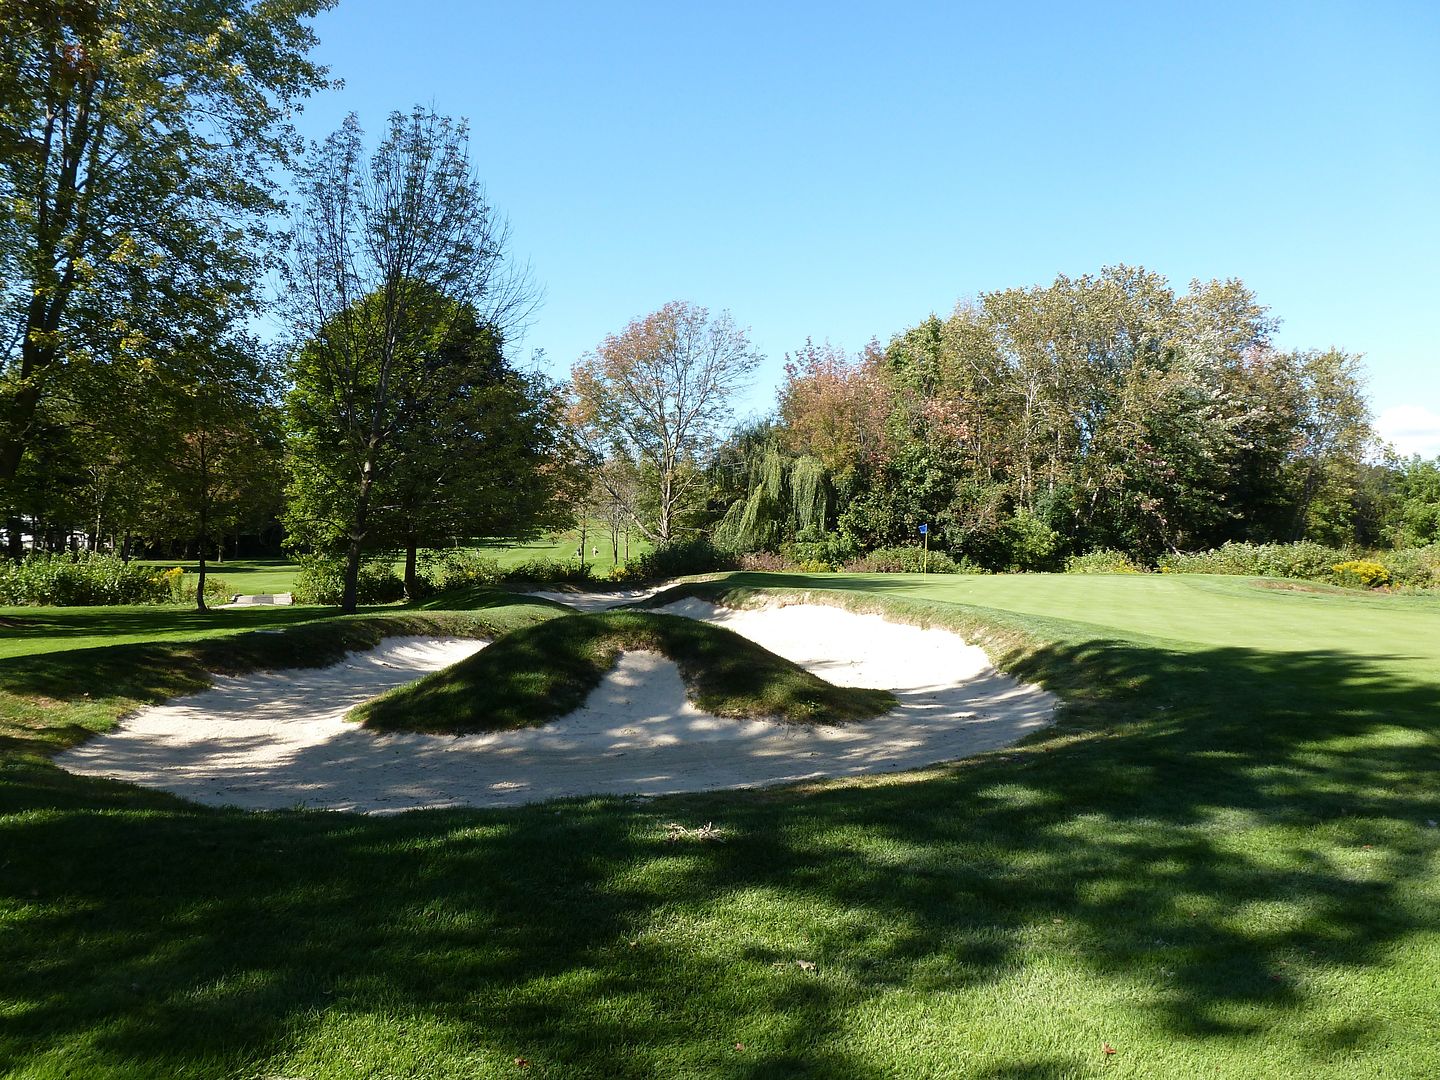
Hole 6: Par 3, 223 Yards
This is a phenomenal par-3 that breaks the mould of traditional architecture. Not only is this par-3 over 220 yards, but it plays uphill, to a diagonal green, with the deepest greenside bunkering on the golf course. Though there is some room to run the ball onto the green, the steep grade of the slope short of the green, means that most shots landing short will not bounce forward -- instead, these shots will veer left, toward the deep greenside bunkers.
 |
| 6 Tee |
 |
| The ground short of the 6th green slopes hard from right to left |
 |
| Shots that miss left find the deepest bunker on the golf course |
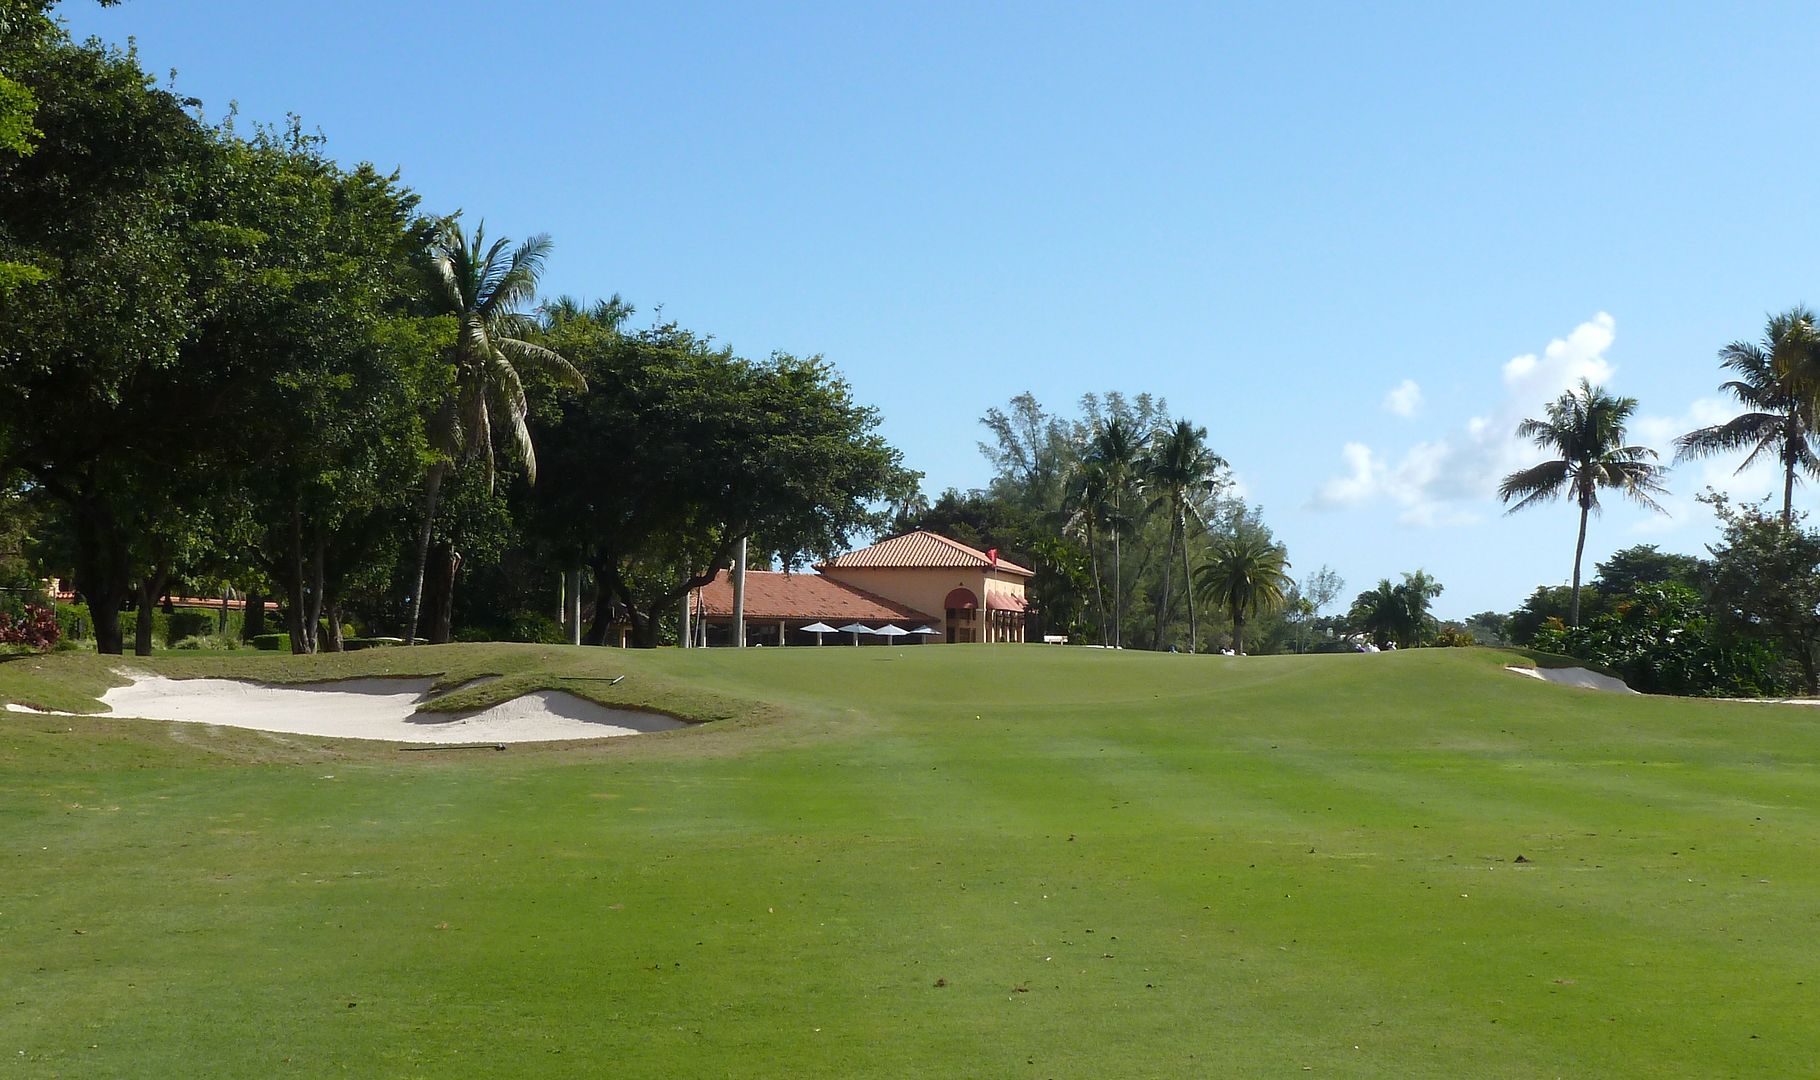
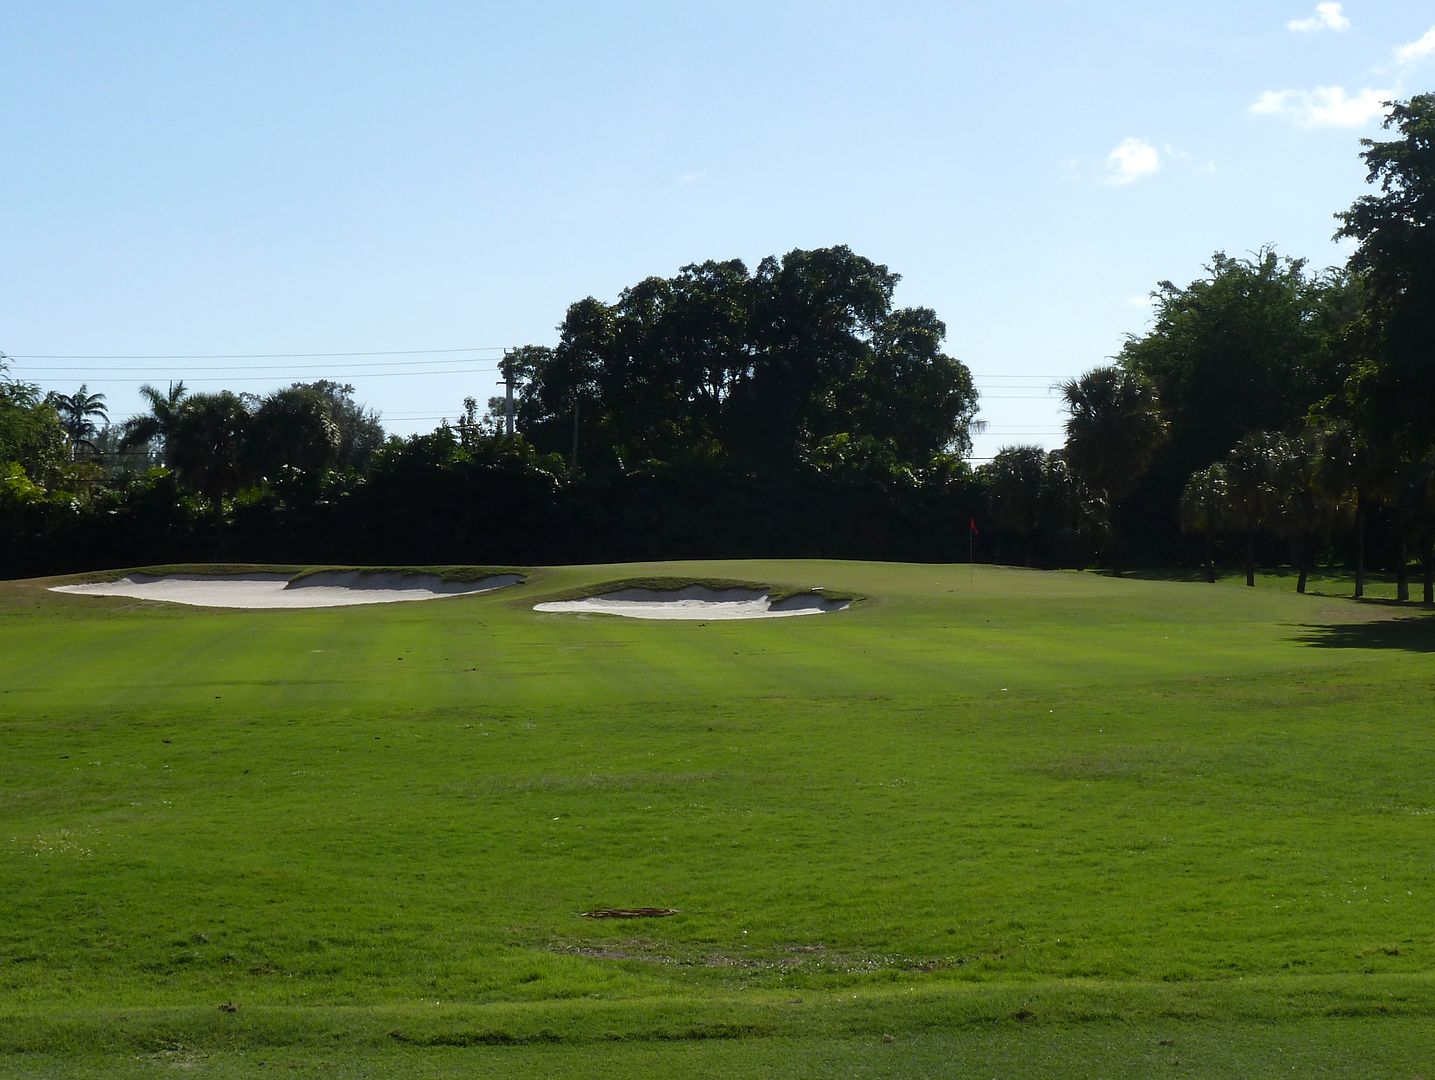
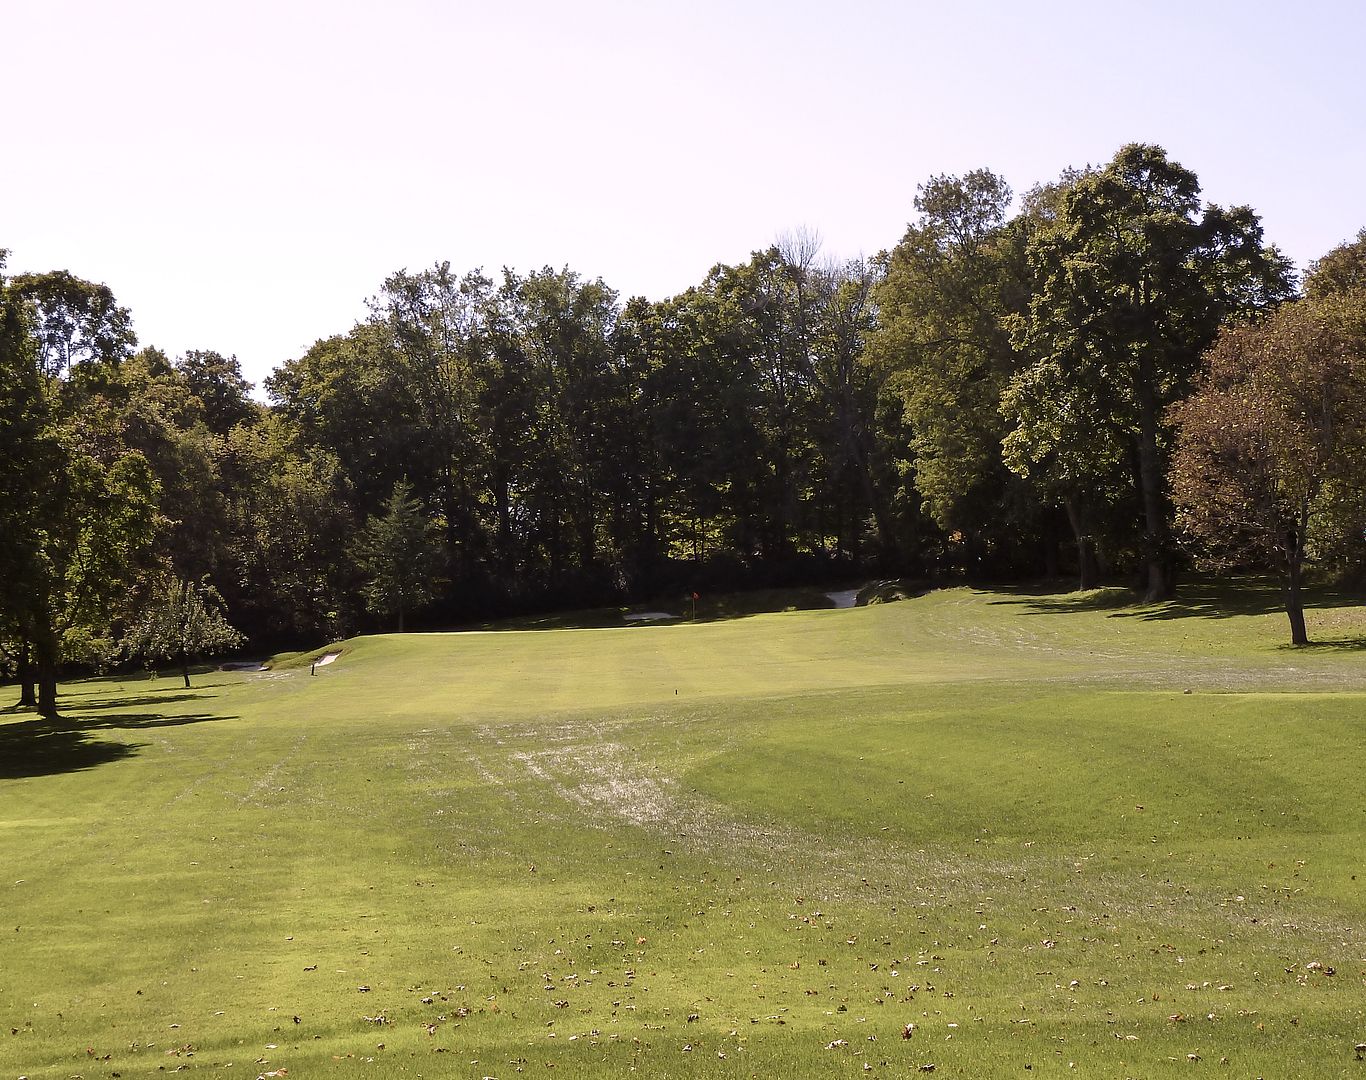
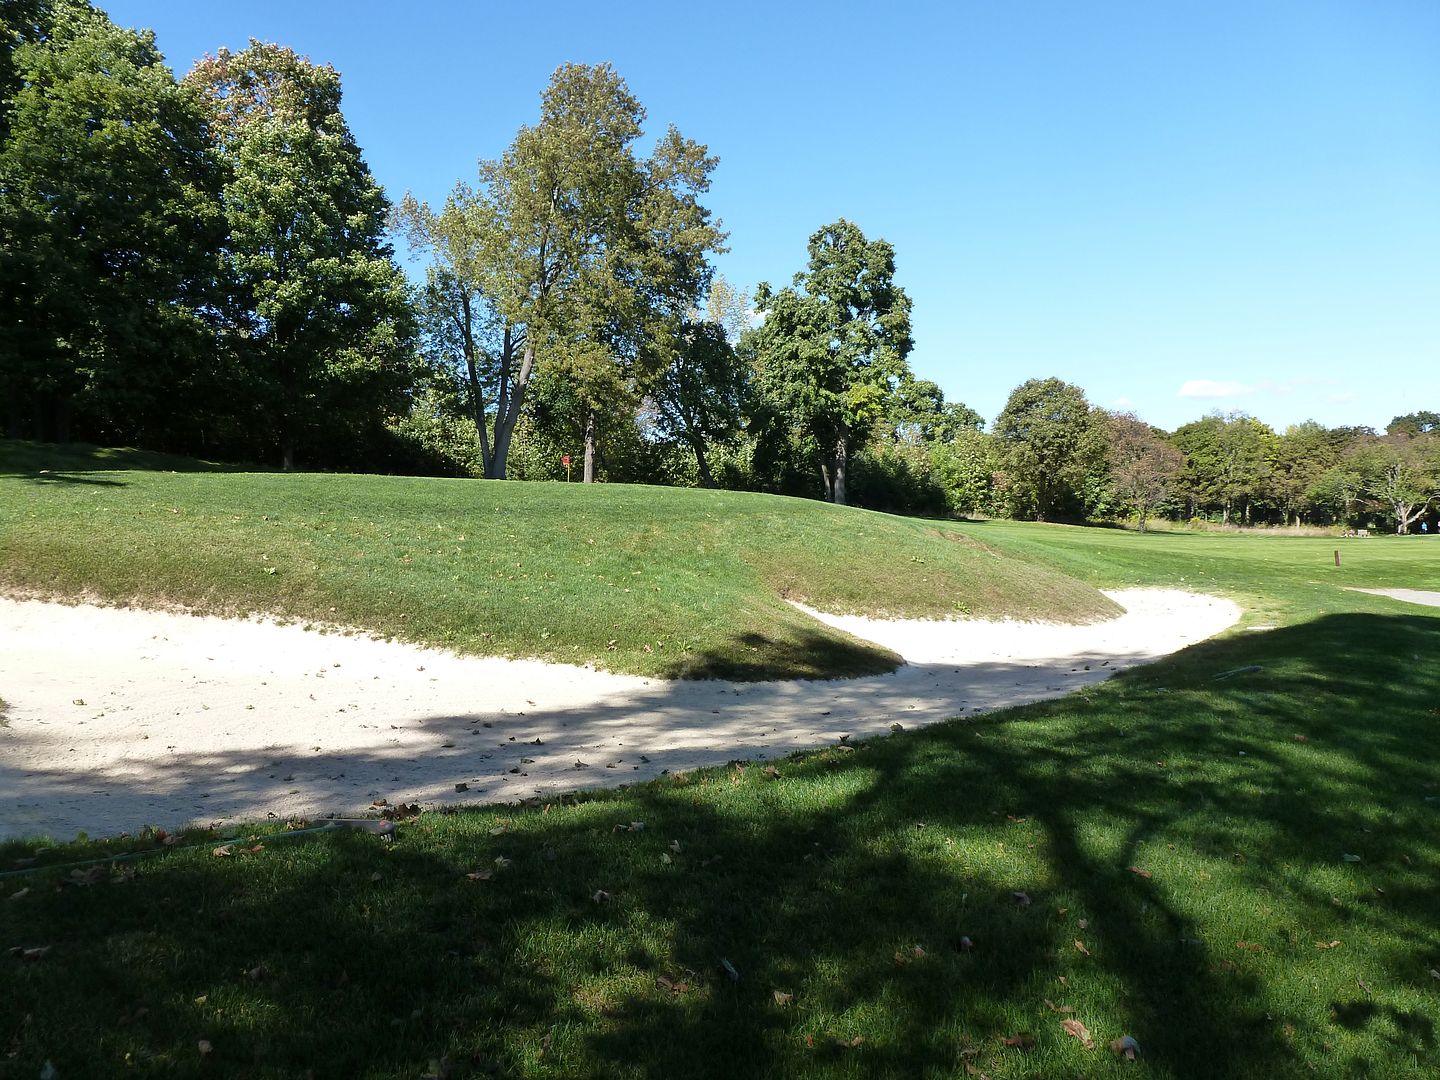
Hole 8: Par 3, 151 Yards
It is a bit of a trek to get from the 7th green to the 8th tee, but at least the 8th is a stunner! Oh, and on the walk you get a glimpse at the left greenside bunker, which is among the most unique I have ever seen.
 |
| 8 Tee |
The eighth plays downhill to a very narrow green with a larger back portion. Deep bunkers on both sides of the green place a premium on accuracy. The left greenside bunker has a one-of-a-kind mound in its centre that can make for some very interesting lies.
 |
| The unique greenside bunker on 8 |
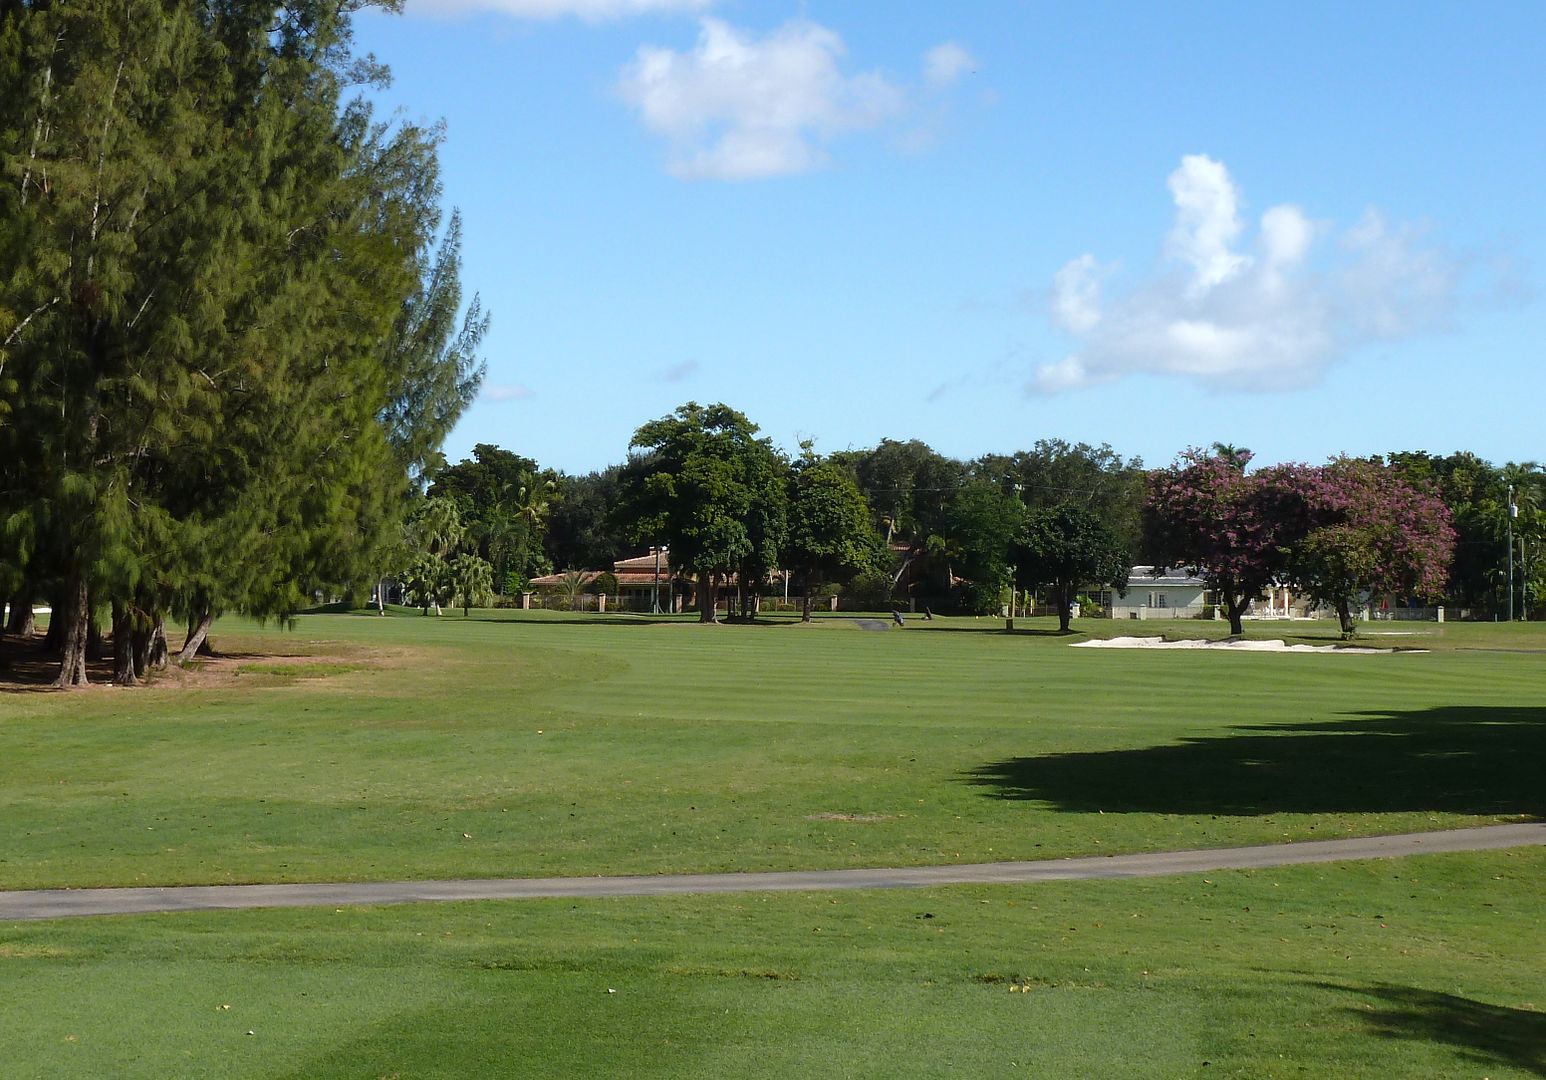
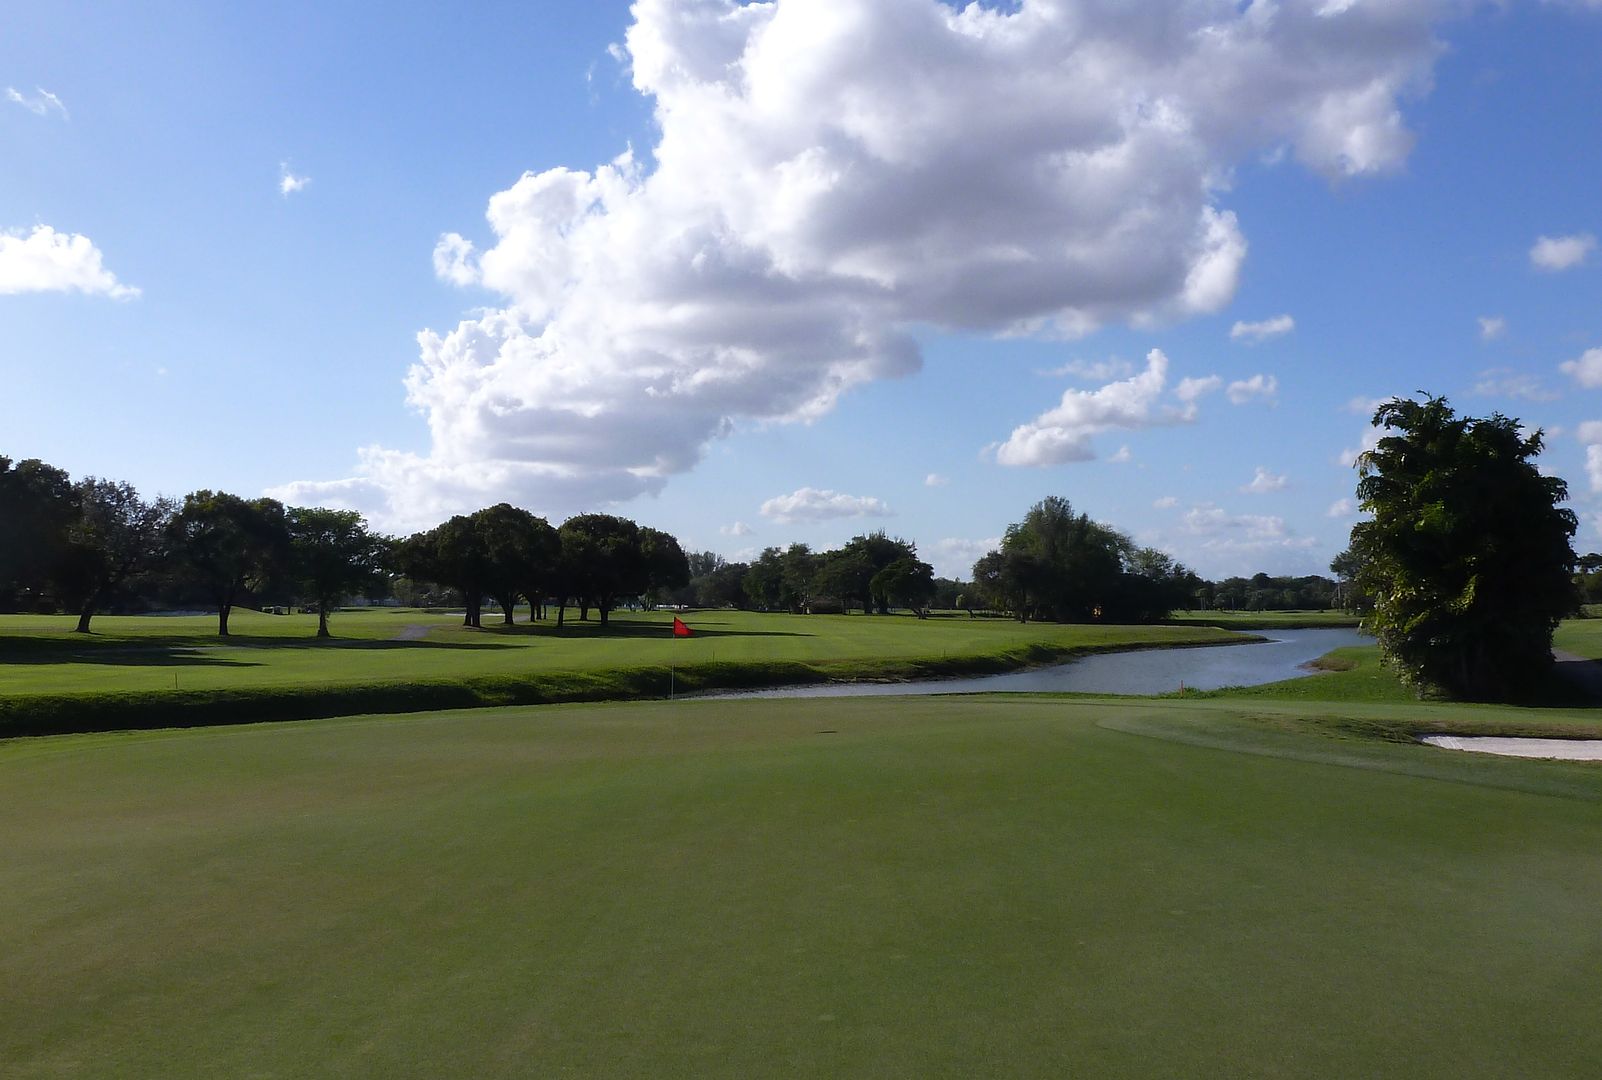
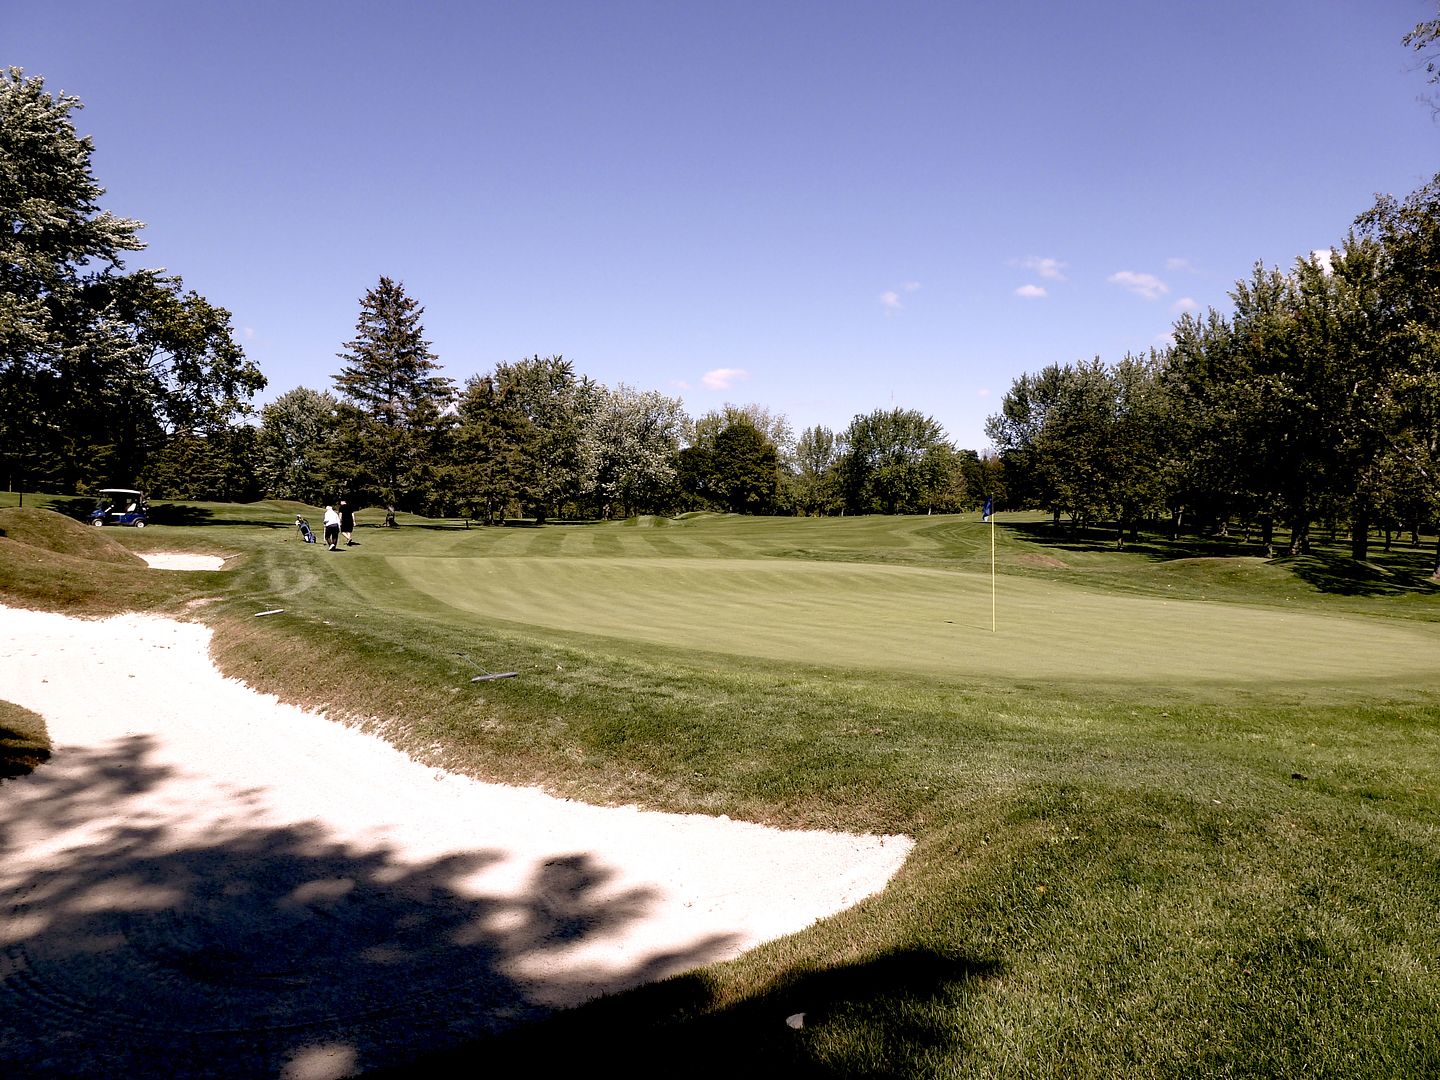
Hole 11: Par 5, 494 Yards
The downhill par-5 11th begins inconspicuously -- a tee shot to a fairly wide fairway guarded only by trees on the left, giving the player the feeling that the left is probably the ideal line (and it is).
 |
| 11 Tee |
As the player crests the hill, he is hit by one of those "oh wow" moments. The second shot continues down the hill, all the way to green, which is guarded by a crossing stream and a deep fronting bunker.
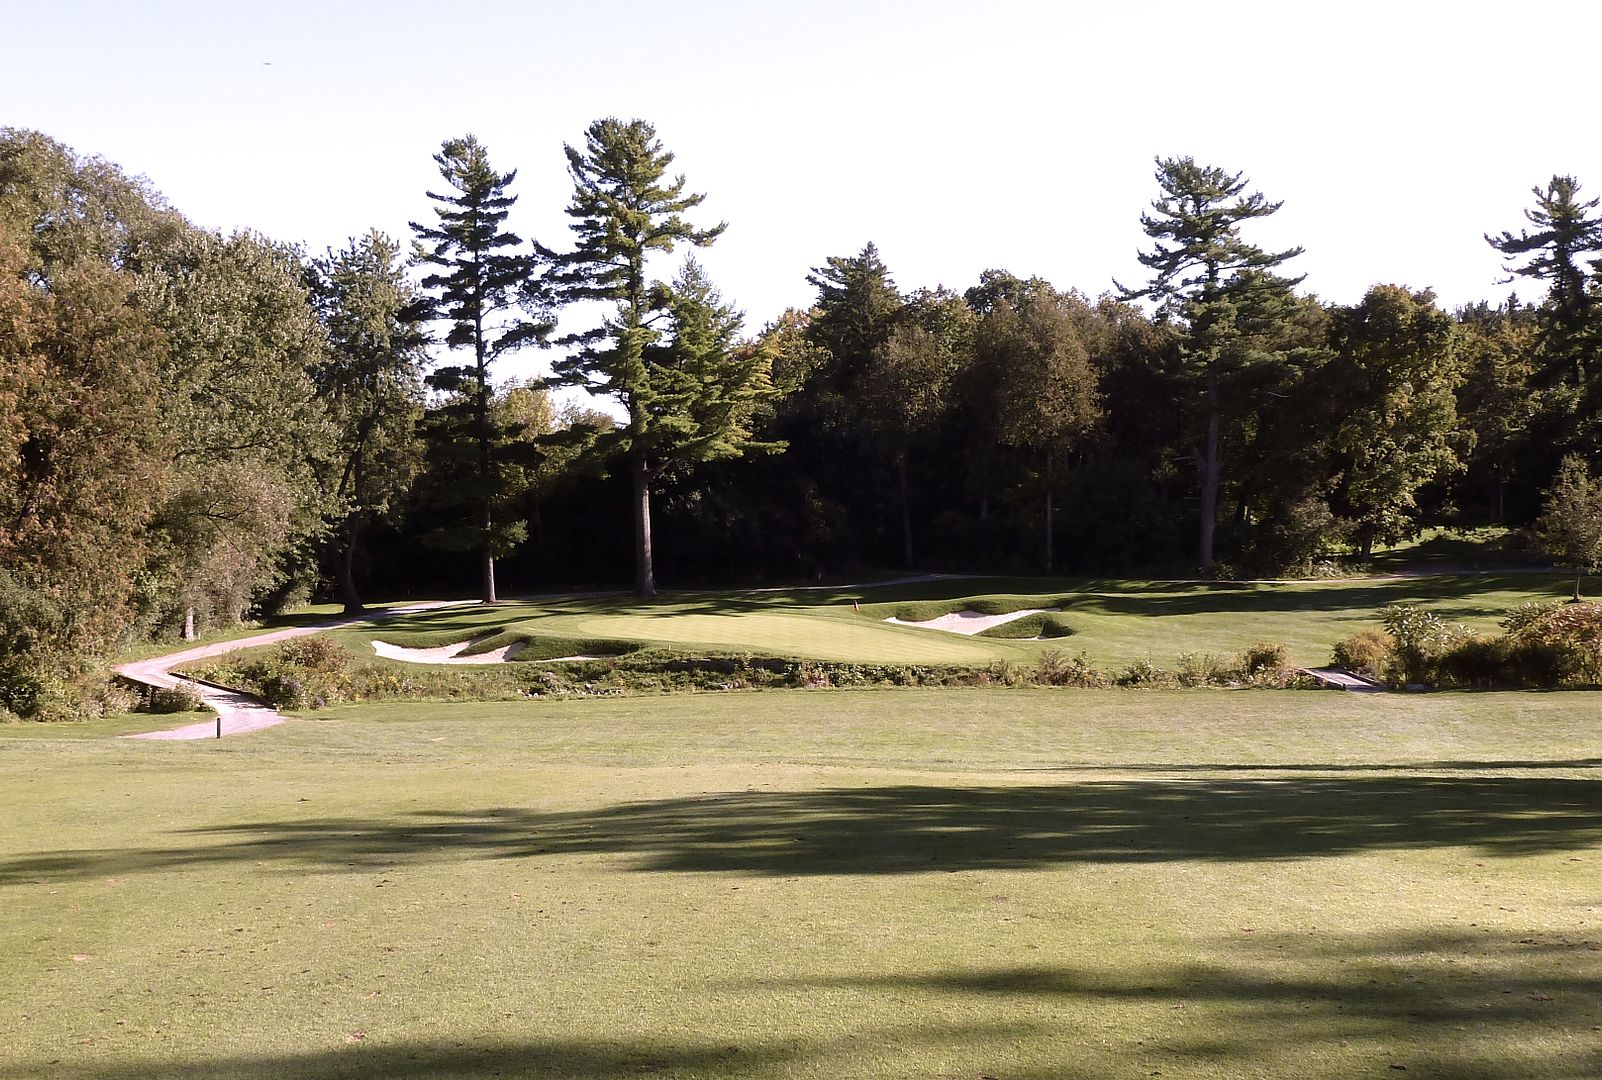 |
| 11 Approach |
In 2006, as part of Ian Andrew's restoration, a pond short of the 11th green was converted into a stream. Whereas, in the past, weaker players were forced to carry a 100 yard wide pond, they now must only carry a 10 yard wide stream. An excellent change.
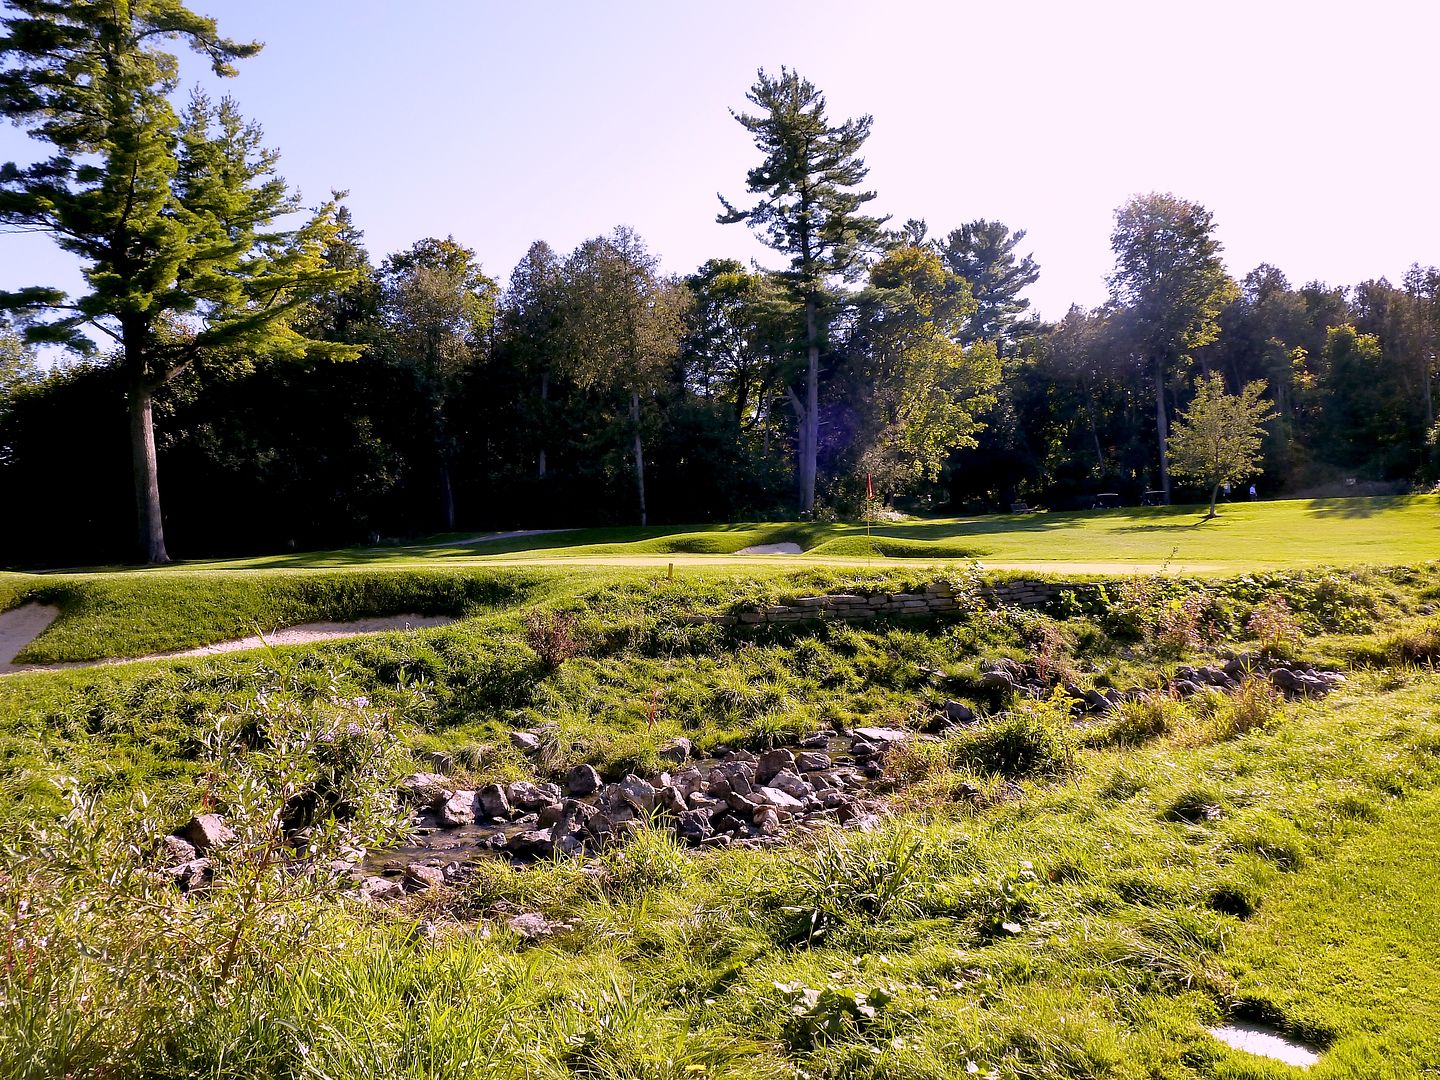 |
| A stream protects the 11th green... |
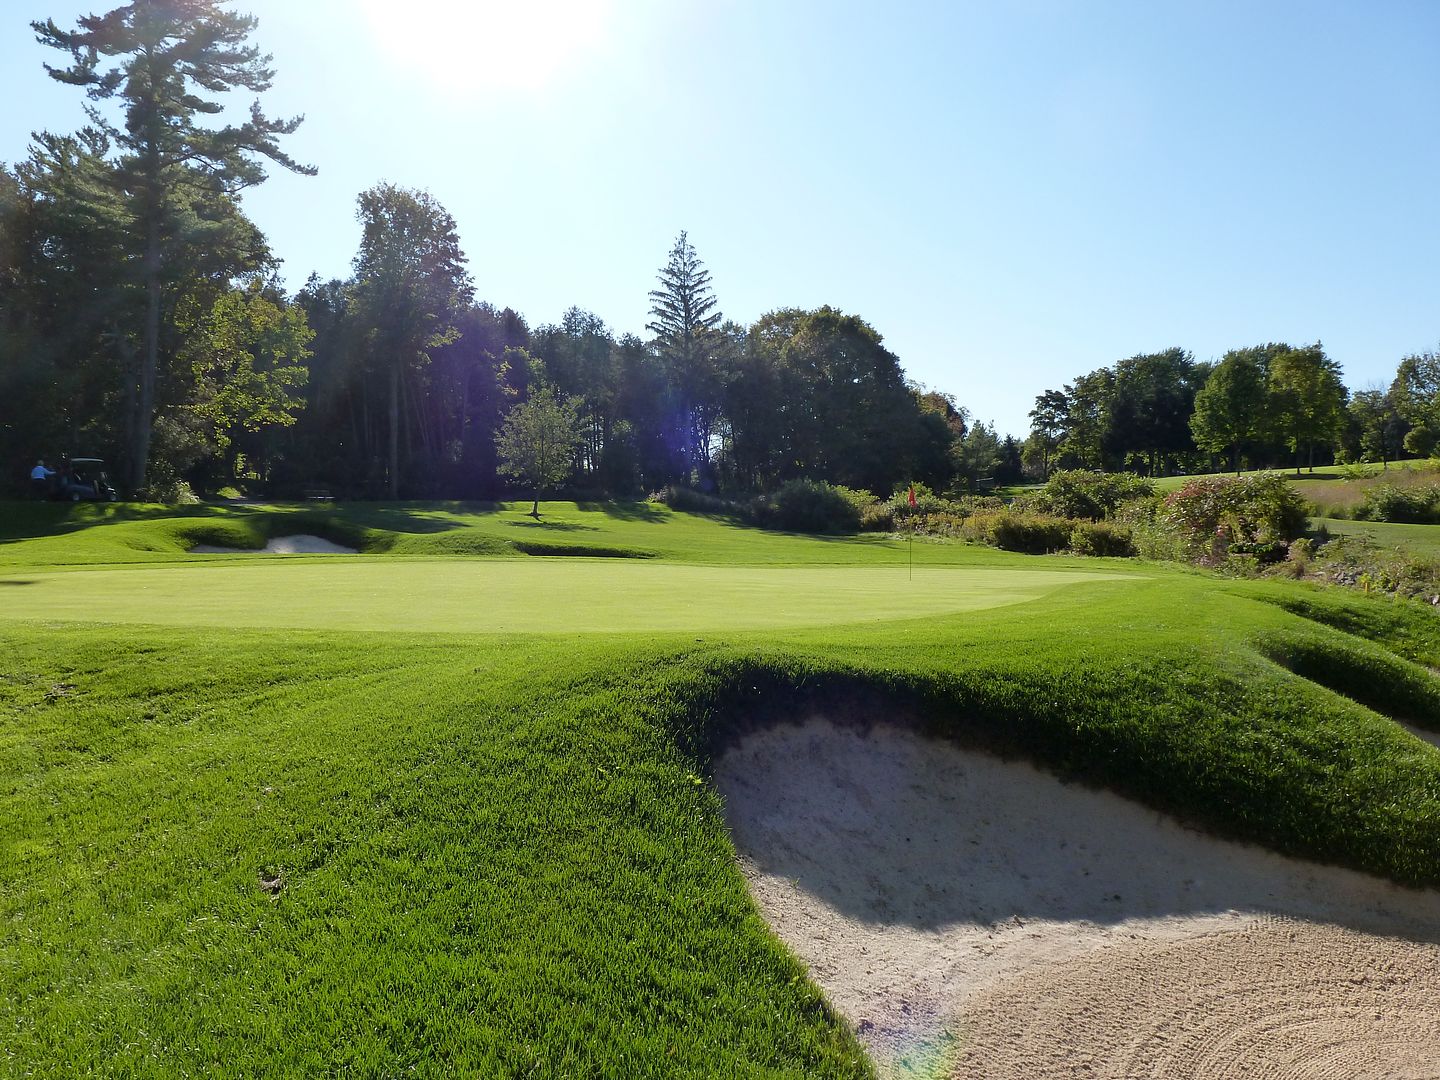 |
| As does a deep fronting bunker |
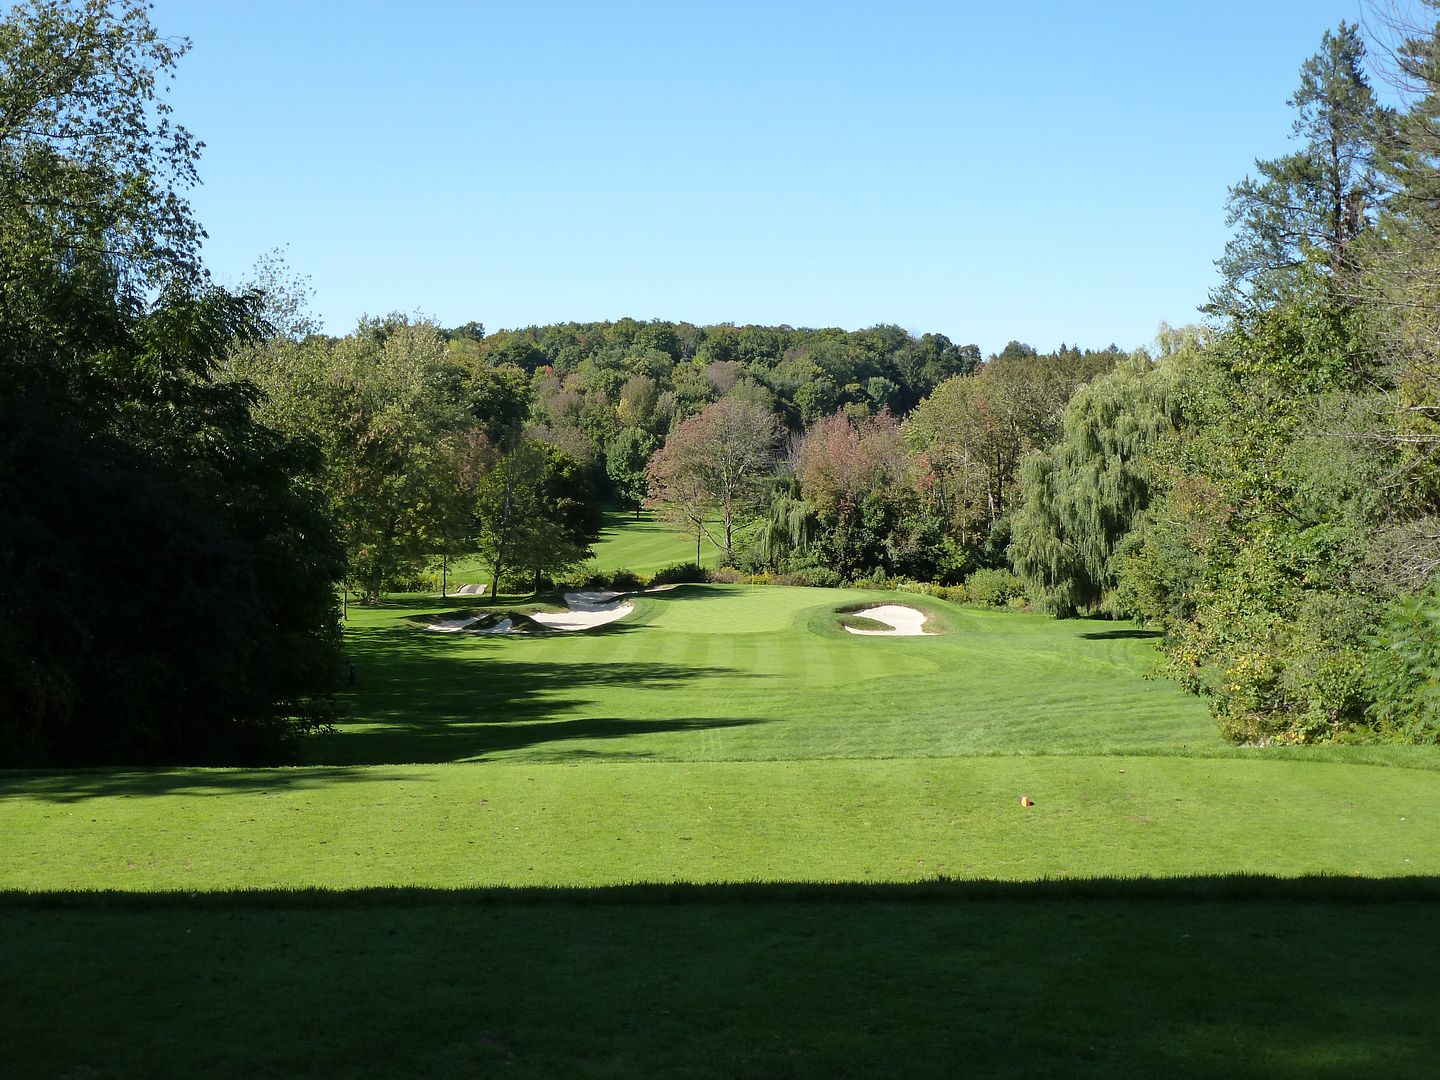
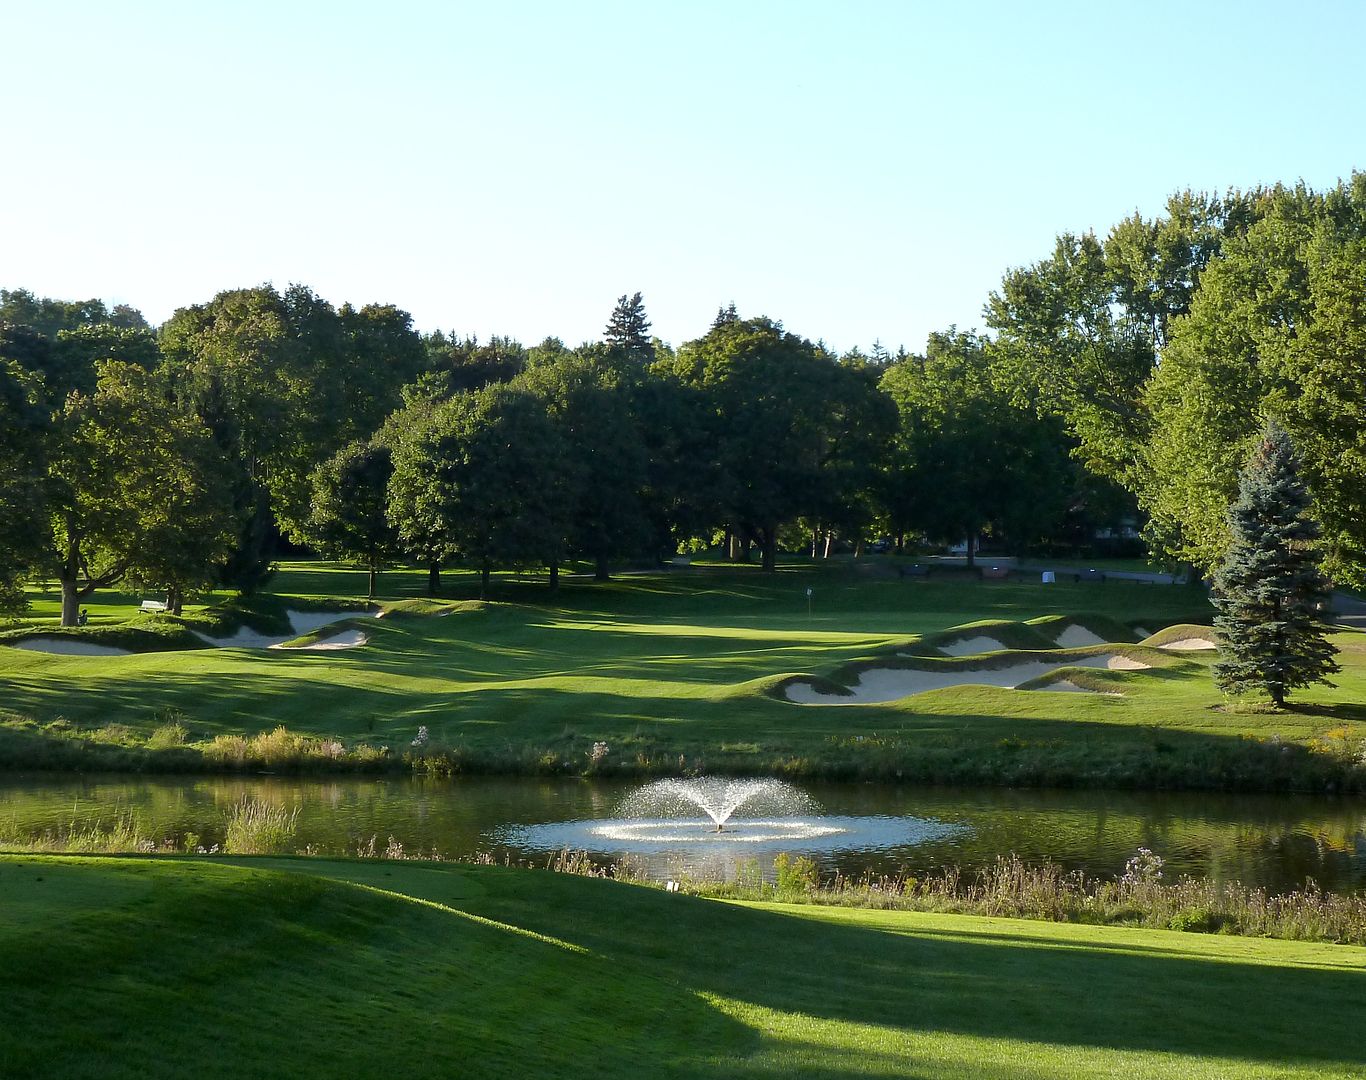
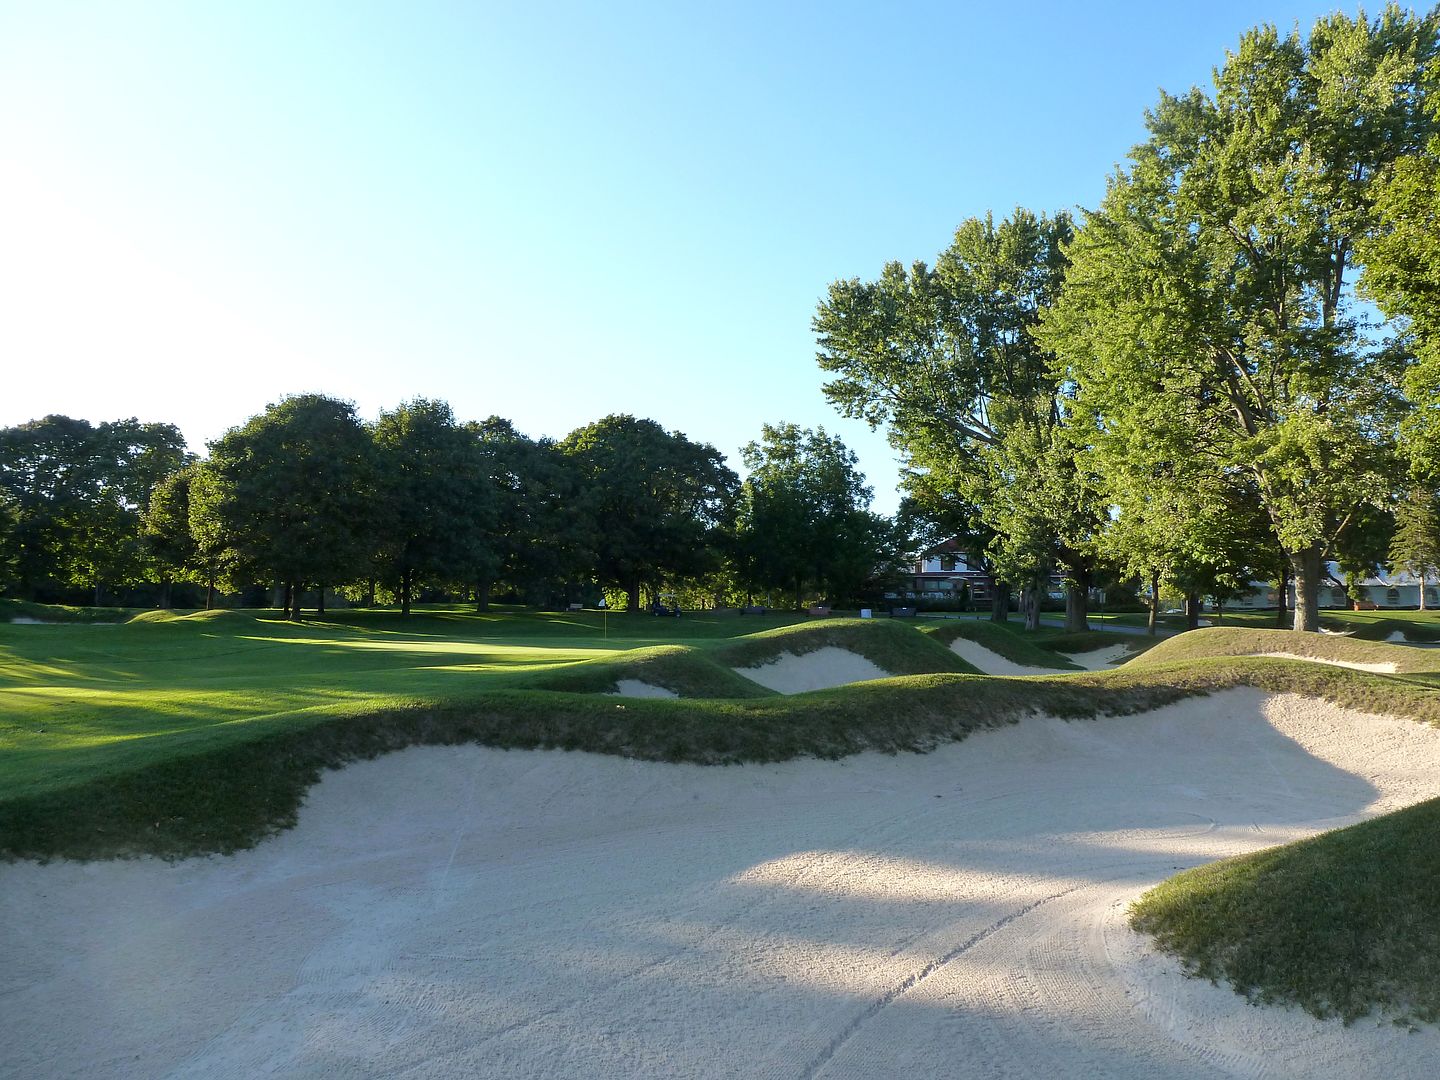
Hole 13: Par 4, 391 Yards
On a course full of strong holes, this one may be the best. A short walk from the 12th green to the 13th tee passes by the back of the 18th green, and one cannot help but think, "wow, when do I get to play that!?" Fortunately, in seeing the 13th, most player's minds should return to the task at hand.
 |
| 13 Tee |
The 13th gives the feeling of a downhill hole, but it plays substantially uphill. Teeing off over the aforementioned ravine to a fairway the flows naturally with the land, sloping significantly from left-to-right. Thompson no doubt is successful in luring many players to try to cut-off more than they are capable of, leaving them in horrible position in the right rough. The intelligent play is to the left side of the fairway, where the fairway contours are steepest and will kick the ball toward the centre of the fairway.
 |
| Approach to 13 from right side of fairway |
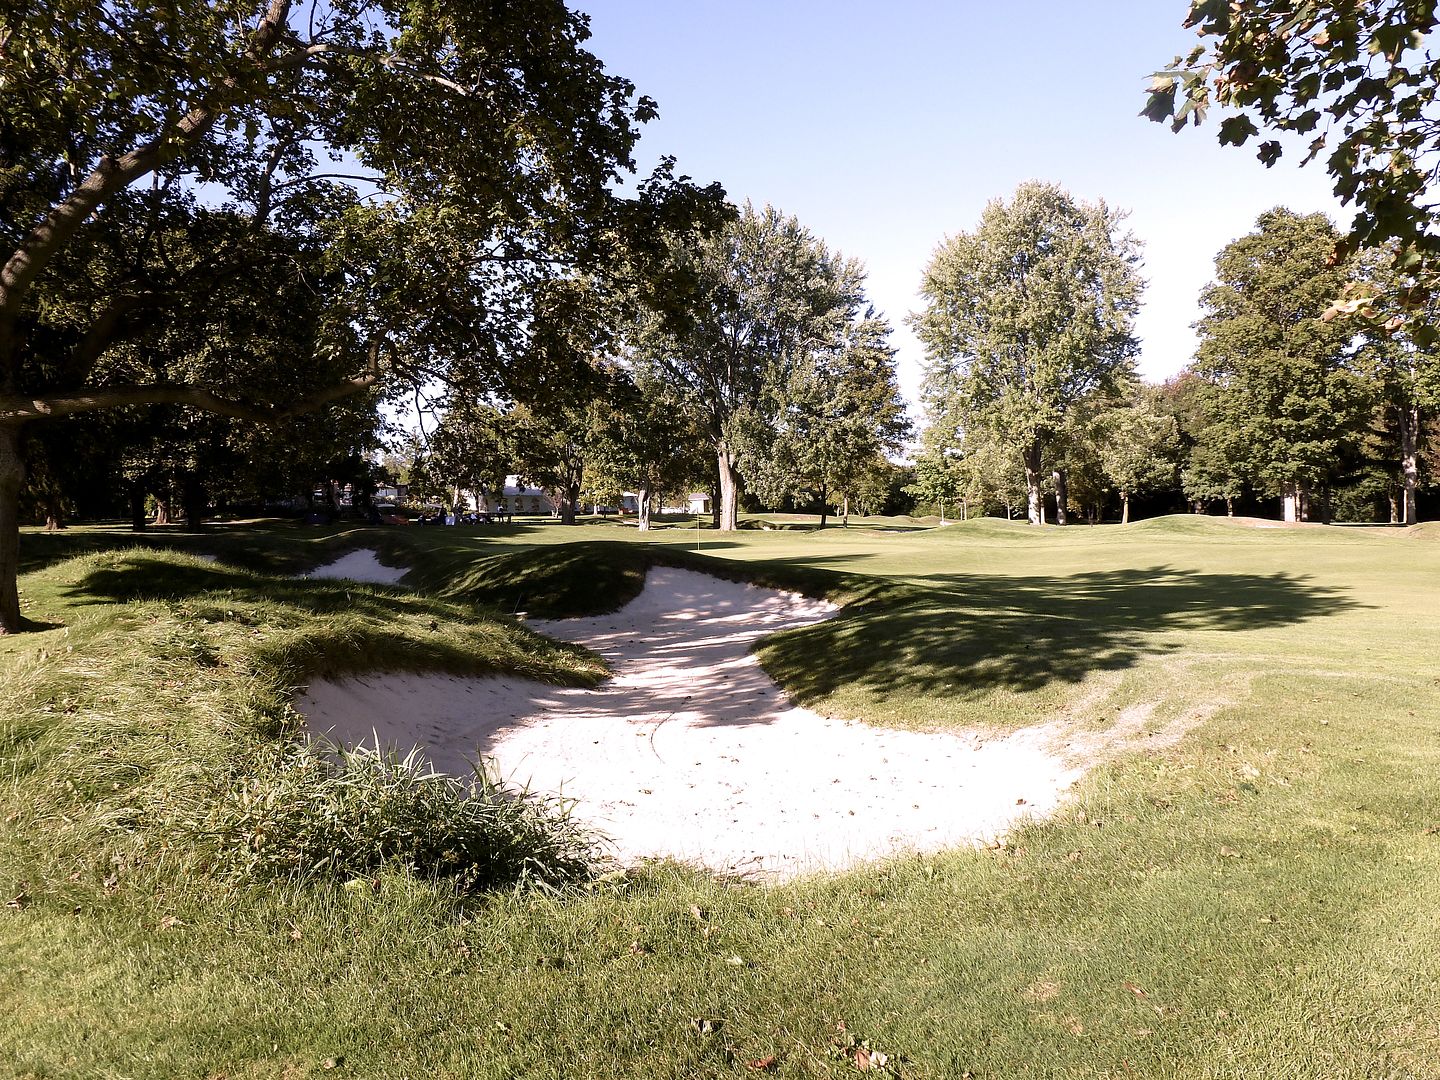
The approach to the 13th green is extremely difficult. Not only does it play significantly uphill, but the green is guarded by extremely deep fronting bunkers, and even deeper valley to the right of the green.
 |
| A deep valley right of the green...don't miss here |
 |
| Very deep fronting bunkers... don't miss here either! |
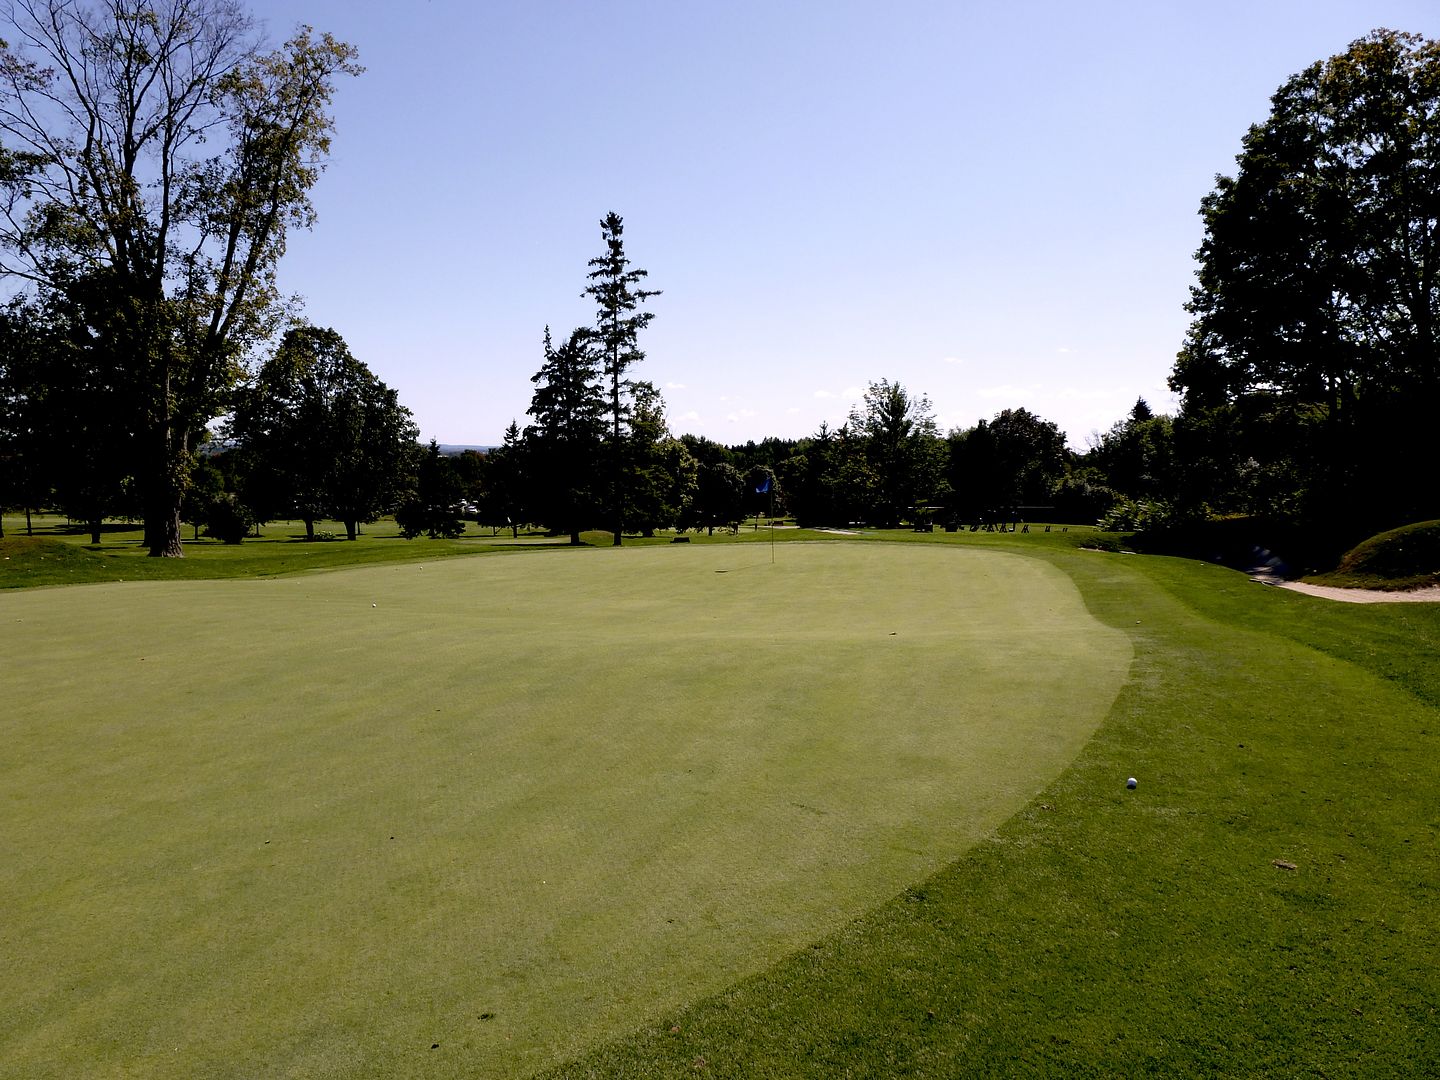
Fortunately, the green at 13 is quite large and among the flattest on the course.
 |
| 13 Green |
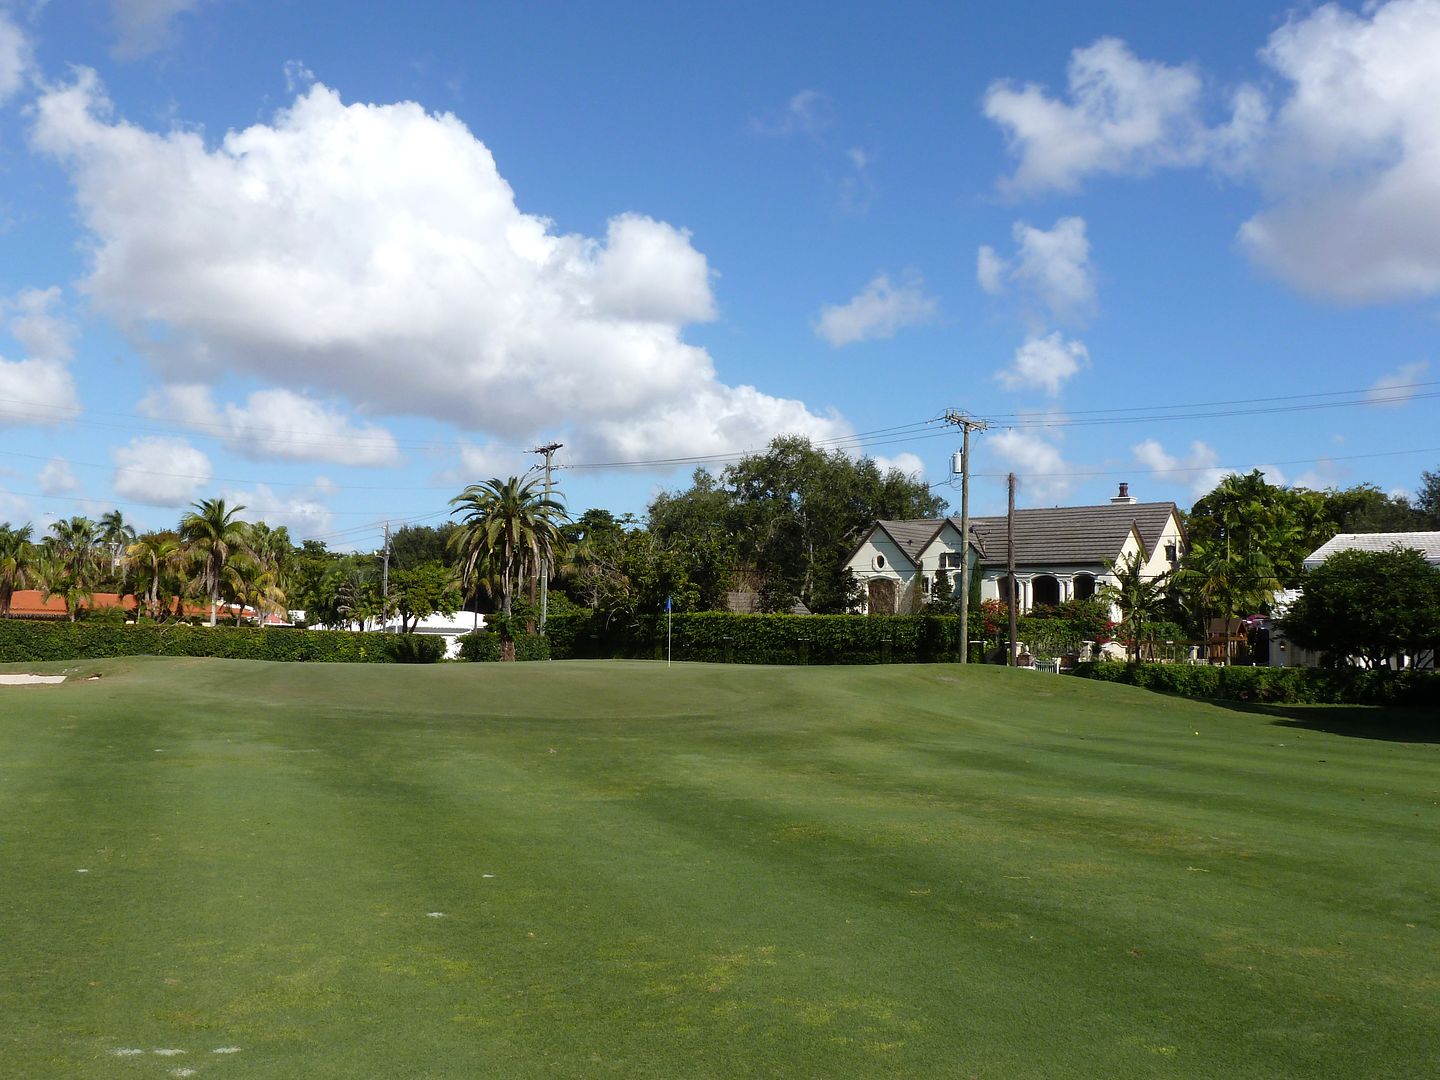
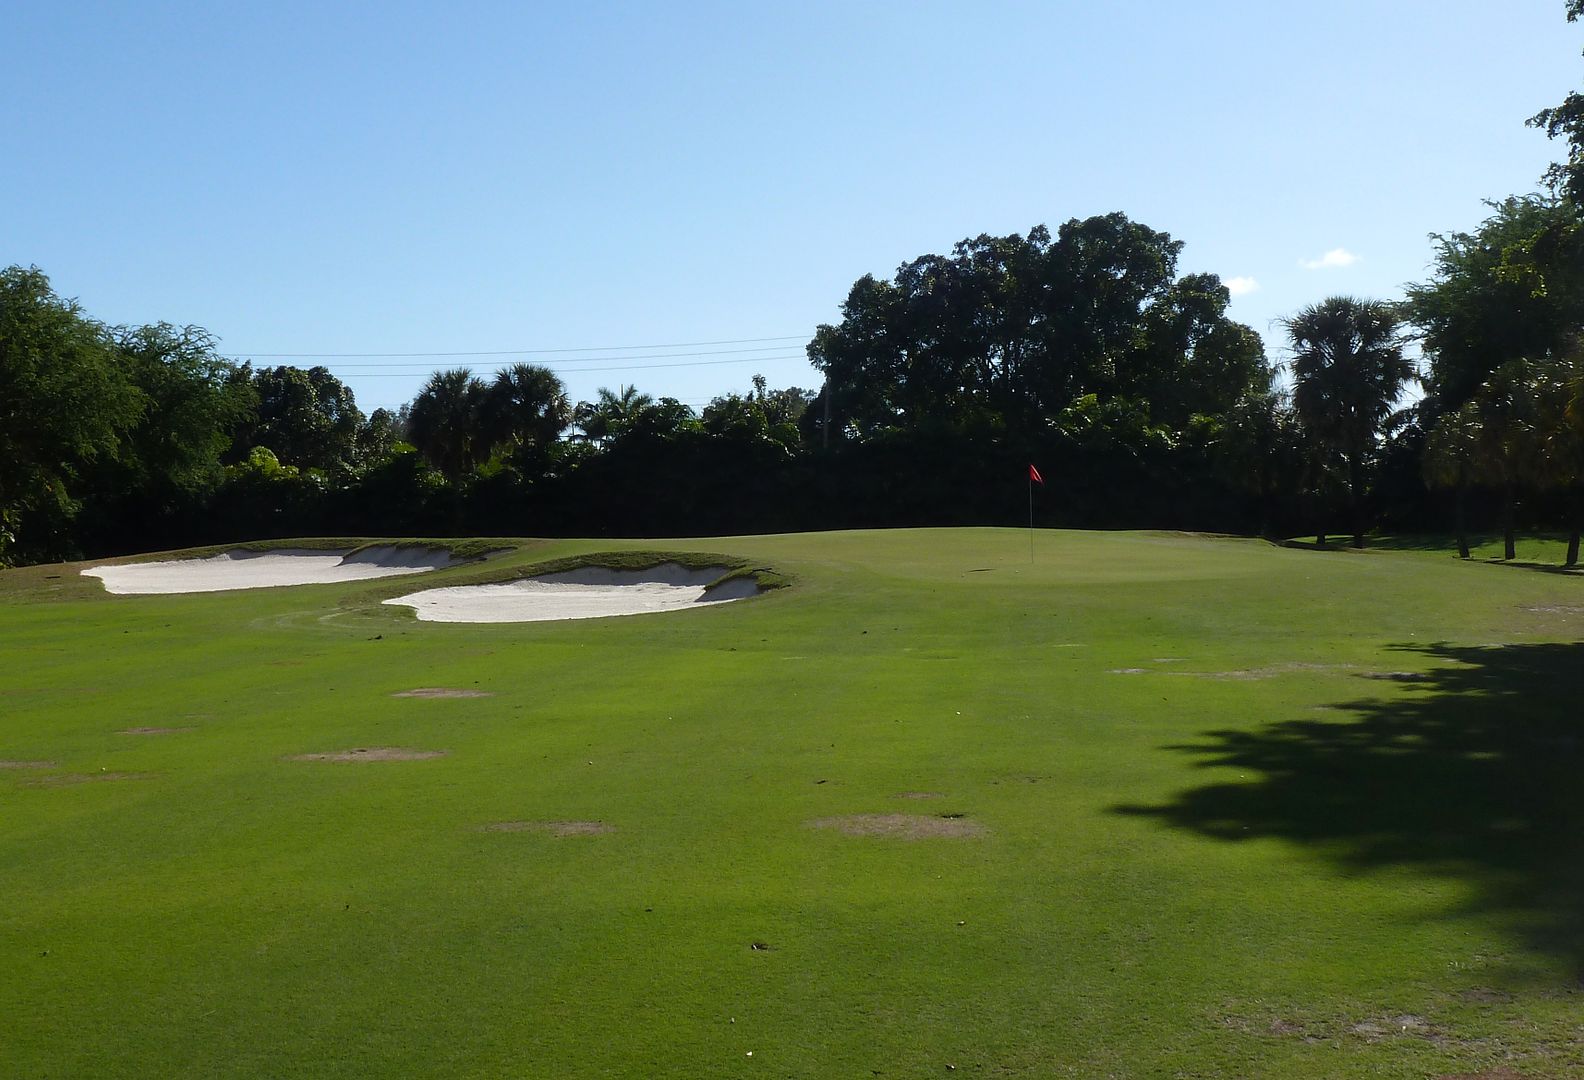
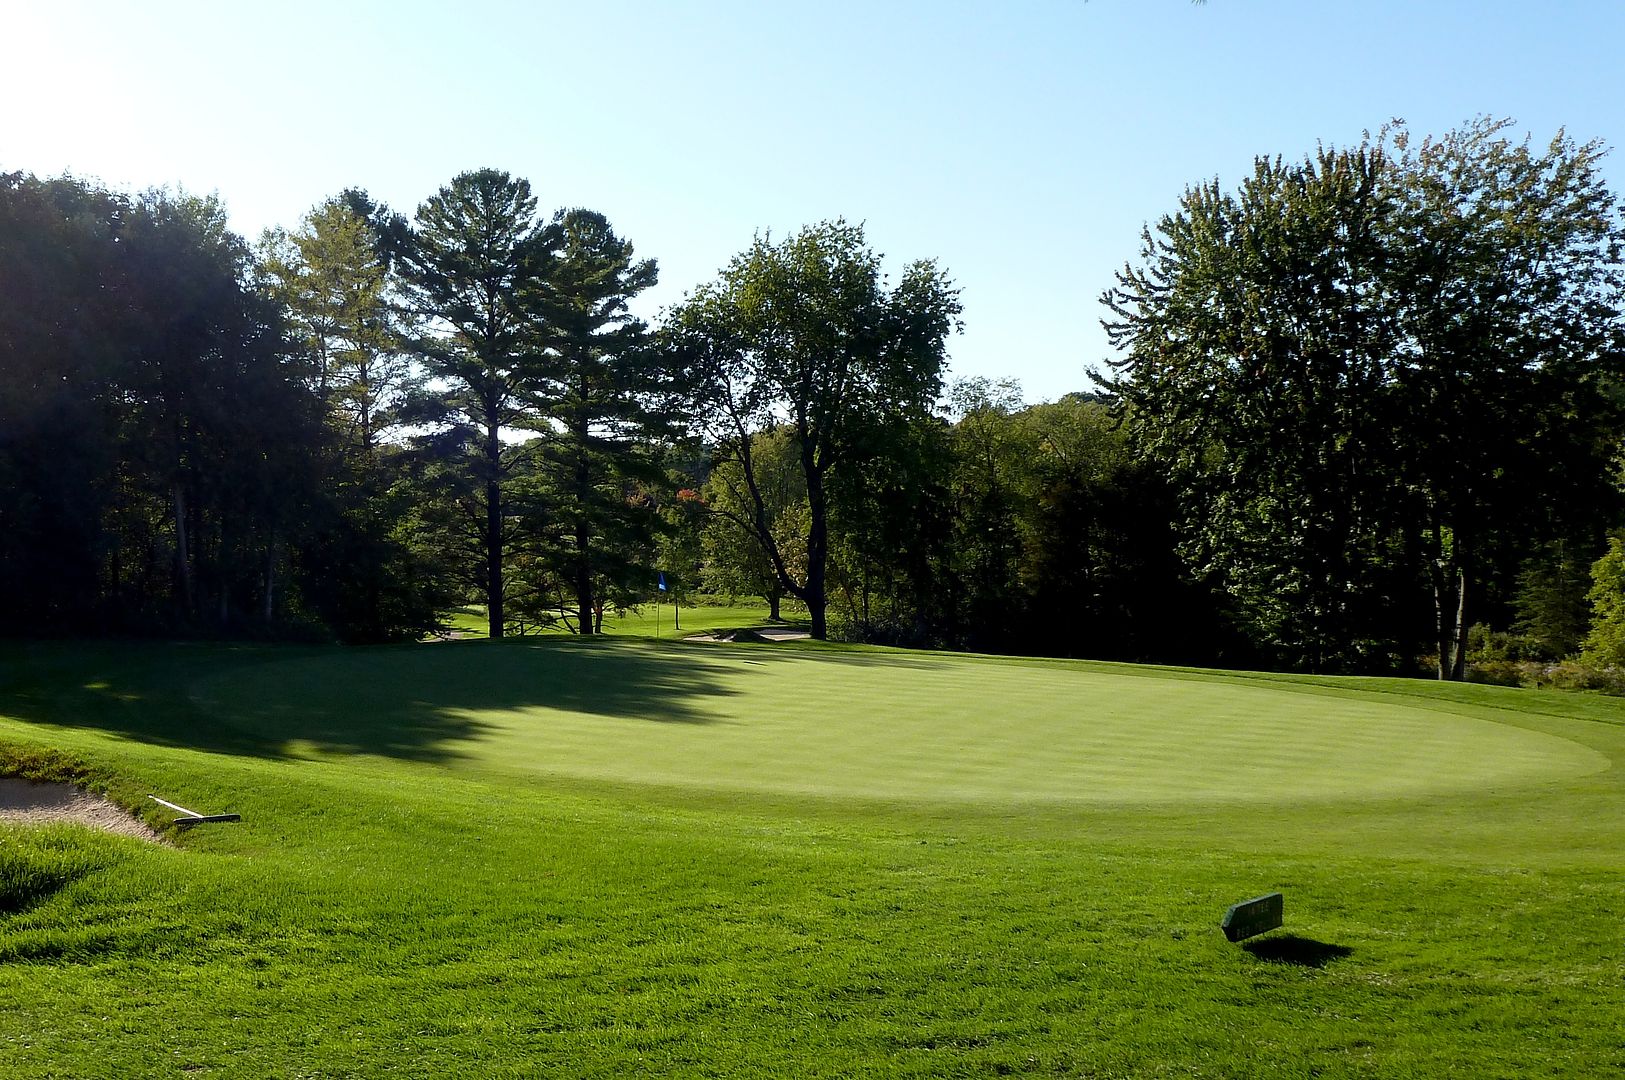
Hole 18: Par 3, 198 Yards
A stunning and difficult finishing hole, the 18th plays nearly 200 yards to an extremely well-bunkered, two-tiered green. Shots can miss short, but not anywhere else.
 |
| 18 Tee |
As the player moves up in tees, the angle into the 18th green becomes easier. From the back tee (pictured above), there is a forced carry over the right greenside bunkers, but from the middle and forward sets, the player is free to run the ball onto the green.
 |
| Right Greenside Bunkers |
 |
| Left Greenside Bunkers |
 |
| 18 from Behind - Note the Two-Tiered Green |